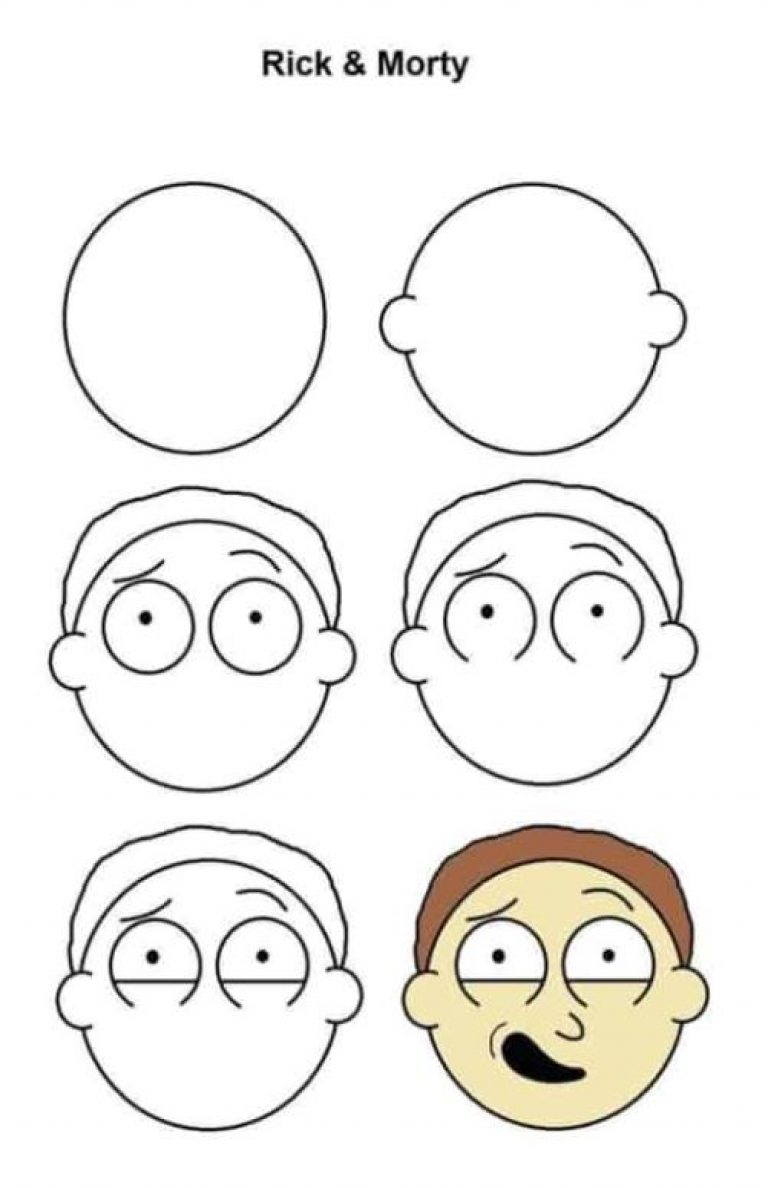
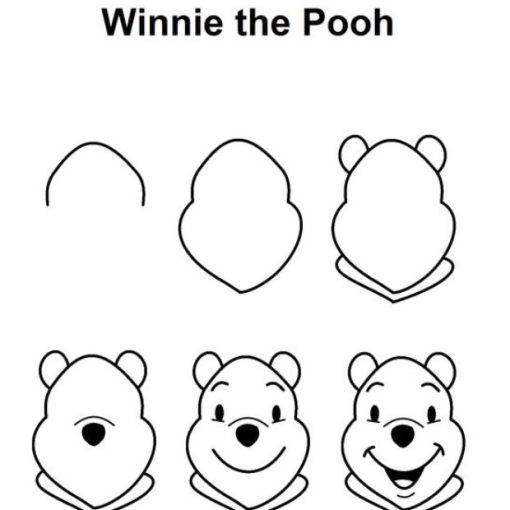
First, draw a perfect circle for Morty’s head with two round ears coming out of each side of the circle. Second, draw large circle eyeballs, a curved line for each eyebrow, small pupils, and the outline of short hair on the top of his head. Leave the bottom portion of the circle for each eyeball open like it is shown in the cartoon Rick & Morty. Next, draw a horizontal line about 1/4 up each circle eyeball for a slightly closed bottom eyelid. Next, draw a small rounded shape for the nose and an irregular rounded shape for the mouth. Finish your Morty drawing by coloring his hair dark brown, his face a tan color, and his mouth completely black.
Step-By-Step Morty’s Head Drawing Tutorial
- Start by drawing a large, circular shape for the head. This will serve as the basic shape for Morty’s head.
- Sketch in the basic shape of Morty’s eyes and eyebrows. The eyes should be large and expressive, with pupils and irises.
- Sketch in the basic shape of Morty’s nose and mouth. The nose should be small and round, while the mouth should be open, with the upper lip slightly curved.
- Sketch in the basic shape of Morty’s ears. They should be positioned on the sides of the head and should be slightly rounded.
- Add in details such as hair, wrinkles, and shading. The hair should be flat and short, while the wrinkles should be used to create a more expressive face. Use shading to create depth and texture on the face.
1 Tip For Drawing Morty’s Head
One tip for drawing Morty’s head from Rick & Morty is to pay attention to his facial expression and body language. Make sure to capture Morty’s expression as it is often shown with a confused or shocked expression.