Drawing is an amazing way to show off your creativity and bring your imagination to life. And guess what? Today, we’re going to teach you how to draw a rocket! Rockets are super cool because they represent adventure, exploration, and the human desire to reach new heights. Don’t worry if you think it might be hard. We’ve got your back with simple, step-by-step instructions that will help you create your very own awesome rocket. All you need is a pencil, some paper, and a dash of imagination. So, let’s dive in and get ready for an artistic adventure. Get ready to learn how to draw a rocket!
Materials Needed
Before we begin, make sure you have the following materials ready:
- A pencil
- Paper
- An eraser
- Colored pencils or markers (optional)
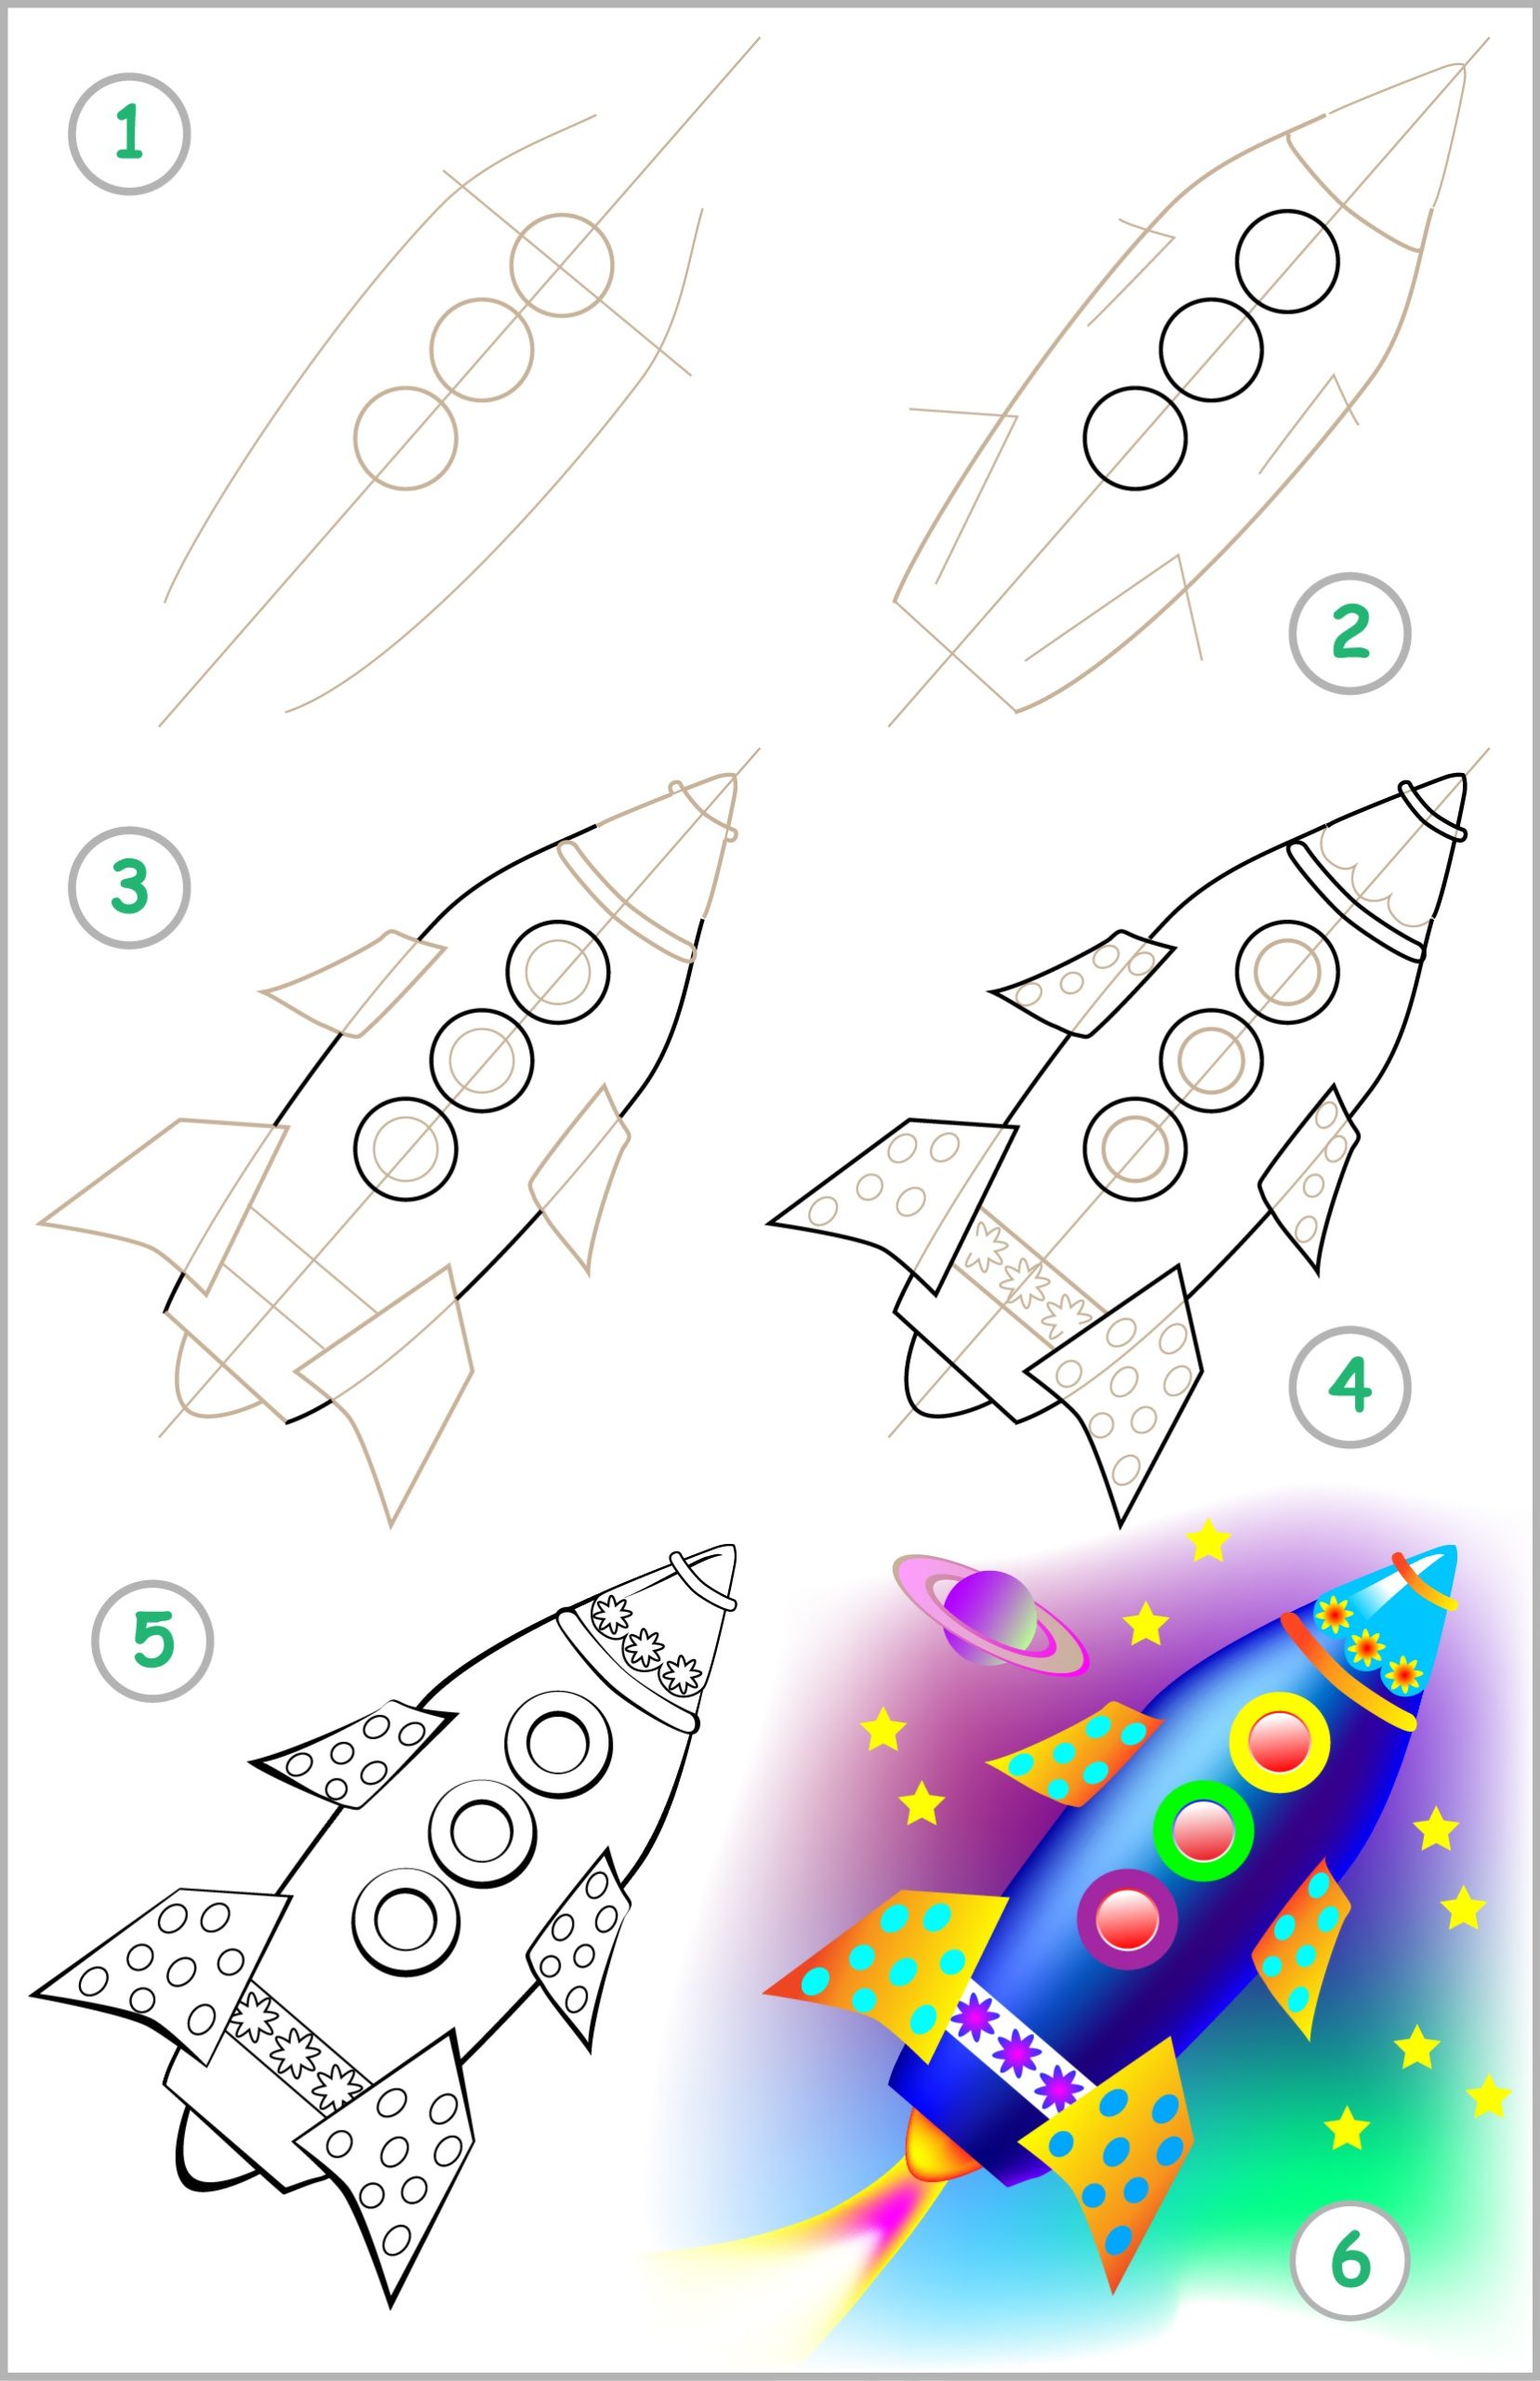
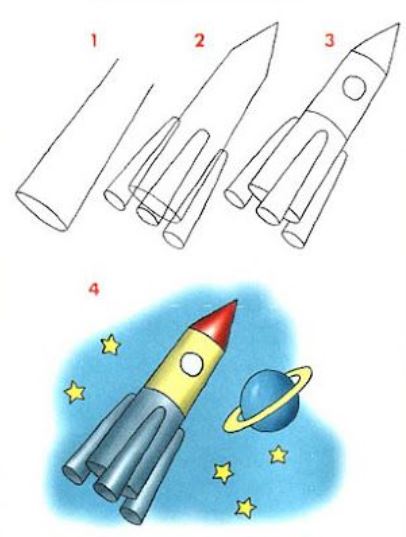
Step 1: Sketching the Basic Shape
Start by drawing a horizontal line slightly above the center of your paper. This will serve as the horizon line. Then, draw a large oval shape intersecting the horizon line. This oval will form the body of the rocket.
Step 2: Adding the Fins
Extend two lines from the bottom of the oval, curving them outward. These lines will act as the rocket’s fins. Repeat the same process on the other side to create a symmetrical look.
Step 3: Drawing the Cone
On top of the oval shape, draw a smaller triangle pointing upward. This will represent the cone of the rocket.
Step 4: Detailing the Rocket
Add smaller details to your rocket to make it more realistic. Draw a smaller oval shape near the bottom of the rocket to create a window. Then, add a door and some portholes using small circles or squares. Don’t forget to include a few lines to indicate panels on the body of the rocket.
Step 5: Finalizing the Outline
Trace over the lines you want to keep, darkening them to create a bold outline for your rocket. Erase any unnecessary lines and adjust the shape if needed. You’re almost ready to add some color and bring your rocket to life!
Step 6: Coloring Your Rocket
Now comes the fun part—coloring! Let your creativity soar as you choose the colors for your rocket. Traditionally, rockets are depicted in shades of gray or silver, but feel free to experiment with vibrant colors if you prefer. Add shading and highlights to give your rocket a three-dimensional appearance.
Step 7: Adding Background Elements
To complete your rocket drawing, consider adding a background. You can create a starry sky, a launchpad, or even an alien planet. Let your imagination run wild!

10 Parts of a Rocket You Need to Draw
When drawing a rocket, there are several key parts that you’ll want to include for a realistic representation. Here are some of the different parts of a rocket that you need to draw:
- Body: The main structure of the rocket, usually cylindrical or conical in shape.
- Fins: These are like wings on the rocket that help stabilize its flight. They are typically located at the bottom and are usually triangular or trapezoidal in shape.
- Nose Cone: The pointed tip at the front of the rocket. It helps reduce air resistance during flight.
- Engines: The rocket’s engines are responsible for generating the thrust needed for liftoff and propulsion. They are usually located at the bottom.
- Rocket Boosters: Additional engines or solid rocket boosters that provide extra power during launch. These are often attached to the sides of the main rocket.
- Payload Section: The part of the rocket where satellites, crew, or other cargo are carried.
- Fairing: The protective covering around the payload section of the rocket. It is often jettisoned once the rocket reaches space.
- Escape Tower: A safety feature found on some rockets, designed to carry the crew capsule away from the rocket in case of an emergency during launch.
- Antennas and Communication Dishes: These are used for communication with mission control or other spacecraft.
- Propellant Tanks: These hold the fuel and oxidizer used to power the rocket’s engines.
Remember, the level of detail you include in your drawing is up to you. These are just the basic parts of a rocket, but you can also add additional details like windows, hatches, or intricate patterns to make your rocket drawing more unique and interesting. Let your imagination take flight!
FAQs for Drawing a Rocket
How long will it take to draw a rocket?
The time required to draw a rocket depends on your skill level and the level of detail you want to achieve. On average, it can take anywhere from 30 minutes to a few hours to complete.
Can I make modifications to the rocket design?
Absolutely! Feel free to add your own unique touches and make modifications to the rocket design. Let your imagination soar and make it your own!
Are there any tips for making my rocket drawing more realistic?
To make your rocket drawing more realistic, pay attention to details such as shadows, reflections, and textures. Take inspiration from real rockets or reference images to add authenticity to your artwork.
What if I make mistakes while drawing the rocket?
Mistakes are a natural part of the artistic process. Don’t be discouraged if you make errors along the way. Use your eraser to correct any mistakes and keep practicing. Remember, every masterpiece starts with imperfect lines!
Can I use this guide to draw rockets in different styles?
Absolutely! This guide provides a foundation for drawing a basic rocket. Once you master the fundamentals, you can explore different styles, add intricate designs, or even create imaginative rocket variations.
Where else can I use my rocket drawing?
Your rocket drawing can be used in various ways! You can frame it as artwork for your room, use it in school projects, create a greeting card, or even incorporate it into a digital illustration. Let your creativity take flight!
Conclusion
Congratulations! You have successfully learned how to draw a rocket from scratch. Remember, drawing is a journey, and each stroke of the pencil brings you closer to unlocking your artistic potential. Don’t be afraid to experiment, practice regularly, and most importantly, have fun with your artwork. So, grab your pencil, let your imagination soar, and draw your very own rocket masterpiece!
