Follow our easy tutorial and you will have your own Olaf drawing! This is a great instructional article to teach kids how to draw Olaf from Frozen.
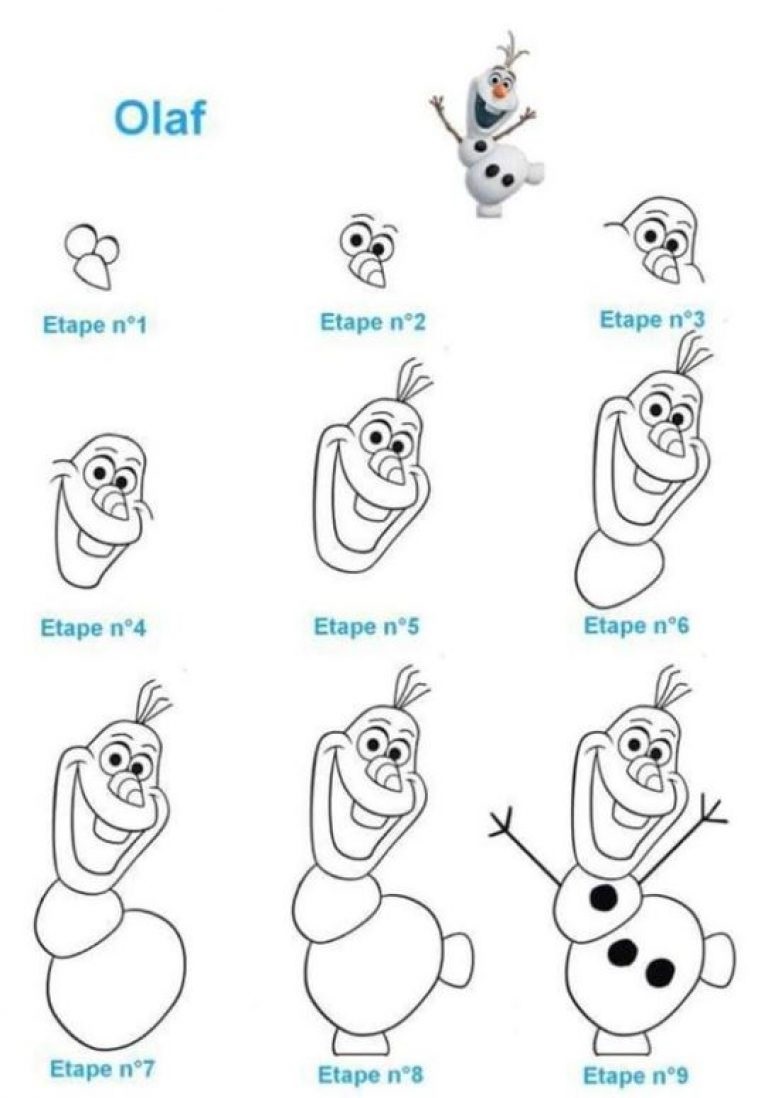
In this tutorial, Olaf has a sideways head and his hands are in the air. Start by drawing Olaf’s two eyeballs with a carrot shaped nose connected at the bottom of the eyes. Next, draw the pupils in the eyes, two eyebrows, and draw the outline of Olaf’s head and his large cheeks. Complete the face drawing with a rounded oval shape to represent Olaf’s large head. Within his head, draw an open mouth with 1 tooth in the center. Draw a small circular shape underneath the head for the second portion of a snowman. Next, draw a large circular shape at the bottom of the snowman. Draw large black buttons going down the center of Olaf’s body. Olaf’s arms look like sticks with three stick-shaped fingers. Finally, draw two rectangle shapes for the feet of Olaf.
How to Draw Olaf From Frozen Step-By-Step For Kids and Beginners
Olaf, the lovable snowman from Disney’s Frozen, has captured the hearts of kids and adults alike with his adorable appearance and quirky personality. If you’re a fan of Olaf and want to learn how to draw him, you’re in luck! In this step-by-step guide, we’ll walk you through the process of drawing Olaf from Frozen, even if you’re a beginner. So grab your art supplies and let’s get started!
Materials Needed to Draw Olaf
Before we begin, make sure you have the following materials handy:
- White drawing paper
- Pencil
- Eraser
- Fine-tip black marker
- Colored pencils or markers (optional)
Step 1: Draw the Outline of Olaf’s Head, Face, Body, and Feet
To start drawing Olaf, we’ll begin with simple shapes. First, draw a large oval for his head that gets larger around the cheeks and smaller at the top of Olaf’s head. Then, add a smaller oval below it for his neck/chest. Then, draw a larger oval shape underneath the smaller oval for Olaf’s body. Next, draw two small lines on either side of his body for his arms. Finally, add two rectangles at the bottom for his feet.
Step 2: Draw Olaf’s Facial Features
Now that we have the basic shapes in place, let’s add Olaf’s facial features. Draw two large circles for his eyes, leaving some space for his eyebrows in between. Inside the circles, draw two smaller circles for his pupils. Next, add two curved lines above his eyes for his eyebrows. Below his eyes, draw a small triangle for his carrot nose. Draw several sticks coming off Olaf’s head for his hair.
Step 3: Draw the Arms and Buttons of Olaf
Olaf has stick-like arms, so let’s add them next. Draw two long, thin rectangles for his arms, connecting them to the smaller ovals we drew earlier. At the ends of his arms, add small circles for his mittens. Then, draw three circles down the middle of his body for his buttons.
Step 4: Add Details to Olaf’s Body
Now it’s time to add some details to Olaf’s body. Draw wavy lines across his body and arms to create the appearance of texture. Add some curved lines on his buttons to make them look more like buttons. Then, add some more lines on his body and arms to give them a three-dimensional look.
Step 5: Draw Olaf’s Feet
Let’s draw Olaf’s feet next. Draw two rectangular shapes at the bottom of his body for his feet. He just has two small shapes for feet and they almost look like hooves.

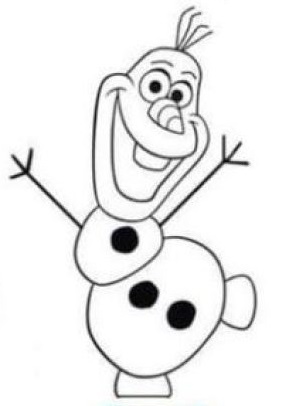
Remember that Olaf is supposed to look like a snowman, so don’t hesitate to exaggerate the shapes and details, and make him look fluffy or round.
Step 6: Coloring Olaf
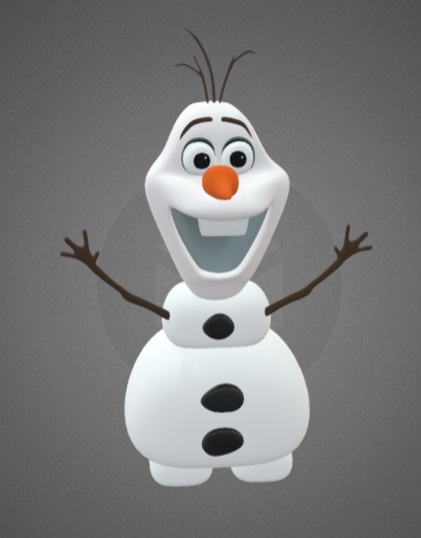
Now that we have finished drawing Olaf, it’s time to add some color to bring him to life! You can use colored pencils or markers to color in Olaf’s body. Start by coloring his body and head with a light shade of blue to represent the snow. Then, use darker shades of blue to add shading and depth to his body and arms. Color his eyes and pupils black, and his carrot nose orange. You can also add some blush on his cheeks with a light pink color. Finally, color his buttons and accessories with black and brown colors, and his twig arms and leaves with shades of brown and green.

Tips for Drawing Olaf For Kids and Beginners
Drawing Olaf may seem challenging, but with some practice and patience, you can create a cute and recognizable version of this beloved character. Here are some tips to keep in mind:
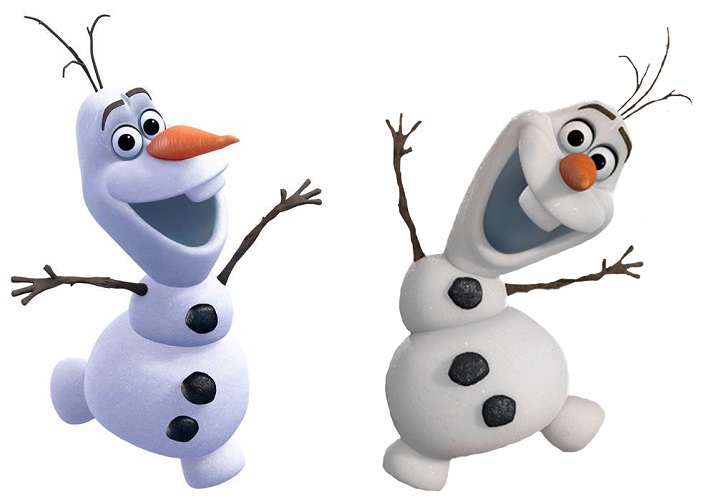
Pay close attention to Olaf’s proportions when drawing him by watching the animated film Frozen. Olaf should have a big head and a little body because he is a snowman. He should have very thin arms in relation to his body. In order to make him appear more like a snowman, be sure to include details like buttons, his carrot nose, and his fluffy texture. Finally, to ensure that Olaf has the proper dimensions and characteristics, you can use reference photos from the movie as a guide.
How to Draw Olaf FAQs
What are the basic shapes I need to draw Olaf?
To draw Olaf, you’ll need to start with a large oval for his head, a smaller oval for his body, and two smaller ovals for his arms. You’ll also need circles for his eyes, pupils, and buttons, and rectangles for his feet and twig arms.
Can I use markers instead of colored pencils to color Olaf?
Yes, you can use markers or any other coloring medium of your choice to color Olaf. Just make sure to choose colors that will give him a snowy and icy appearance, like different shades of blue for his body and black for his buttons.
How long does it take to learn to draw Olaf?
The time it takes to learn to draw Olaf will vary depending on your skill level and practice frequency. With regular practice, you can improve your drawing skills and create a recognizable version of Olaf in a relatively short amount of time.
Can I add my own creative touches to Olaf’s design?
Absolutely! While this tutorial provides a step-by-step guide to drawing Olaf, feel free to add your own creative touches to make your drawing unique. You can experiment with different colors, textures, and details to make Olaf truly your own.
Are there other characters from Frozen that I can learn to draw?
Yes, there are many other characters from Frozen that you can learn to draw, such as Elsa, Anna, Kristoff, and Sven. You can find tutorials and guides online or in drawing books to help you learn how to draw these characters as well.
In Summary
Drawing Olaf from Frozen can be a fun and rewarding activity for kids and beginners. By following the step-by-step instructions in this tutorial and practicing regularly, you can create your own unique version of this beloved snowman. So grab your art supplies and start drawing Olaf today!

