Today, we’re going to share an easy, step-by-step guide showing you how to draw a lemon. In addition, you will learn how to draw a lemon slice. This lemon drawing tutorial is perfect for beginners, and even kids can follow along! We’ll walk you through the process, from sketching the basic shape to adding the finishing touches. Whether you’re practicing your drawing skills, creating a piece of art for your kitchen, or simply looking for a fun activity to fill your afternoon, you’ll love learning how to draw a lemon.
Step 1: Gather Your Materials
Before you begin, make sure you have everything you need. You will need:
- A piece of paper
- A pencil (HB or 2B are good for sketching)
- An eraser
- Colored pencils or crayons in yellow, green, and a little bit of orange and brown (optional)
Once you have all these materials, you are ready to start drawing your lemon!
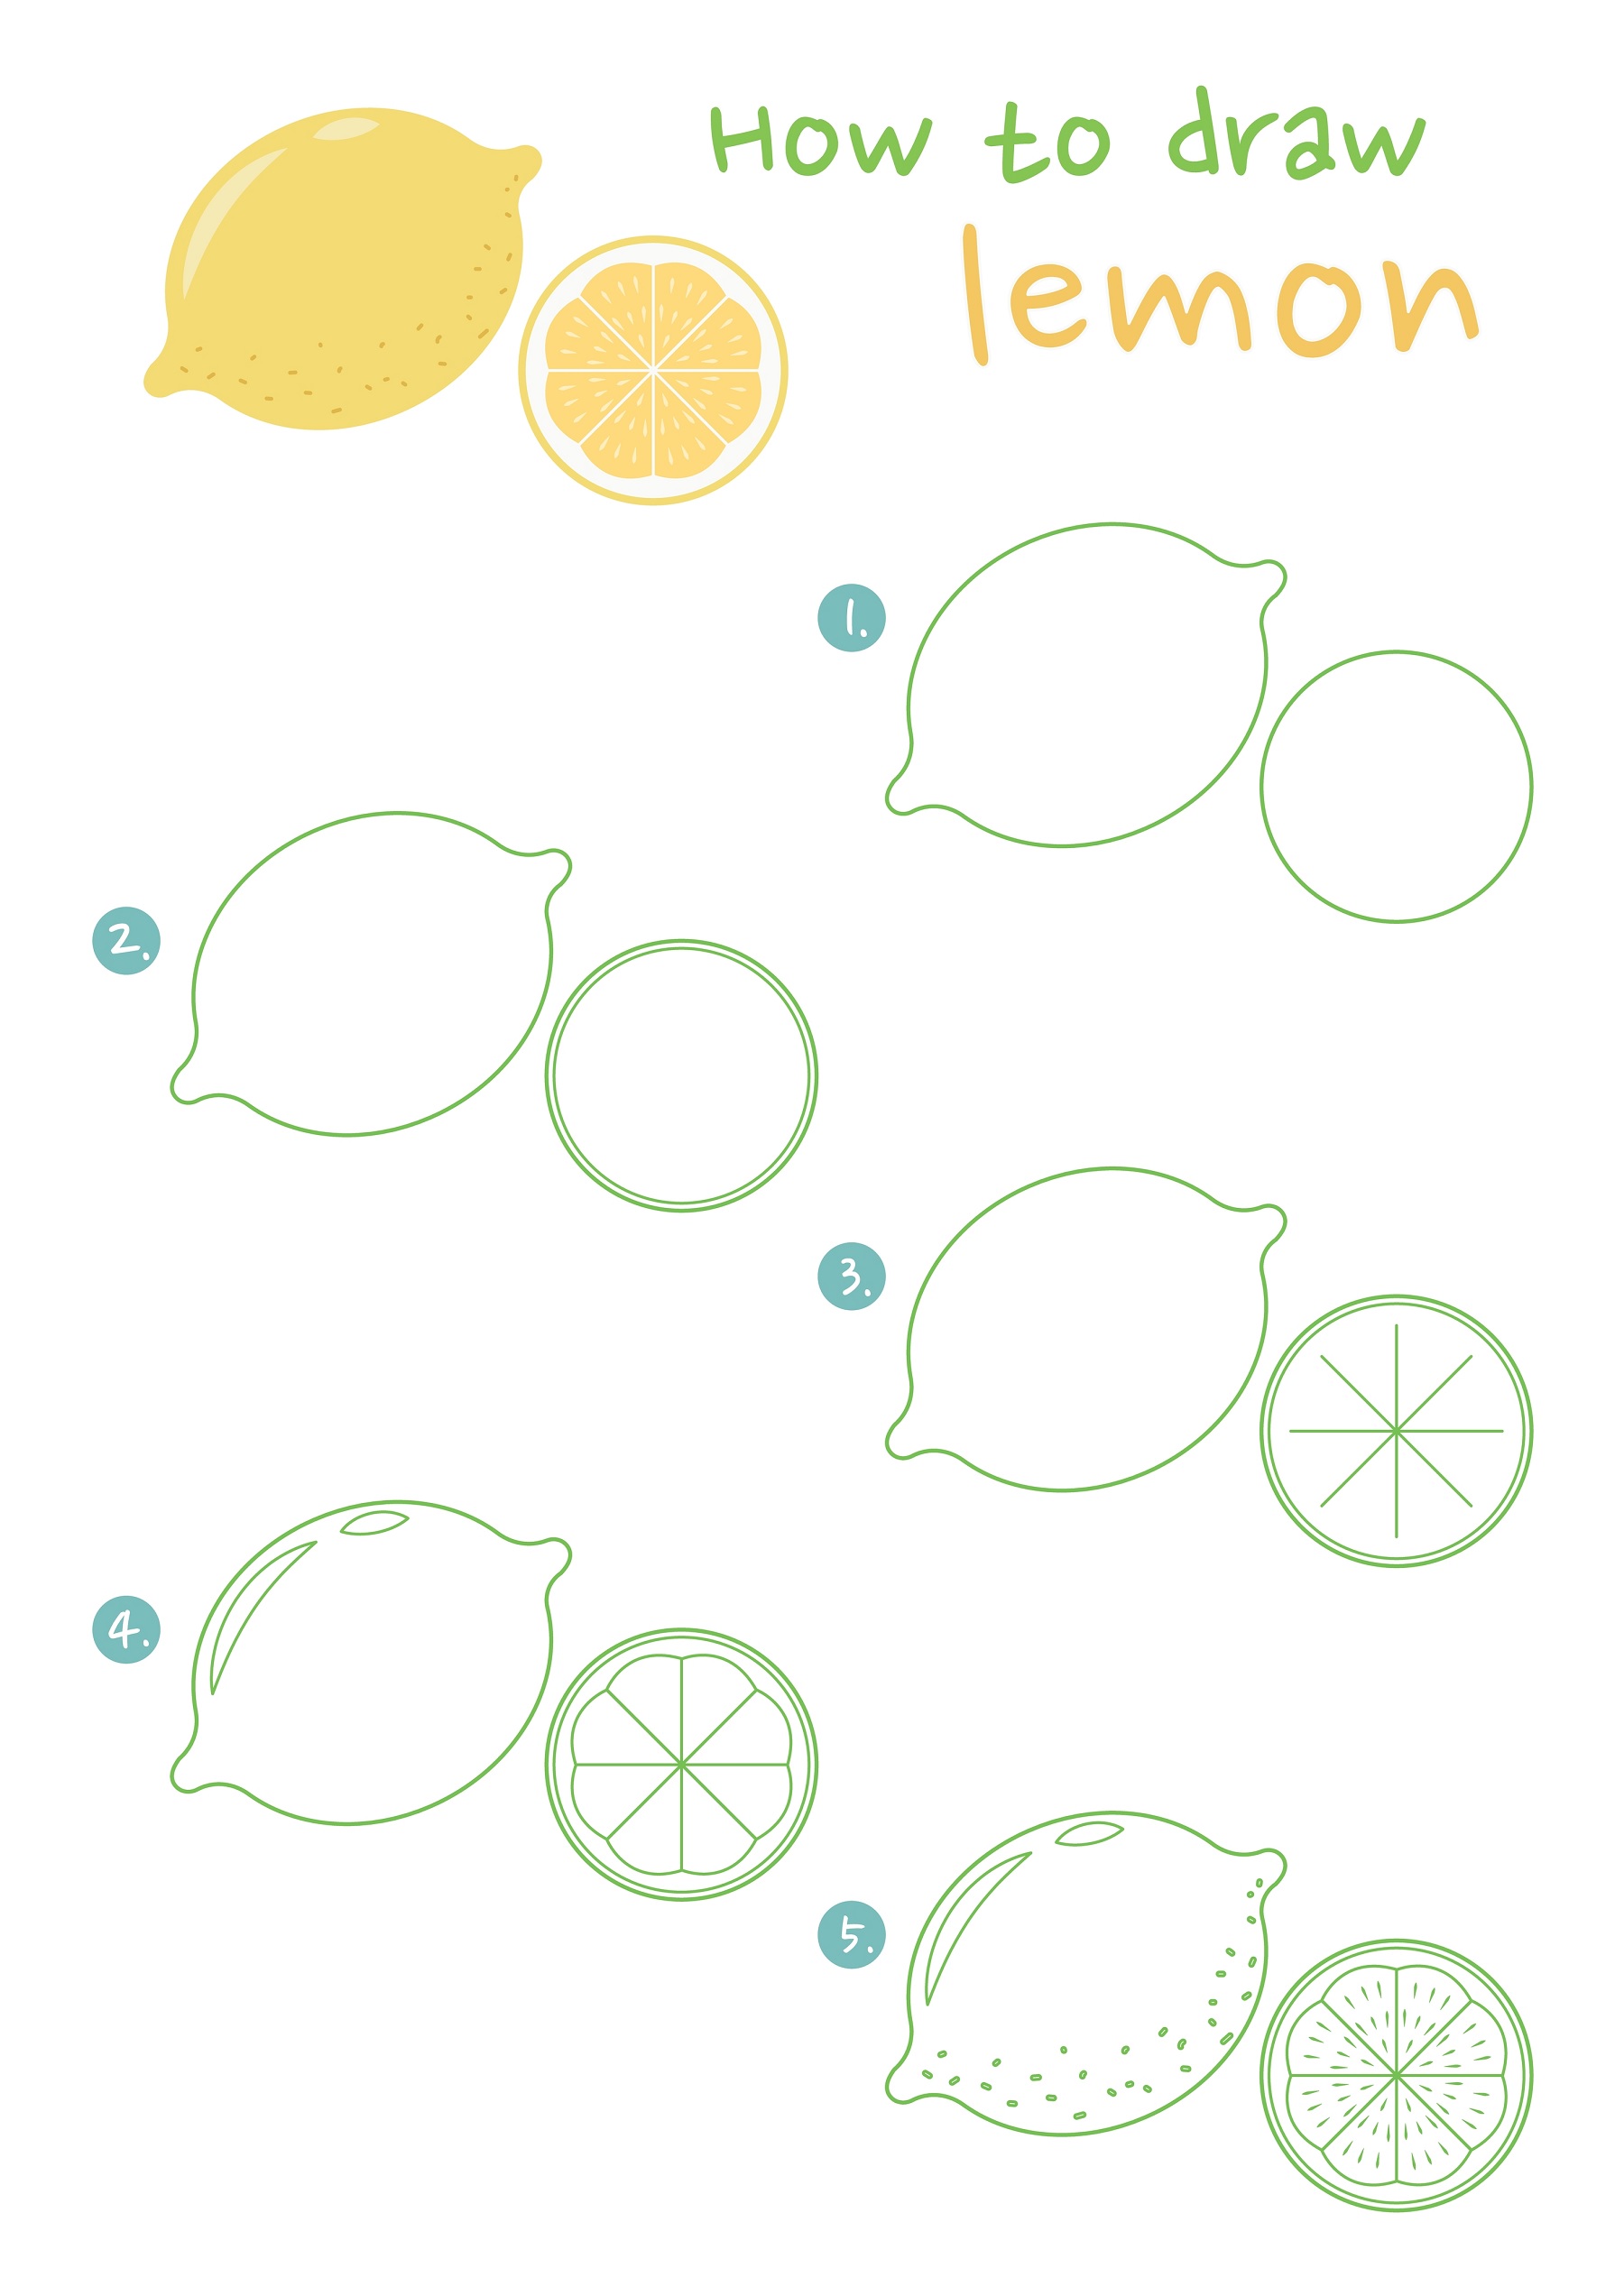
Step 2: Draw the Basic Shape of a Lemon
Start by drawing the basic shape of the lemon. This is going to be an oval shape. Try to make the oval a little bit longer than it is wide because lemons are usually longer than they are round. Don’t worry about getting it perfect – this is just your starting point.

Step 3: Add the Ends of the Lemon
Next, you’re going to draw the ends of the lemon. At the top of your oval, draw a small circle – this is where the stem of the lemon would be. At the bottom of the oval, draw a similar circle. These circles give your lemon a bit more of a realistic shape.
Step 4: Refine the Lemon Shape
Now it’s time to refine your lemon shape. Look at your oval and the circles you’ve drawn. Try to connect them smoothly so that the circles become part of the oval, creating a slightly pointed shape at the top and bottom of the lemon. Your shape should now look more like a real lemon.
Step 5: Draw the Stem and Leaf of the Lemon (optional)
At the top circle of your lemon, you can add a small stem and leaf. For the stem, draw a small line going up from the top circle, then draw another line parallel to it, and connect these two lines at the top. Now you have a stem! For the leaf, draw an almond shape starting from the stem. Remember, leaves aren’t perfect, so it’s okay if it’s a bit wavy or uneven.
Step 6: Add the Texture to the Lemon’s Skin
Lemons have textured skin. To make it look more like a lemon, draw small dots all over the surface of your lemon. Make sure they’re small and spread out. You can also add a few curved lines to show the natural lines in a lemon’s skin.

Step 7: Erase Any Unnecessary Lines in your Drawing
Take a moment to erase any lines you don’t need. This might include any parts of the initial oval that can still be seen, or any marks outside the lemon shape. You should be left with a clean sketch of a lemon.
Step 8: Color the Lemon Yellow
Grab your yellow colored pencil or crayon and color in your lemon. Make sure to leave the stem and leaf uncolored if you have drawn them. Then, take a bit of orange and lightly blend it with the yellow at the top and bottom of the lemon to show a bit of shading. This will make your lemon look more three-dimensional.
Step 9: Color the Stem and Leaf of the Lemon
If you’ve drawn a stem and leaf, now is the time to color them. Use a brown color for the stem and green for the leaf. If you want, you can add some darker green lines to the leaf for added detail.
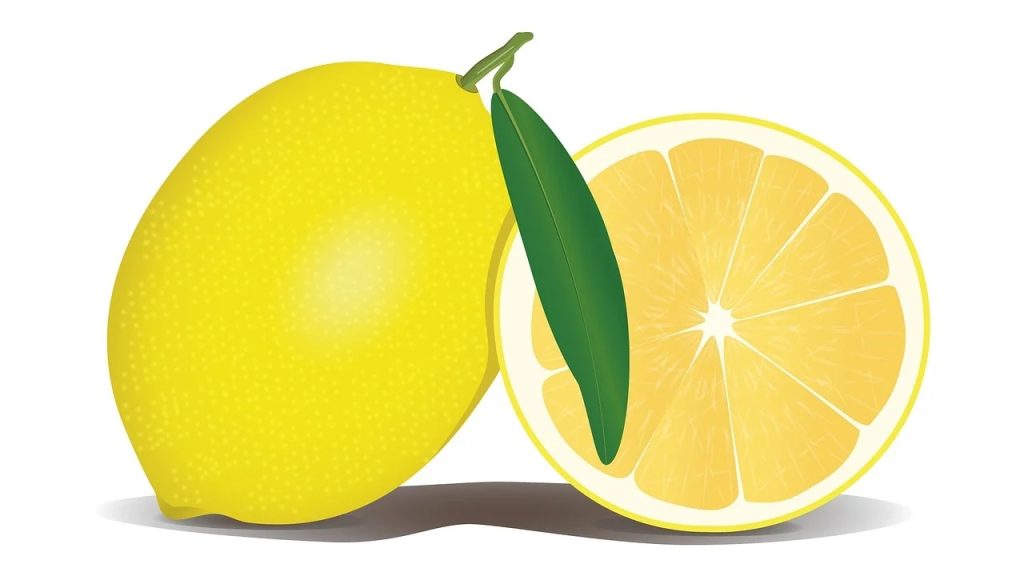
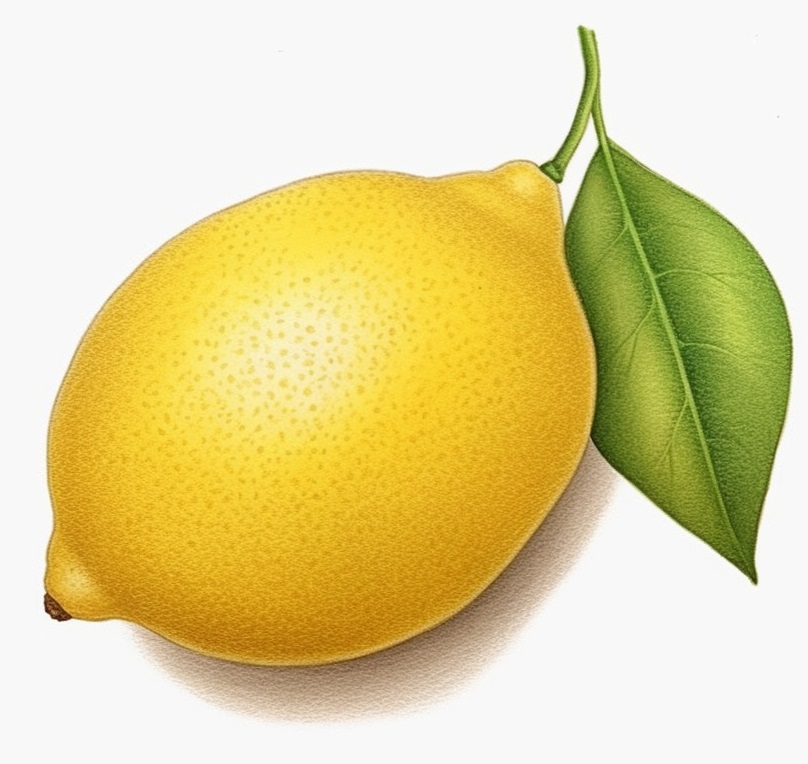
Lemon Drawing
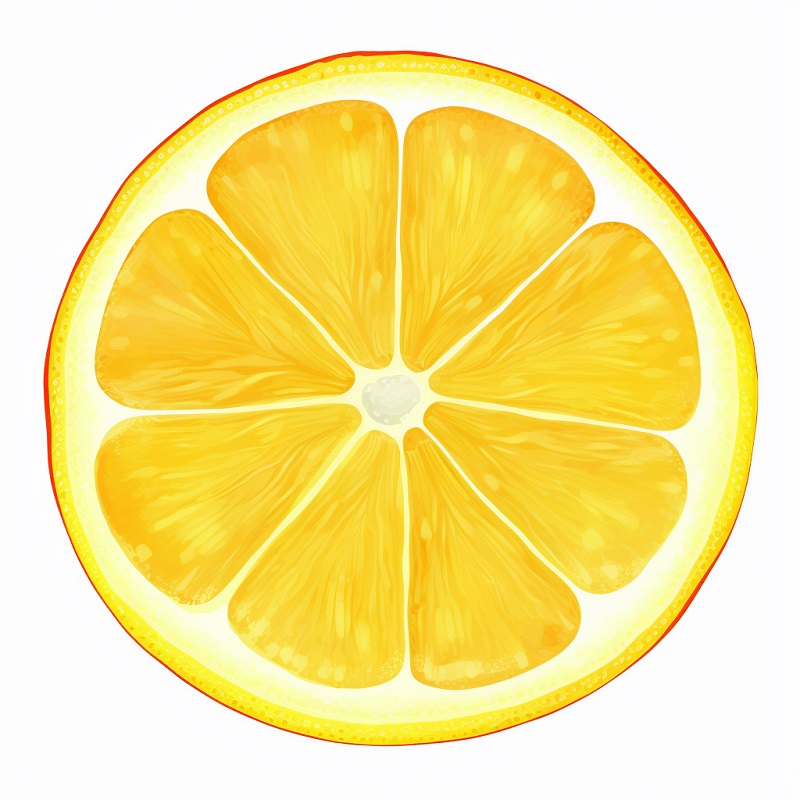
How to Draw a Lemon Slice Step-By-Step
I went over the steps for drawing a whole lemon above. Below, I will cover exactly how to draw a lemon that has been sliced in half.
Step 1: Draw a Circle for Your Lemon Sliced in Half
The first step is to draw a circle for the basic shape of the sliced lemon. Try to make your circle as round as possible, but don’t worry if it’s not perfect – you can always fix it later.
Step 2: Draw the Inner Circle to Show the Peel
Now, you’re going to draw another circle inside the first one. This inner circle represents the peel of the lemon, and it should be a bit smaller than the outer circle. Leave a good amount of space between the two circles to create the thickness of the lemon’s rind.
Step 3: Draw the Inner Lemon Segments
Inside the inner circle, draw lines that radiate out from the center, like the spokes of a bicycle wheel. These lines represent the segments of the lemon. Make sure these lines are curved slightly to give the lemon a more realistic look.
Step 4: Add the Lemon Seeds
Lemons have seeds, so let’s add a few! In some of the segments, draw small oval shapes to represent the seeds. You can add as many or as few as you like.
Step 5: Erase Unnecessary Lines in Your Drawing
Take a moment to erase any lines that you don’t need. This could include any parts of the initial circles that can still be seen in the segments, or any marks outside the lemon shape. What you should have now is a clean sketch of a sliced lemon.
Step 6: Color the Lemon Slice
Grab your yellow colored pencil or crayon and color in the segments of your lemon. Then, color the space between the two circles with a slightly darker shade of yellow to represent the rind.
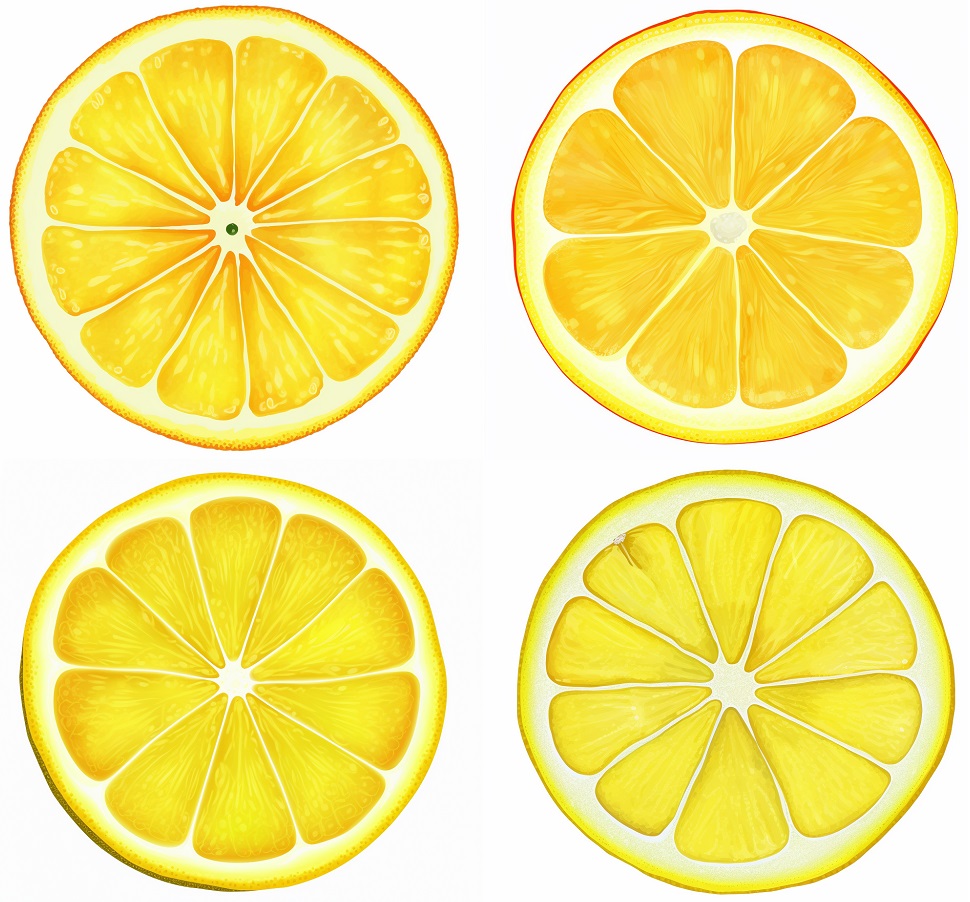
Lemon Slice Drawing
FAQs for Drawing a Lemon
What is a lemon fruit?
A lemon is a citrus fruit known for its vibrant yellow color and sour taste. It’s packed with vitamin C and is often used in cooking and baking for its acidic flavor or in drinks for a refreshing twist.
How can kids draw a lemon easily?
Kids can easily draw a lemon by starting with a basic oval shape, then refining it to have slightly pointed ends. Adding small dots for texture and coloring it yellow makes it look like a real lemon. Following a step-by-step guide, like the one we provided, can make the process simple and fun.
What color is a lemon?
A ripe lemon is typically a bright, vibrant yellow color. However, depending on their level of ripeness and the variety, lemons can also have shades of green and orange.
What does a lemon look like?
A lemon looks like a slightly elongated oval, or an egg shape, with a small protruding stem at one end. Its skin is textured with small pores and often has a shiny surface. Inside, the lemon is divided into segments filled with a sour-tasting juice.
Who should draw a lemon?
Anyone who is interested in learning to draw or wants to practice drawing simple objects can draw a lemon. It’s a great starting point for beginners because of its basic shape, and can also be fun for more experienced artists who want to experiment with texture and shading. Drawing a lemon can also be a fun and educational activity for kids.
How to Draw a Lemon Videos
Video #1
Video #2
Conclusion
Well, there you have it – a complete guide on how to draw a lemon. We hope you enjoyed this lemon drawing tutorial as much as we did putting it together. Remember, the key to mastering any drawing is practice, so don’t worry if your first few attempts don’t look exactly like a professional’s. Keep trying and soon you’ll see improvements. Don’t forget to have fun as you draw your lemon.

