If you’re looking for a fun, easy, and creative way to enhance your drawing skills, learning how to draw grapes step-by-step is the perfect project! This versatile and juicy fruit can be a delightful addition to still life drawings, illustrations, or just a simple sketch. In this tutorial, we’ll guide you through the process, so grab your drawing tools, and let’s get started.
Materials You Will Need to Draw Grapes
Before you begin, make sure you have all the necessary materials at hand. Here’s a quick list of the essentials:
Drawing Tools
- Pencil (HB or 2B)
- Eraser
- Sharpener
- Drawing paper or sketchbook
Coloring Tools (Optional)
- Colored pencils, markers, or watercolor paints
- Blending tools (e.g., blending stumps, paper towel, or your finger)
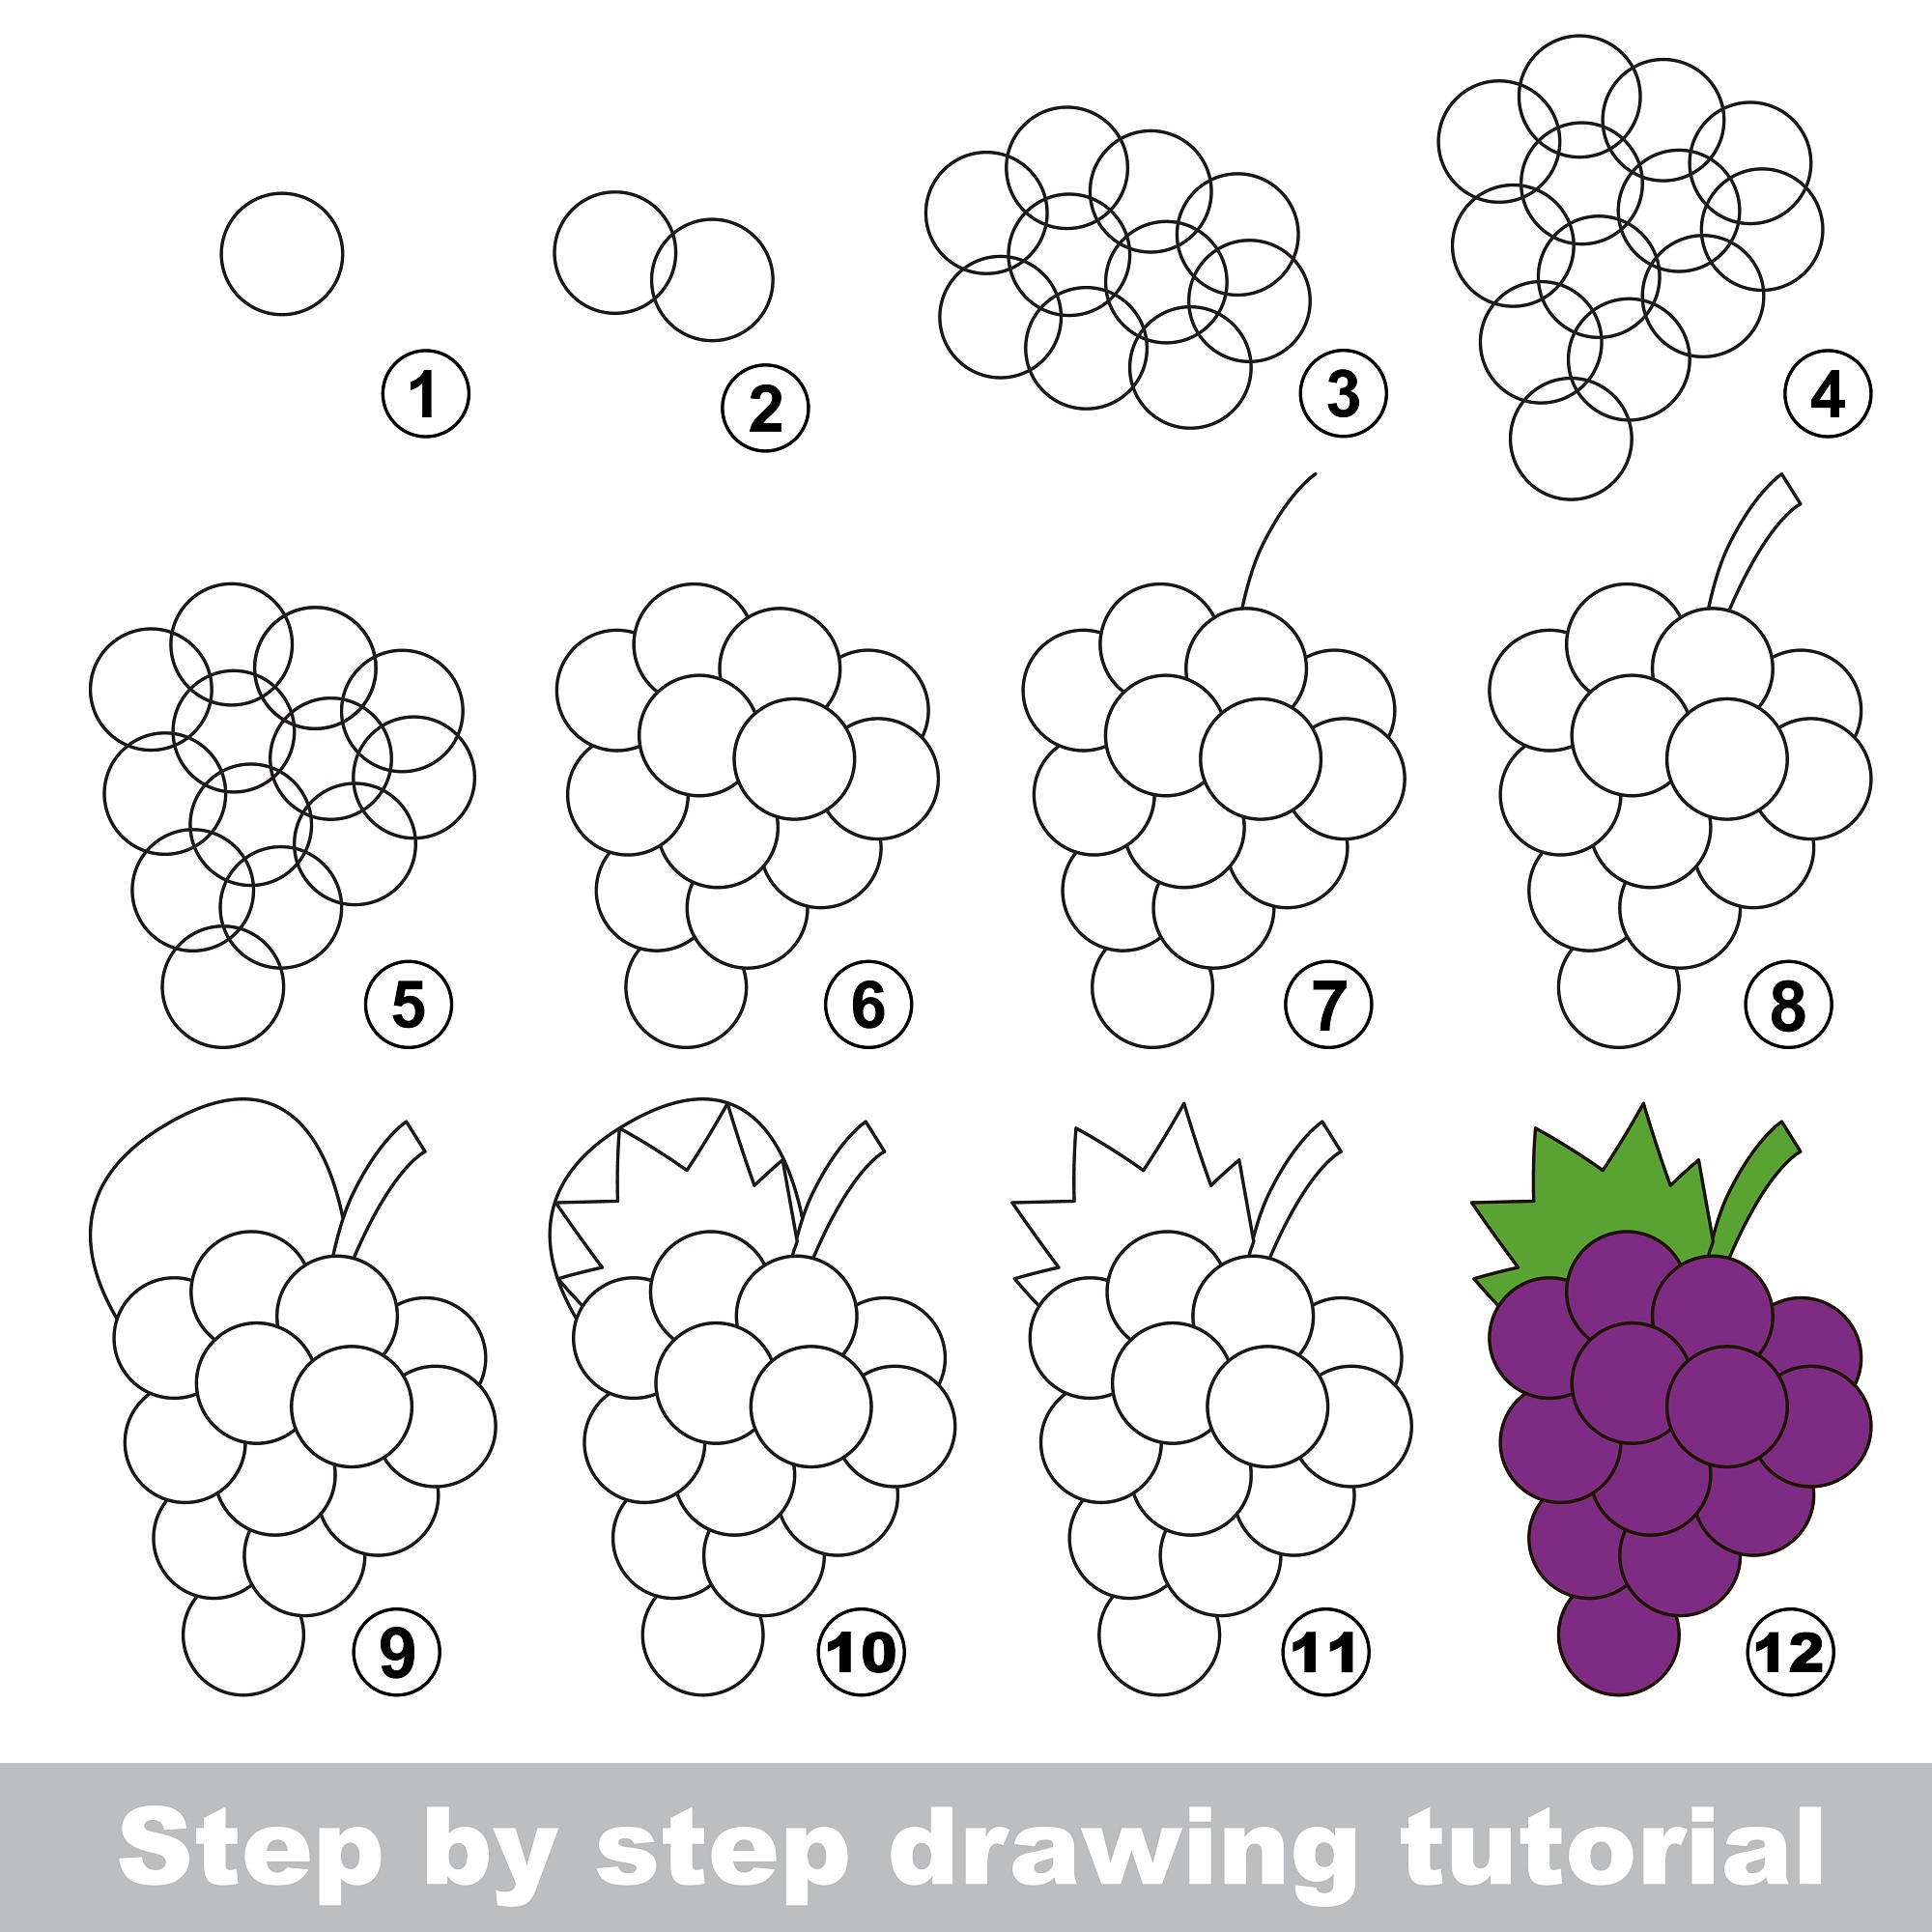
Step-By-Step Guide to Draw Grapes
Step 1: Sketch a Basic Shape
First, lightly sketch an oval or circular shape on your paper. This will serve as the overall shape of your grape cluster. Don’t worry about making it perfect; the outline will be erased later.
Step 2: Draw the Individual Grapes
Starting at the top of the sketched shape, begin drawing circles or ovals to represent individual grapes. Make sure the grapes touch or slightly overlap each other to create a natural look. Remember, grapes come in different sizes, so vary the size of your circles to add interest and depth.
Step 3: Add Details to the Grapes
For each grape, draw a small, curved line near the top, where it connects to the adjacent grape. This will create the illusion of depth and show where the grapes join together.
Step 4: Draw the Stem and Leaves
Add a curved line at the top of the grape cluster to represent the stem. To draw leaves, sketch out a few simple leaf shapes extending from the stem. Add veins to the leaves by drawing a central line and adding diagonal lines from the center.
Step 5: Add Shadows and Highlights
Using a slightly darker pencil or shading tool, add shadows to the grapes where they overlap or are hidden from light. Also, add highlights to the top of each grape by erasing a small area or using a white pencil.
Step 6: Color Your Grapes
When selecting colors for your grapes, consider the variety you’re drawing. Grapes come in various shades of green, red, and purple. Pick two or three shades of the same color for a more realistic look.
Coloring Techniques
- Start by applying a light base color to each grape, making sure to leave the highlights untouched.
- Gradually build up layers of color, using darker shades to emphasize the shadows and create depth.
- For a smoother appearance, blend the colors using a blending tool, your finger, or a paper towel.
Tips and Tricks for Drawing Grapes
Observe and simplify shapes for grapes:
Begin by observing real grapes or reference images to understand their shapes and forms. Grapes generally have a round or slightly oval shape, and they grow in clusters. Start by drawing simple circles or ovals for each grape, arranging them in a random pattern to mimic the natural growth of grape clusters. Remember that grapes in a bunch may be overlapping, so take your time to understand how the shapes intersect and layer.
Add shading and texture to your grape drawing:
To give your grapes a three-dimensional appearance, add shading and highlights. Determine a light source for your drawing and shade the grapes accordingly, using a gradient of tones to create the illusion of depth. For instance, the side of each grape facing the light source will be lighter, while the opposite side will be darker. Additionally, add subtle texture by drawing small, irregular dots or lines on the surface of the grapes to represent their natural skin texture.
Draw the grape stem and leaves:
Once you have drawn and shaded the grapes, it’s time to add the stem and leaves. The stem is usually thicker at the base and tapers towards the end. Draw the stem using two parallel, slightly curved lines and connect them at the ends with a rounded tip. For the leaves, observe the shape and veins of real grape leaves or reference images. Draw the basic shape of the leaf first, then add the central vein and smaller veins branching out from it. You can also add shading to the leaves for a more realistic look.
Conclusion
Drawing grapes step-by-step can be a fun and rewarding experience. With a little practice and attention to detail, you’ll be able to create beautiful and realistic grape illustrations. Remember to experiment with different colors, shapes, and sizes to develop your own unique style. Most importantly, enjoy the process and have fun!
