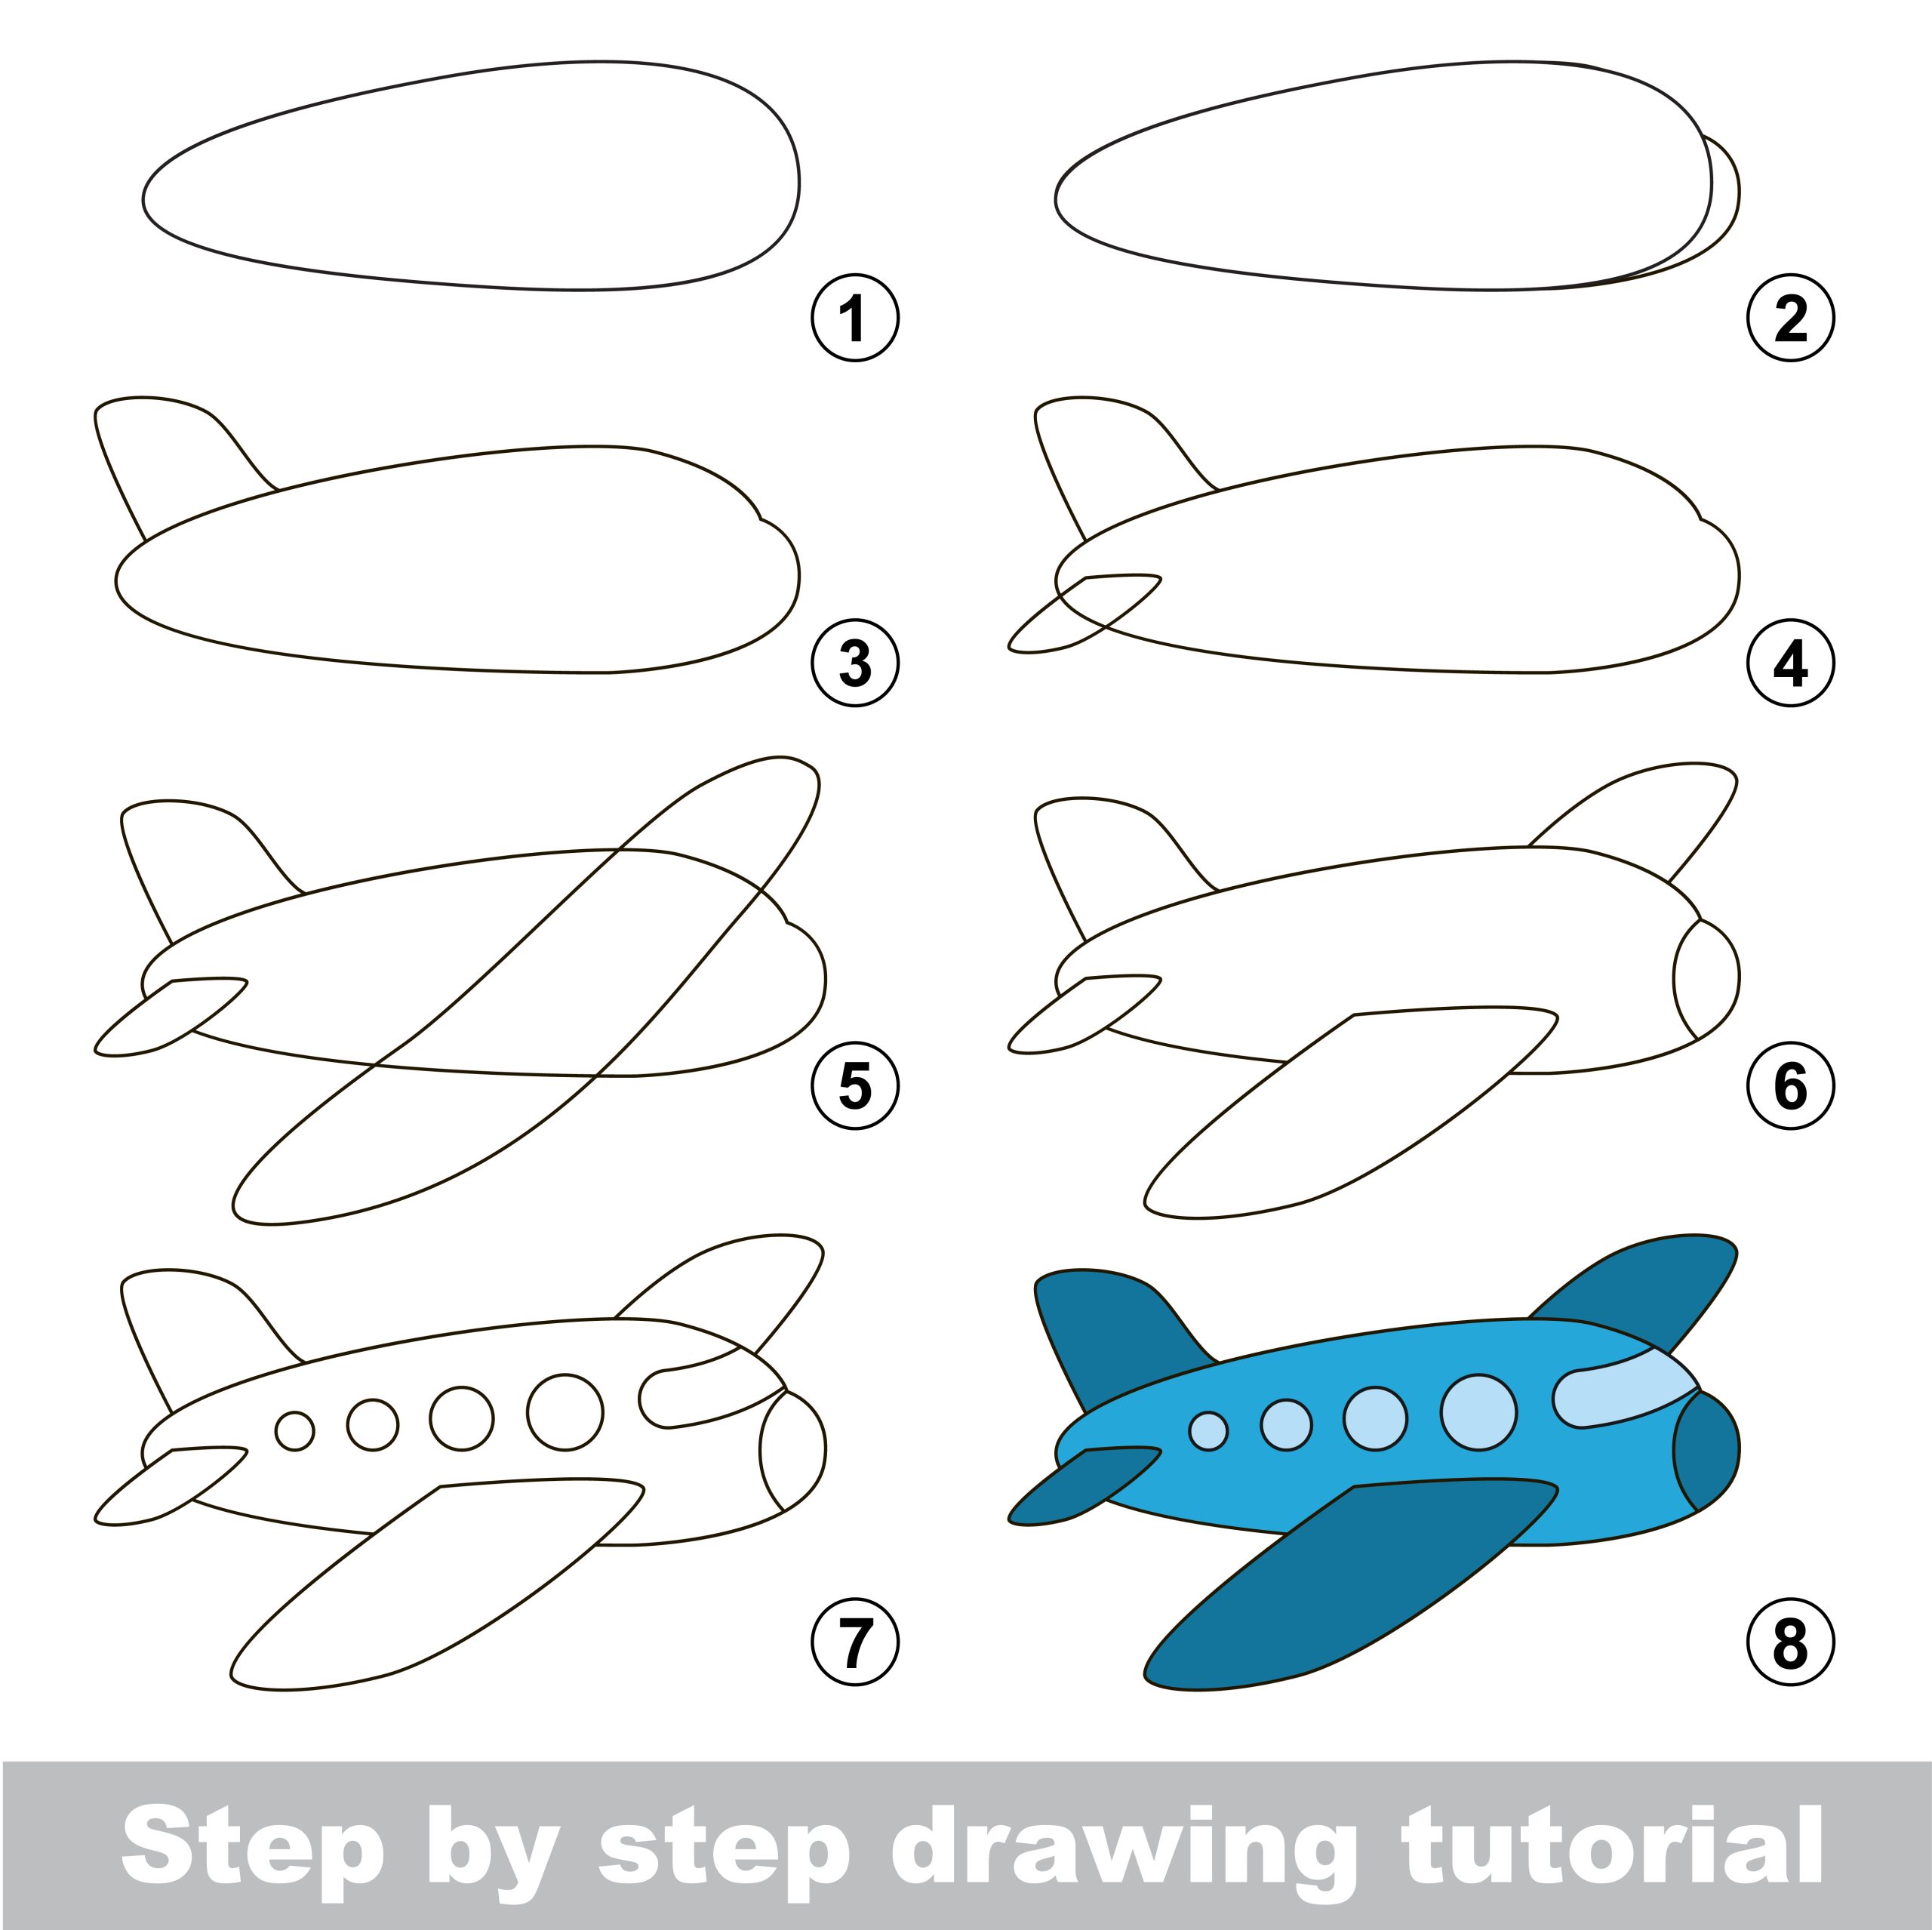
In this blog post, we will guide you through a step-by-step process of drawing an airplane.
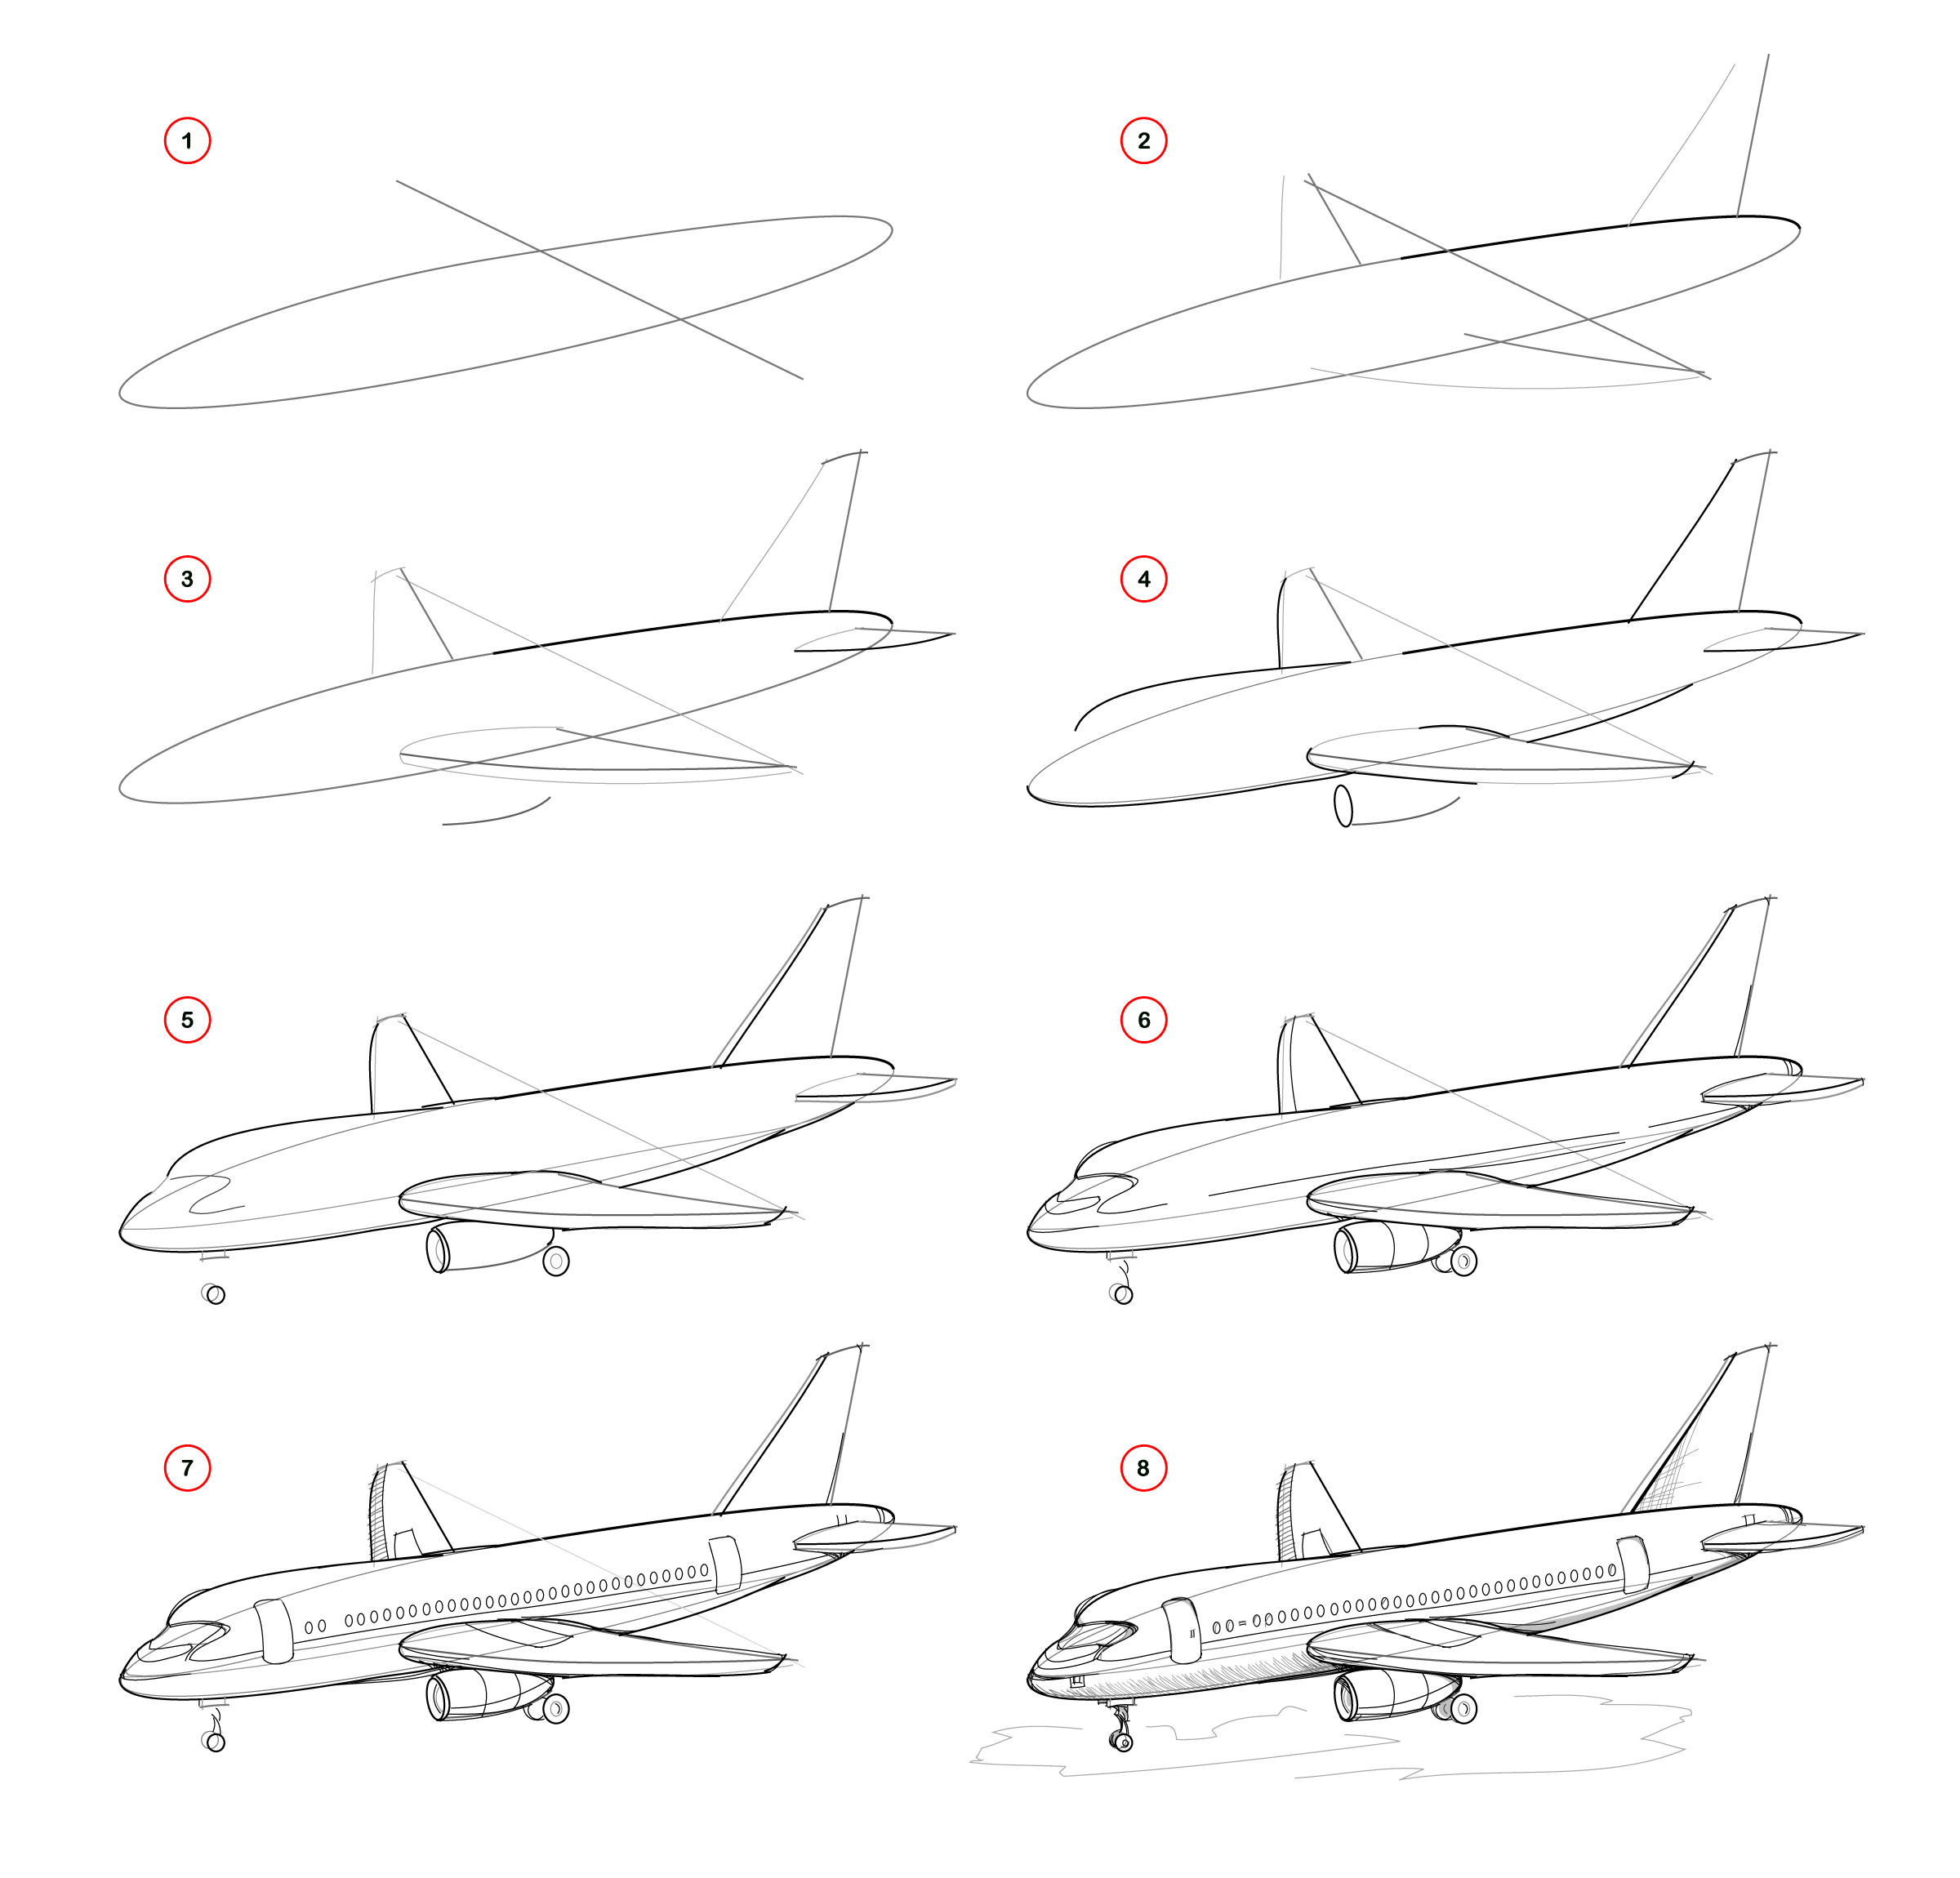
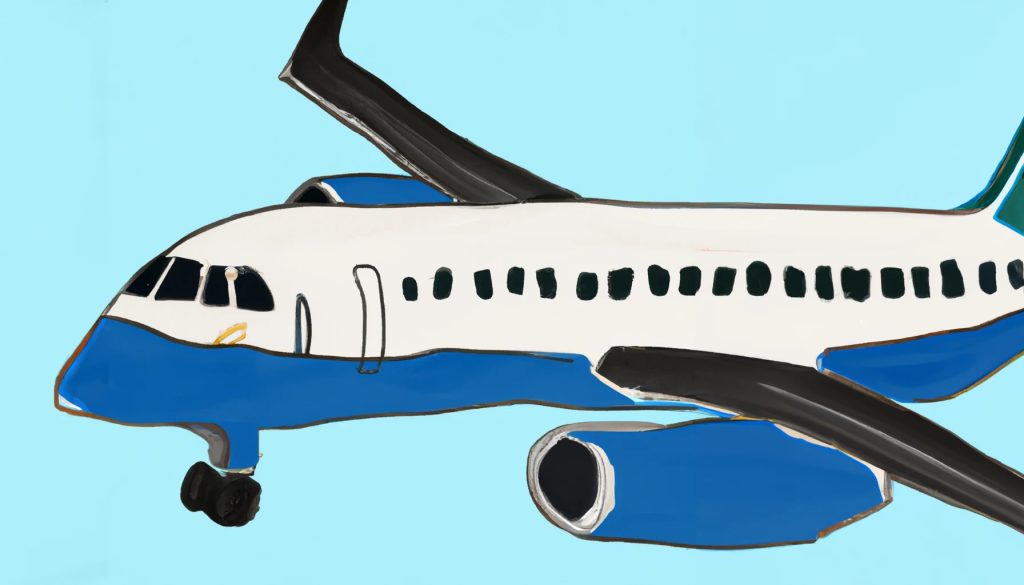
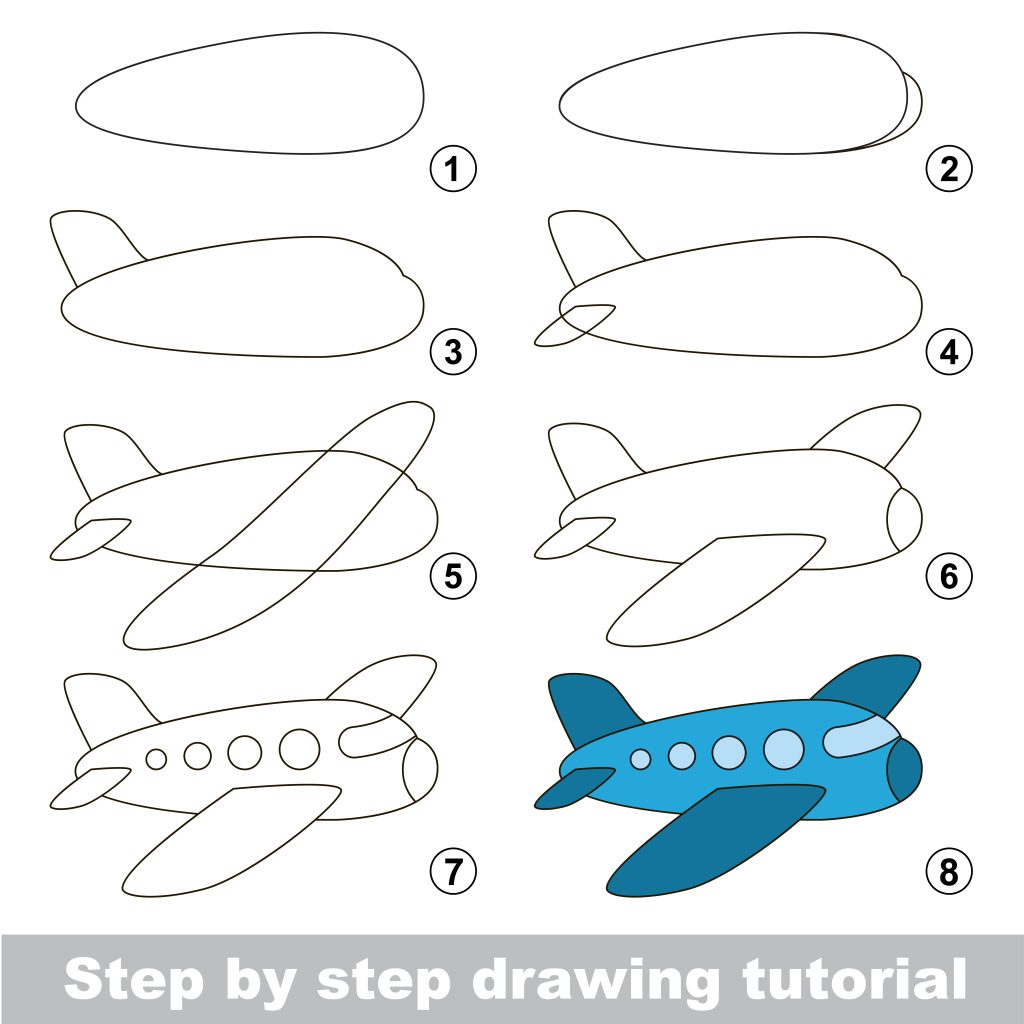
First, you want to draw the body or the fuselage of the airplane by drawing a long oval shape that looks similar to a surfboard. You can draw the shape diagonally and you want to put a perpendicular line through the oval shape about 2/3 of the way down the oval. Next, you want to draw the wings of the plane with rounded triangles coming out from each side and the vertical stabilizer AKA tail wing on the back side of the oval, which is shaped like a tall trapezoid. Next, draw the engines and the landing gear on the bottom of the wings and draw the landing gear towards the front of the body of the plane. After that, draw the cockpit and the horizontal stabilizers, which are the smaller tail wings that come out of the backside of the fuselage. Finally, draw the two entrance/exit doors along with all the windows on the side of the plane. Use shading and color to add additional detail to your airplane.
How to Draw a Cartoon Airplane – Easy Drawing

Step-By-Step Airplane Drawing Tutorial
Drawing an airplane can seem like a difficult task. If you are trying to draw a detailed commercial airliner, it will take some practice to improve. However, drawing a cartoonish airplane can be easier for beginners. Start with the airplane you are able to draw and improve over time.
Materials Needed:
- Paper
- Pencil
- Eraser
- Ruler
- Colored Pencils/Crayons/Markers
Step 1 – Draw the Fuselage or Body
Start by drawing a long, narrow rectangular-oval shape for the body of the airplane. The size of the fuselage will depend on the size of the airplane you want to draw. Make sure to draw it straight and centered on the page.
Step 2 – Draw the Wings
Draw two long, thin rectangles on either side of the fuselage, starting at the bottom of the fuselage and extending outward. The wings should be angled slightly upward to give the airplane a lift. Make sure the wings are even in size and shape.
Step 3 – Draw the Tail
Draw a smaller rectangle at the back of the fuselage, angled upward. This will be the horizontal stabilizer. Then, draw a smaller rectangle on top of the horizontal stabilizer, angled upward as well. This will be the vertical stabilizer. Finally, draw a smaller rectangle at the bottom of the vertical stabilizer for the rudder.
Step 4 – Draw the Engines
Draw two circles or ovals on the bottom of the fuselage, slightly in front of the wings. These will be the engine nacelles.
Step 5 – Draw the Cockpit
Draw a small rectangle at the front of the fuselage for the cockpit. Then, draw a curved line to connect the cockpit to the fuselage.
Step 6 – Draw the Windows
Draw small rectangles along the sides of the fuselage for the windows. Make sure they are evenly spaced and sized.
Step 7 – Draw the Landing Gear
Draw a small rectangle underneath the fuselage for the landing gear. Then, draw two small rectangles on either side of the landing gear for the wheels.
Step 8 – Draw the Final Details of the Airplane
Depending on the airplane you are drawing, you can add other features such as antennae, air intakes, and exhaust ports.
Step 9 – Add Shading to your Airplane
Use a pencil to add shading to the airplane to give it more depth and realism. Shade the areas that are in shadow or under the wings.
Step 10 – Add Color to your Airplane
Use colored pencils or markers to add color to the airplane. Use blue for the top of the airplane and white for the bottom. Add any other colors depending on the livery or design of the airplane.
Step 11 – Add Texture to your Airplane
Use a pencil or pen to add texture to the airplane, such as the rivets on the fuselage or the tread on the tires.
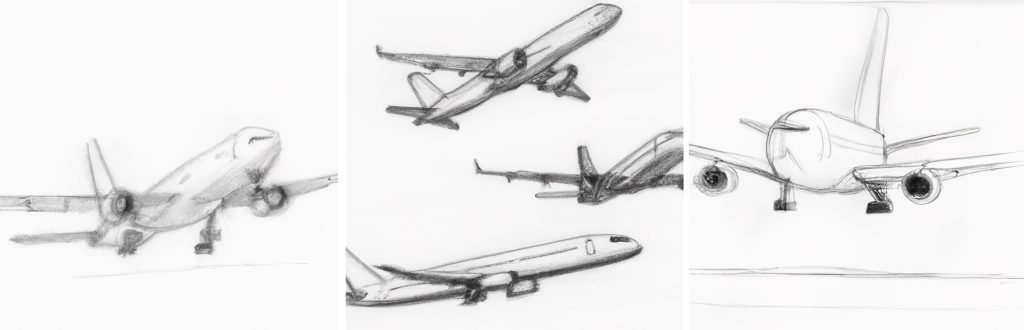
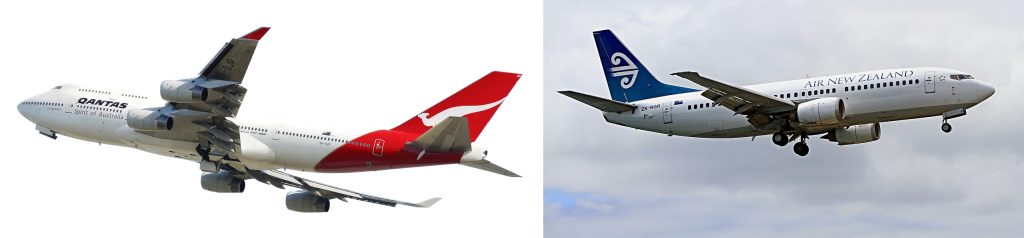
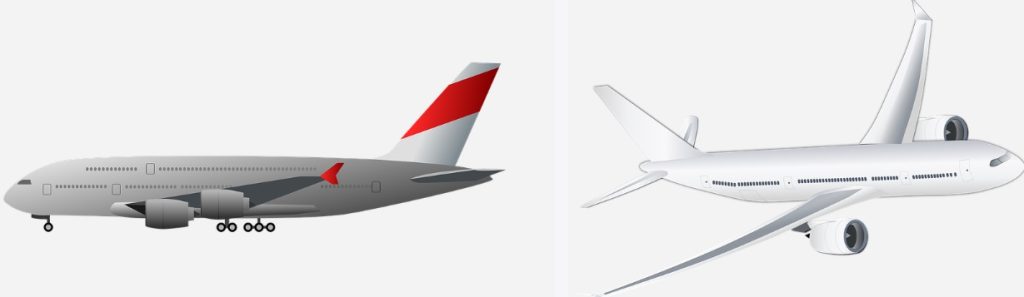
Step 12 – Reference Images of Airplanes
It’s important to use a reference image when drawing an airplane, to ensure accuracy and realism. We will provide you with plenty of reference images to use as a guide for your drawing. By looking at actual airplanes and drawings, you can get an idea of what your drawing should look like.
Tips For Drawing an Airplane
I put two tips below to remember as you draw your airplane.
Pay Attention to Proportions and Angles
One of the most important things to keep in mind is to pay close attention to the proportions and angles of the airplane’s body, wings, tail, and engines. Take your time to carefully observe the reference image and use a ruler or other measuring tool to ensure accuracy. Additionally, it can be helpful to break down the airplane into basic shapes and then build upon them with details.
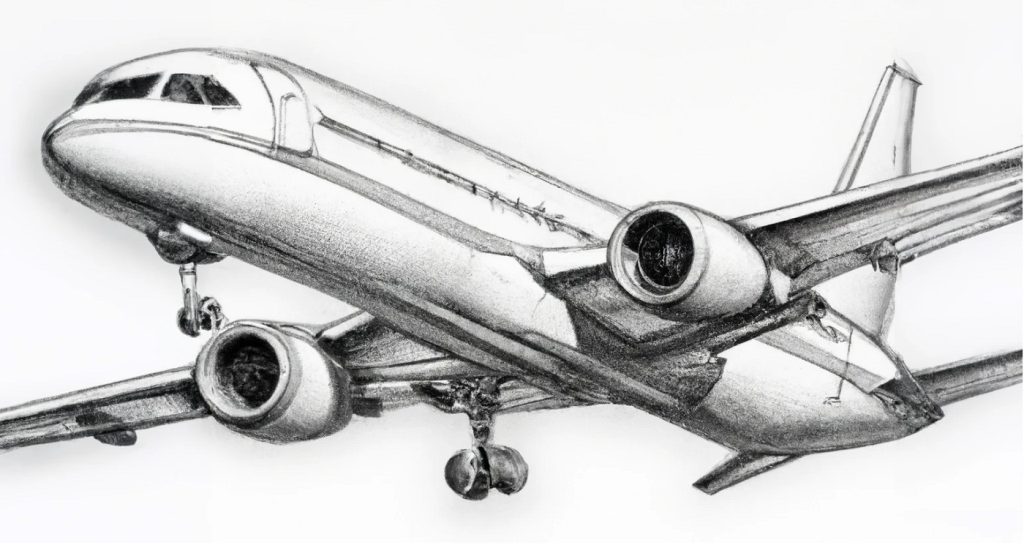
Use Shading and Textures
commercial airplanes typically have a smooth and shiny exterior, with rivets, seams, and other small details visible on close inspection. To achieve a realistic look, you can use a variety of shading techniques to create the illusion of depth and texture, such as hatching, crosshatching, and stippling. Additionally, adding reflections and highlights to the airplane’s surface can help create a sense of shine and reflectivity.
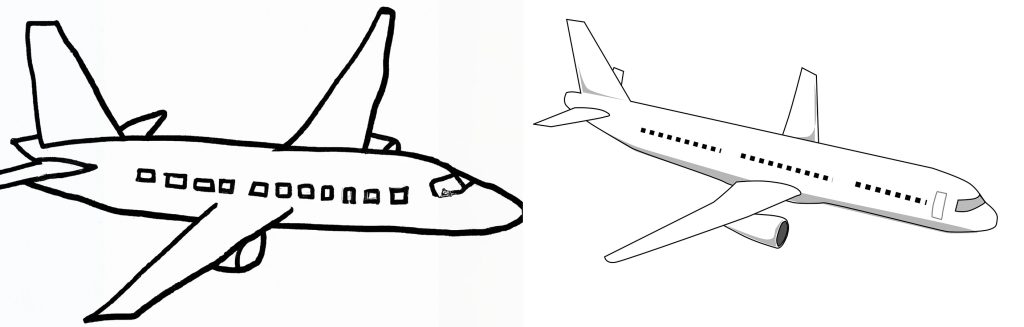
How to Draw a Cartoon-Style Airplane
You can view our complete drawing tutorial for a cartoon airplane here.
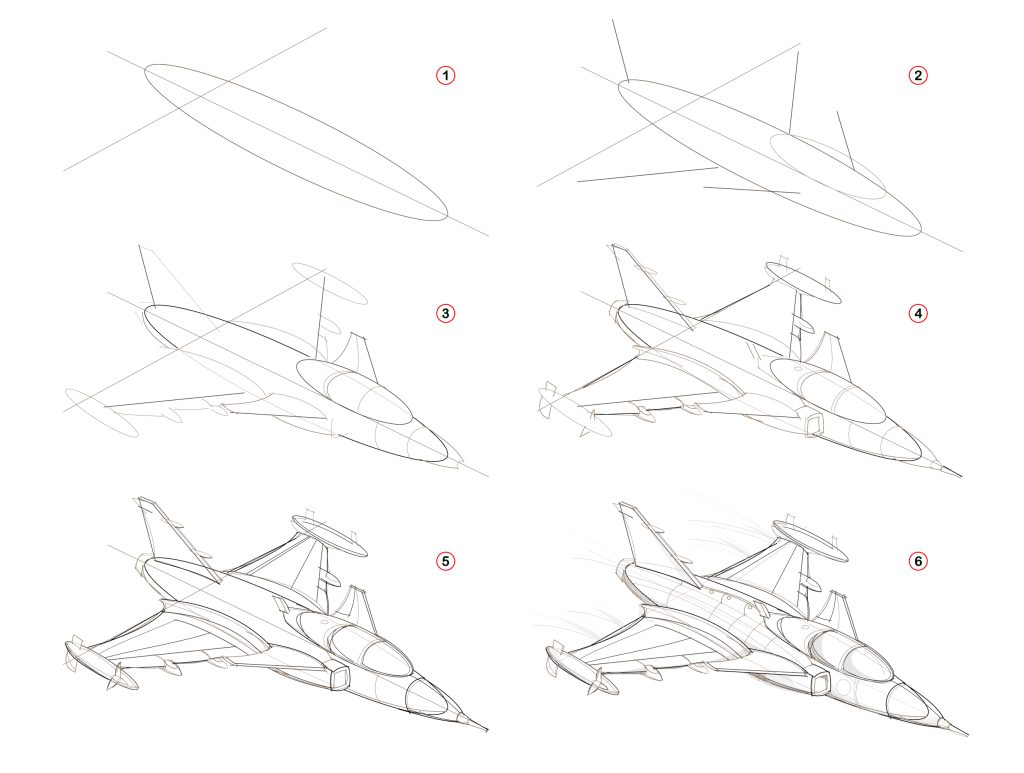
How to Draw a Fighter Jet
You can view our complete drawing tutorial for a fighter jet here.
In Summary
Our goal was to provide you with a comprehensive guide to drawing an airplane, including the basic shapes, details, shading, and coloring techniques. Drawing an airplane may seem difficult at first, but by breaking it down into basic shapes, adding details, and shading and coloring, you can create a realistic and impressive drawing. Remember to practice and experiment with different techniques to improve your skills.

