Before we begin, it’s important to familiarize yourself with the basic structure of a tractor. Tractors are heavy-duty vehicles used in agriculture and construction. They typically have a large body, wheels, and various attachments. By breaking down the drawing process into simple steps, you’ll be able to create an impressive tractor drawing with ease.
Materials For Drawing a Tractor
To start drawing, gather the necessary materials. You’ll need a pencil, eraser, paper, and optional tools such as colored pencils or markers for adding color later on. Using a pencil allows for easy corrections and adjustments as you progress through the drawing.
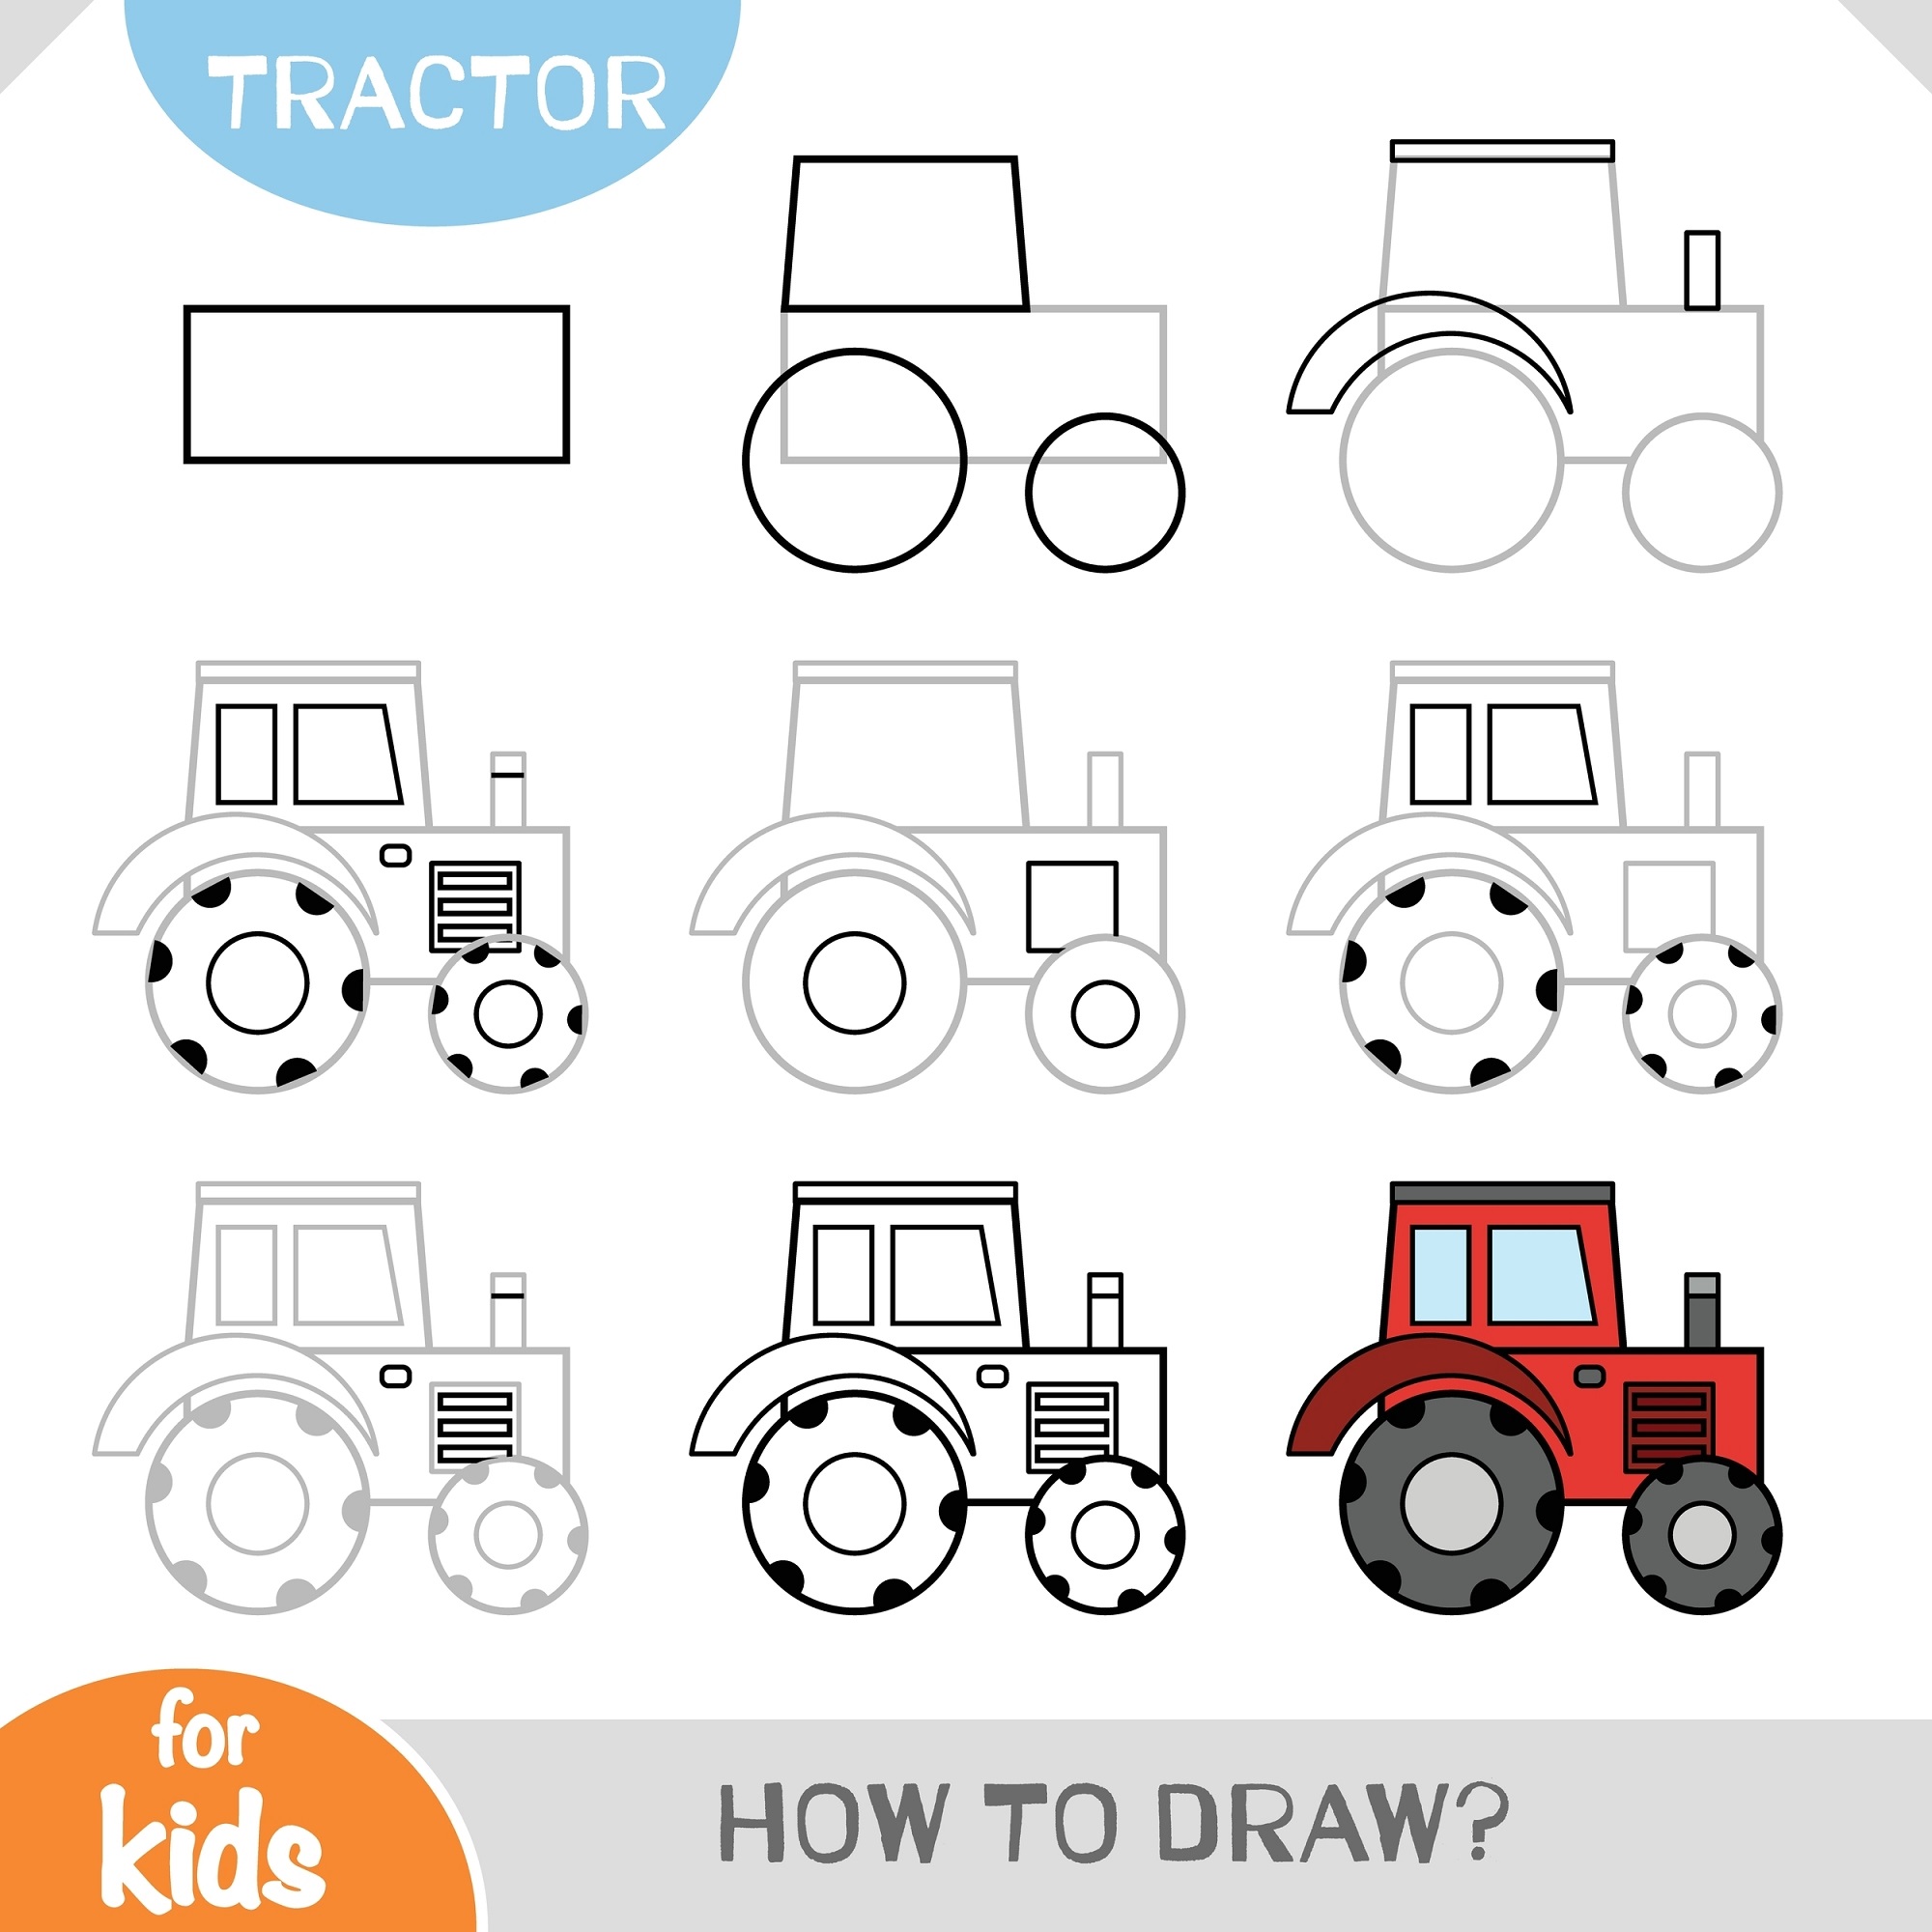
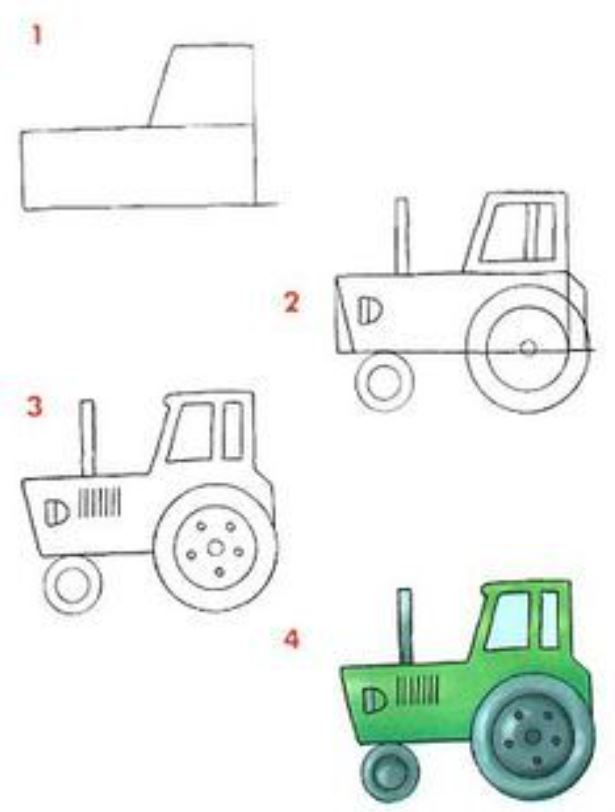
Step 1 – Drawing the Outline of the Tractor
Begin by lightly sketching the outline of the tractor. Start with basic shapes to establish the proportions and positioning. Use light, loose strokes to create a rough framework for your drawing. Pay attention to the overall shape, angles, and curves of the tractor body.
Step 2 – Adding Details to Your Tractor
Once you have the basic outline, start adding more details to your drawing. Focus on the different parts of the tractor, such as the engine, exhaust pipe, and headlights. Use reference images or real tractors to guide you in capturing the specific features and components accurately.
Step 3 – Draw the Tractor’s Wheels and Tires
Next, work on drawing the wheels and tires of the tractor. Pay attention to the perspective and shading to give them a three-dimensional appearance. Add spokes or tread patterns to make the wheels look more realistic. Remember to adjust the size and positioning based on the overall proportions of the tractor.
Step 4 – Draw the Tractor’s Cabin and Windows
Move on to drawing the cabin and windows of the tractor. Pay close attention to the angles and shapes involved. Tractor cabins are typically boxy, so use straight lines and well-defined corners. Add details like handles, mirrors, and windshield wipers to enhance the realism.
Step 5 – Draw the Front and Rear Parts
Now, focus on drawing the front and rear parts of the tractor. These include the grille, headlights, fenders, and exhaust system. Pay attention to the specific design elements of the tractor model you’re drawing. Incorporate curved lines and small details to make your drawing more accurate and visually appealing.
Step 6 – Color and Shade Your Tractor
If you want to add color to your drawing, this is the stage to do it. Use colored pencils or markers to bring your tractor to life. Consider the color scheme you want to use and observe real tractors or reference images for guidance. Apply shading techniques to create depth and dimension.
Step 7 – Finishing Touches For Your Tractor Drawing
After coloring, take a step back and evaluate your drawing. Make any necessary adjustments or refinements to improve the overall composition. Add any additional details or highlights to enhance the realism and make your drawing stand out.

Parts of a Tractor You Need to Draw
When drawing a tractor, there are several different parts you’ll want to include to make it look realistic. Here are the main components of a tractor:
Body:
Start by drawing the main body of the tractor, which is usually a large rectangular or box-like shape.
Wheels:
Tractors typically have four large wheels, two at the front and two at the rear. Each wheel consists of a circular rim and a thick tire.
Engine:
Depict the engine compartment, often located at the front of the tractor. You can draw simple lines to indicate the general position and shape of the engine.
Grille:
Tractors often have a distinctive grille on the front, which helps cool the engine. It can be represented by a series of horizontal or vertical lines.
Headlights:
Include headlights on the front of the tractor, usually positioned on either side of the grille. These are typically circular or rectangular in shape.
Cabin:
Draw the tractor’s cabin, where the operator sits. The cabin is usually a smaller rectangular structure mounted on the body of the tractor.
Windows:
Add windows to the cabin, including a windshield at the front and side windows. These can be represented by simple shapes like rectangles or squares.
Fenders:
Tractor fenders are often located above the wheels and provide protection. They can be drawn as curved or angled surfaces.
Exhaust Pipe:
Include the exhaust pipe, usually positioned on the side or back of the tractor. It is often a cylindrical shape.
Hitch:
Depict the hitch at the rear of the tractor, which is used for attaching various implements or trailers.
3 Tips For Drawing a Realistic Tractor For Kids
Drawing a realistic tractor can be a fun and engaging activity for kids. Here are three tips to help them create a more realistic and appealing tractor drawing:
1. Start with Basic Shapes:
Encourage kids to begin their tractor drawing by using basic shapes as a foundation. They can use rectangles or squares for the body and cabin, circles for the wheels, and triangles for the fenders. Starting with these simple shapes helps establish the overall proportions and structure of the tractor.
2. Add Details Step-by-Step:
Guide children to add details gradually to their drawing. Start with larger features like the wheels, grille, and cabin. Then, they can move on to smaller details such as headlights, windows, and the hitch. This step-by-step approach allows kids to focus on one element at a time, making it easier for them to replicate the features of a real tractor.
3. Use Reference Images:
Encourage kids to look at reference images of tractors while they draw. This helps them gain a better understanding of the specific details and components of a tractor. They can observe the shapes, angles, and proportions of different tractor parts and incorporate them into their own drawing. Reference images also provide inspiration and serve as a visual guide throughout the drawing process.
Conclusion
You’ve successfully learned how to draw a tractor step-by-step. Your 10th tractor drawing will look much better than your very first drawing. By following these tips, kids can develop their artistic skills, improve their attention to detail, and create a more realistic representation of a tractor in their drawings.