Follow our easy tutorial and you will have your own peacock drawing! This is a great instructional article to teach kids how to draw a peacock.
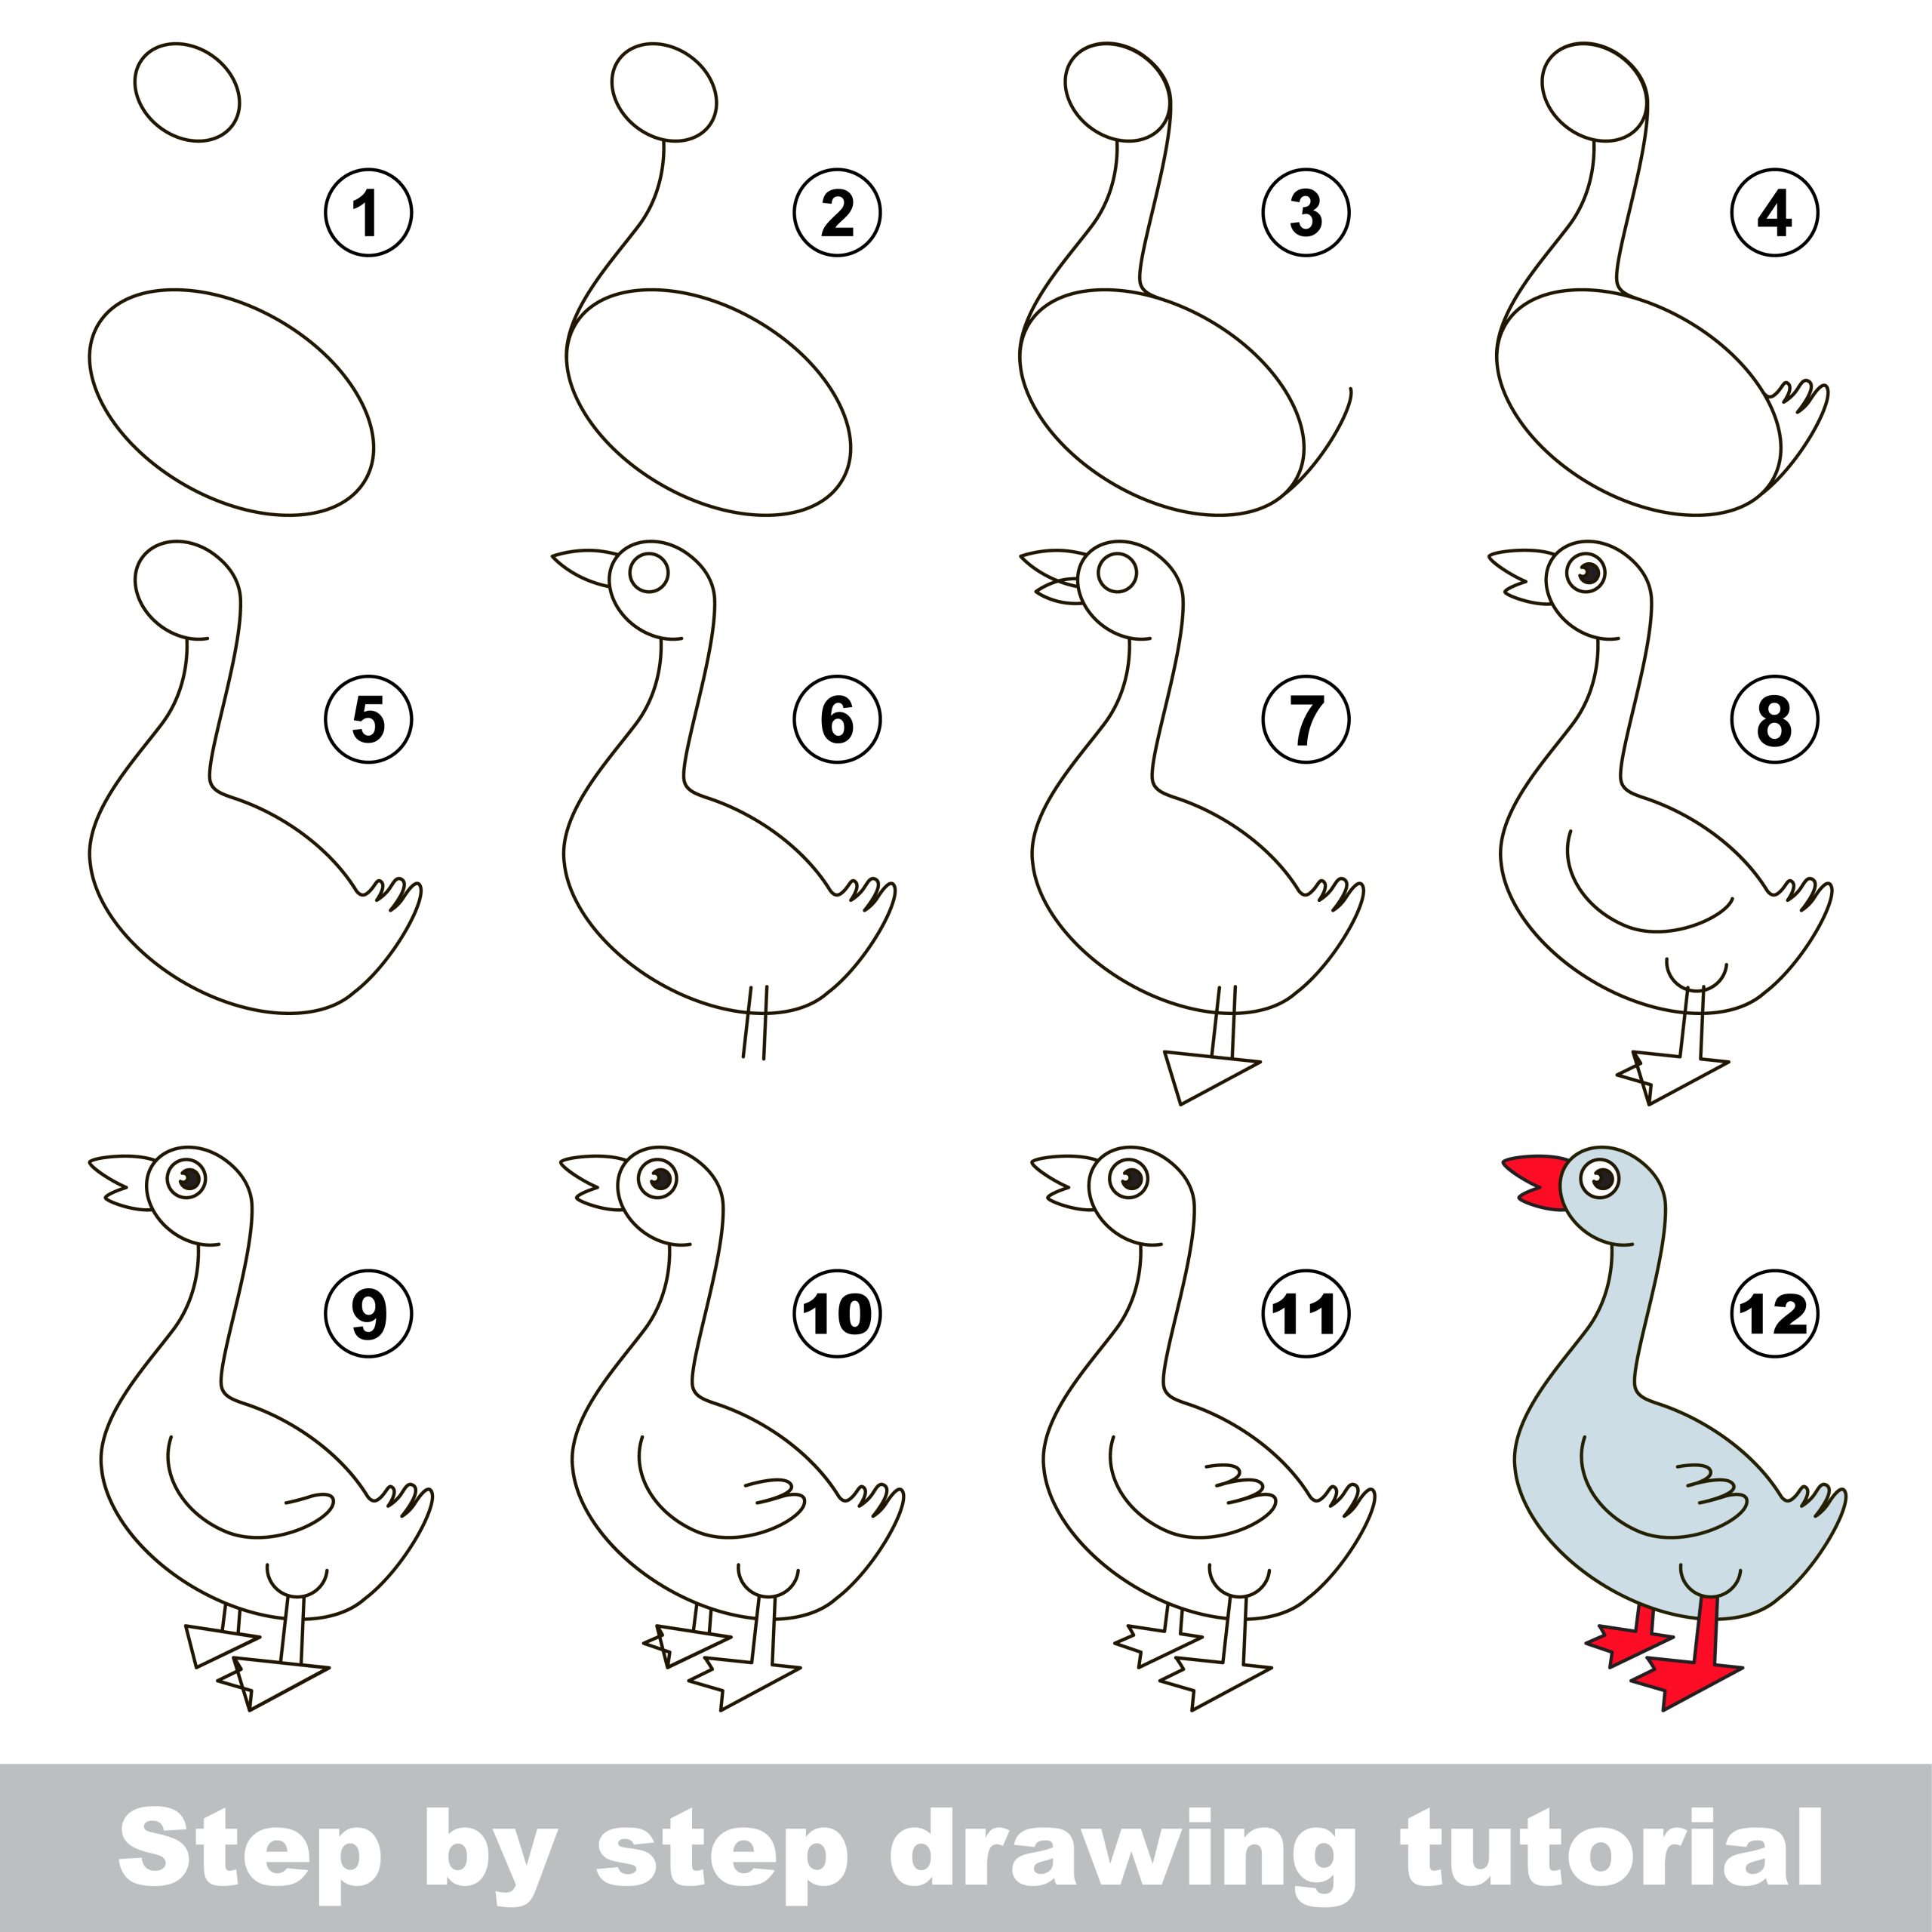
Draw a Basic Peacock in 8 Steps
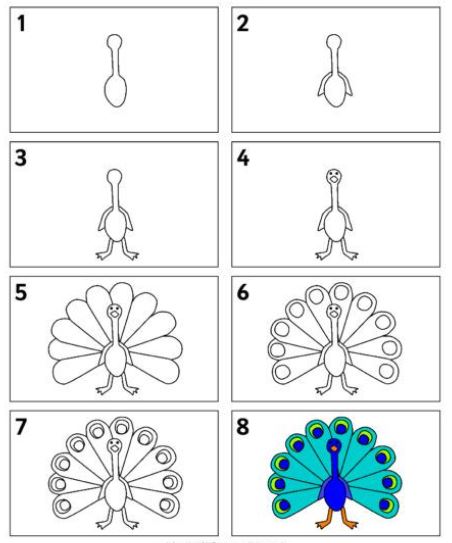
In order to draw a peacock, you need to draw several different shapes and continue to combine them. First, you want to draw the head and the body outline. Second, draw the arms, legs, face, feathers, and feather design. Third, color the peacock with a variety of bright colors. Now you have your very own peacock drawing. The hardest part is trying to get the shapes of the feathers and the colors so it looks realistic.
Step-By-Step Peacock Drawing Tutorial
Are you interested in learning how to draw a peacock step-by-step? Drawing a peacock can be a fun and rewarding experience, and in this guide, we will walk you through the process of creating your own stunning peacock artwork.
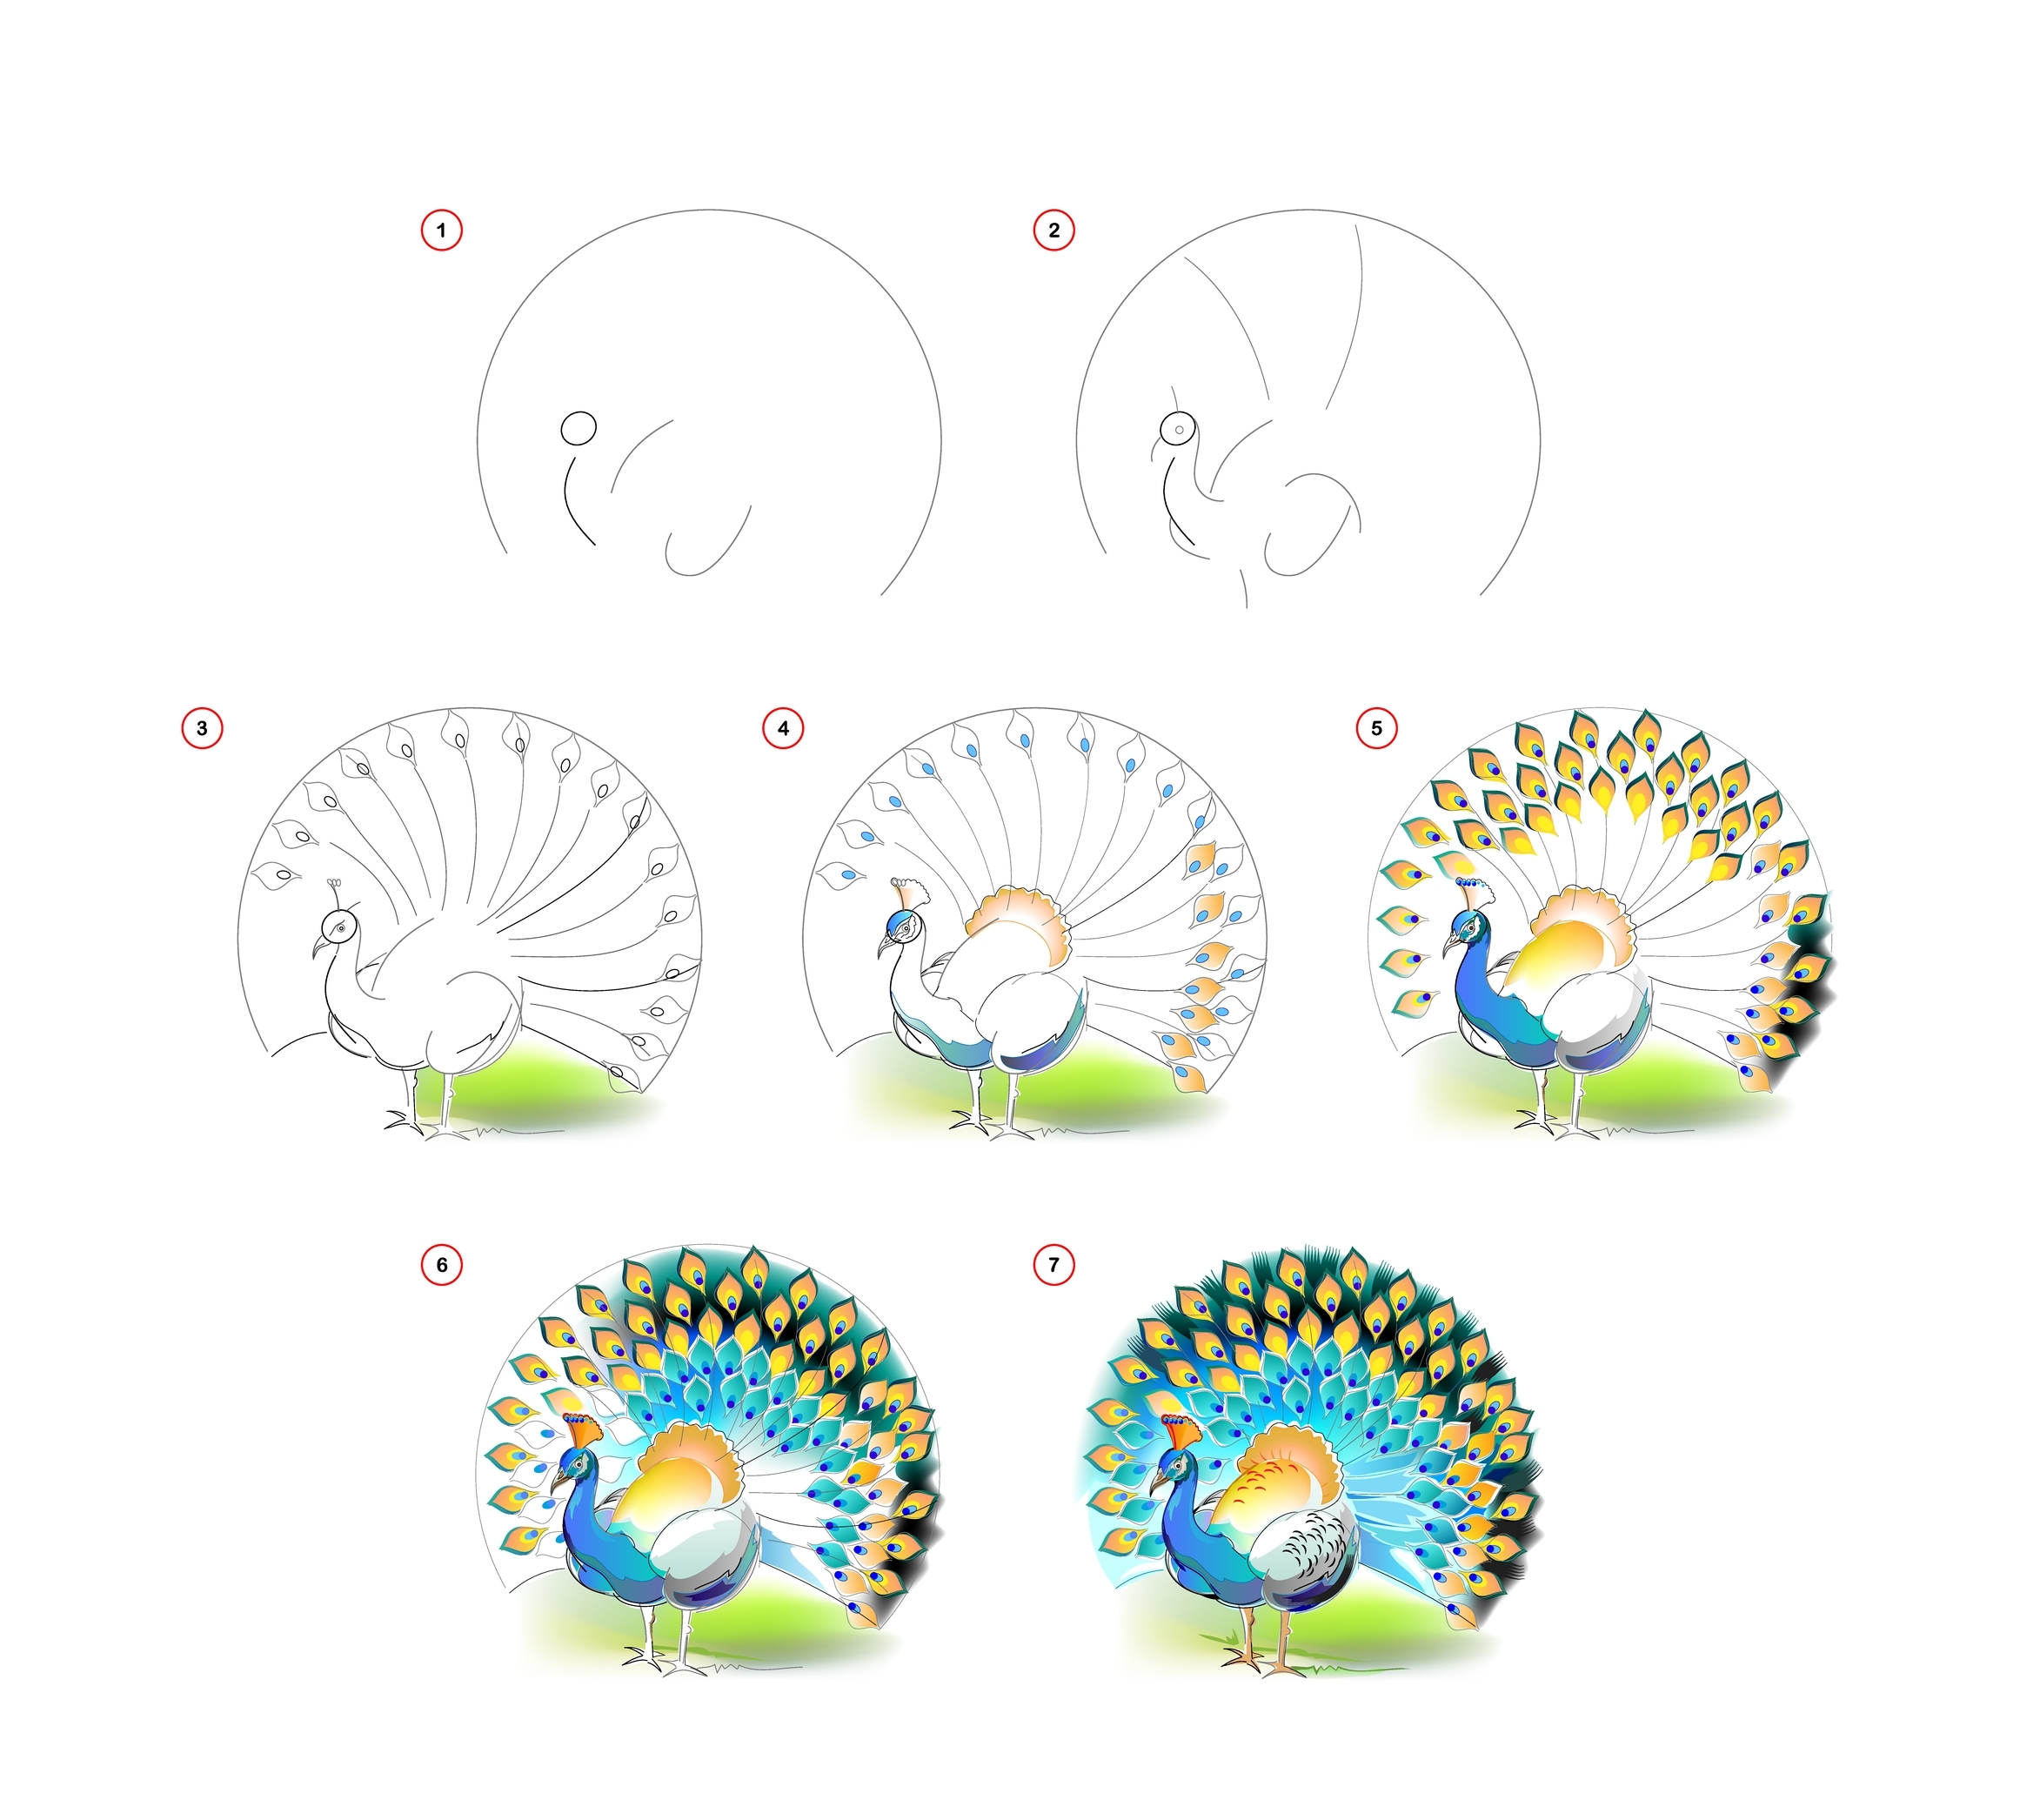
Step 1 – Draw the Head of the Peacock
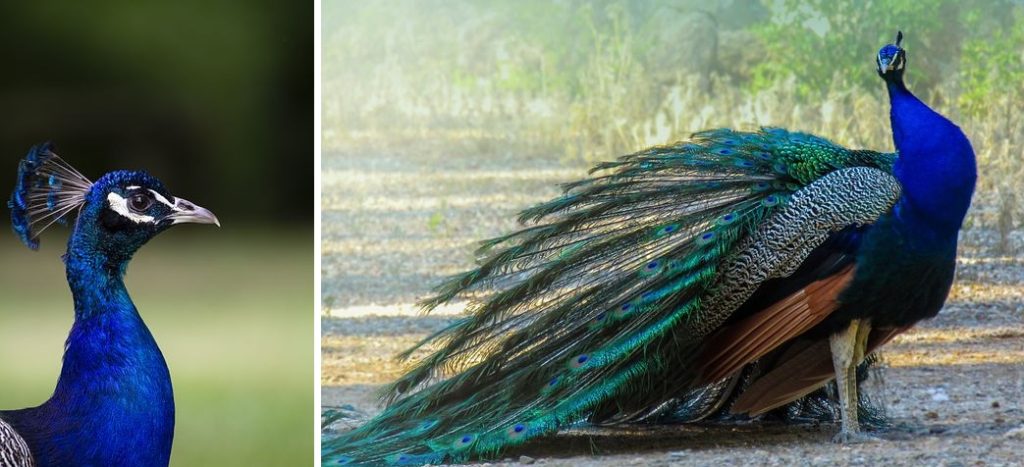
To begin, start by drawing the head of the peacock. Start with a small circle for the eye and a larger circle for the head. Next, draw the beak by drawing a small triangle shape below the eye. Finally, add a small curve to the top of the head to create the crest.
Step 2 – Draw the Neck of the Peacock
After you have drawn the head, continue by drawing the neck of the peacock. Start by drawing a long, curved line extending from the bottom of the head to create the neck. Then, draw another small curve at the base of the neck to create the shoulder.
Step 3 – Draw the Body of the Peacock
Once you have completed the head and neck, move on to drawing the body of the peacock. Draw a large oval shape underneath the neck, and then add two small lines at the bottom to create the tail.
Step 4 – Draw the Legs and Feet of the Peacock
To create the legs and feet of the peacock, draw two long, thin lines extending from the bottom of the body. At the bottom of each leg, draw a small oval shape for the feet.
Step 5 – Draw the Crown-Like Tuft on the Peacock’s Head
The crown-like tuft on the peacock’s head is one of the most distinctive features of this beautiful bird. To draw this feature, add several small lines extending from the top of the head and curving upwards.
Step 6 – Draw the Eyes and the Beak on the Peacock’s Face
The eyes and the beak are two of the most important features of the peacock’s face. To draw the eyes, start by creating a small circle in the middle of the head. Add a second circle around the first one to create the iris, and then draw a small dot in the center of the iris to create the pupil. Finally, draw a small curve at the bottom of the eye to create the eyelid. To draw the beak, start by drawing a small triangle shape below the eye, and then add a small curve to the top of the beak.
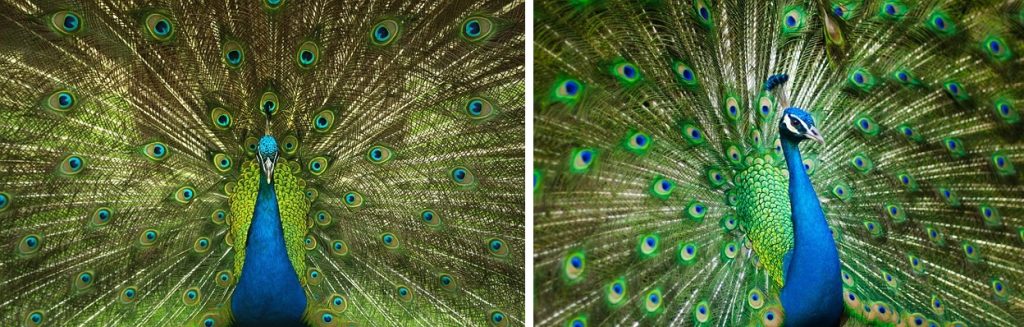
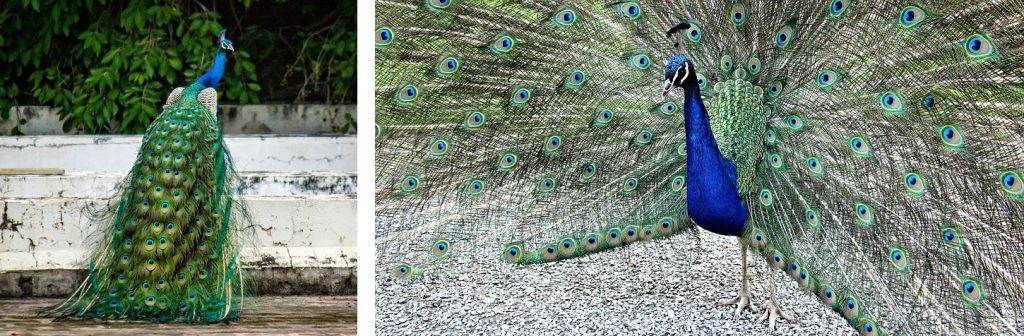
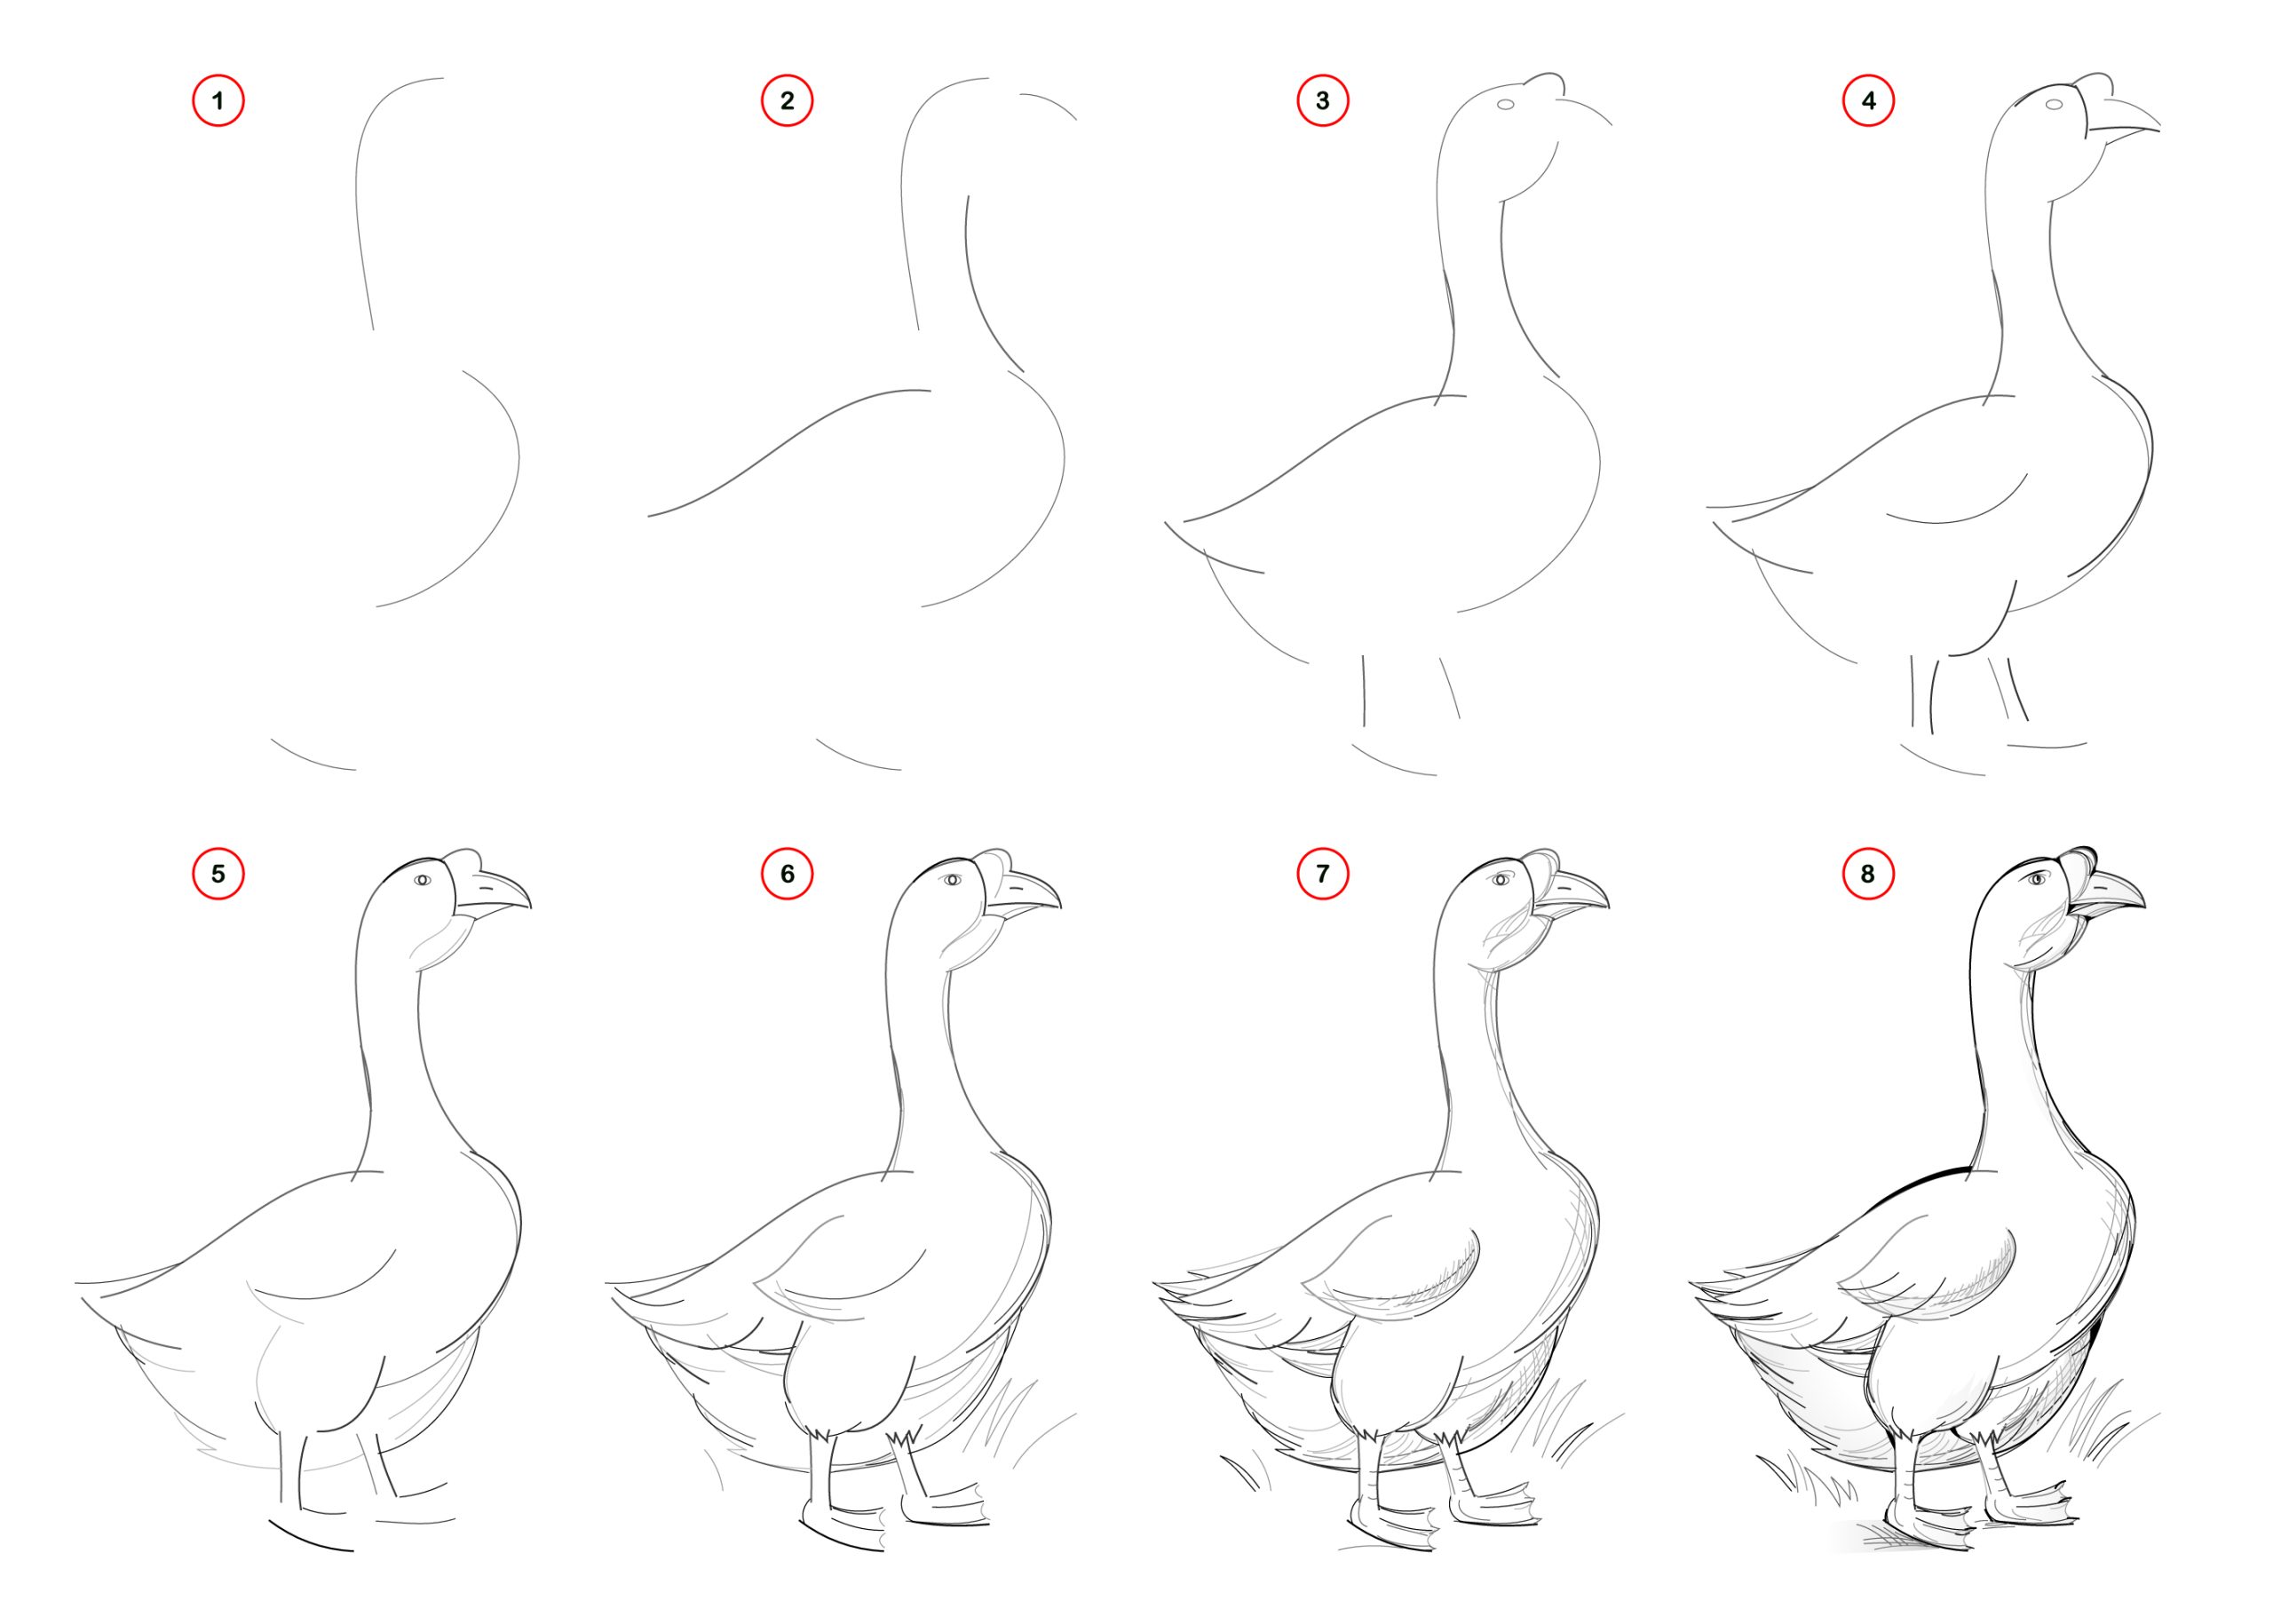
Step 7 – Draw the Feathers of the Peacock
The feathers are the most prominent feature of a peacock, and drawing them requires attention to detail. To start, draw the shape of the feathers using light and gentle strokes. You can begin with the primary feathers that are located on the peacock’s back. Then, move on to the secondary feathers that are located under the primary ones. Remember to draw them in a fan-like shape to replicate the peacock’s signature display.
It is important to note that peacock feathers have an iridescent quality, so try to incorporate different shades of green, blue, and gold when drawing them. You can also add some curves and lines to the feathers to make them look more realistic.
Step 8 – Add Details to the Peacock’s Feathers
The details are what bring your peacock drawing to life. Start by adding some texture to the feathers using fine strokes to replicate the feathers’ tiny hairs. You can also add some more curves and lines to make the feathers look more realistic.
Next, add some shading to the feathers to give them depth and dimension. Shade the feathers’ undersides darker than the top to create a three-dimensional look. Don’t forget to add some shading to the peacock’s body as well.
Finally, add some eye spots to the peacock’s feathers. These spots are the peacock’s most distinctive feature, and they should be drawn with precision. You can add small circles of different shades of blue, green, and gold to create a beautiful and eye-catching effect.
Step 9 – Color Your Peacock
Coloring your peacock is the final step in bringing your drawing to life. Start by coloring the body of the peacock in shades of blue and green. Then, add some gold or yellow to the peacock’s beak and feet.
When coloring the feathers, use different shades of green and blue to create a gradient effect. Remember to color the eye spots with a combination of blue, green, and gold to make them stand out.
Finally, use a darker shade of blue or green to add some shadows and shading to your peacock drawing. This will give your drawing a more realistic and three-dimensional look.
Tips For Drawing a Realistic Peacock
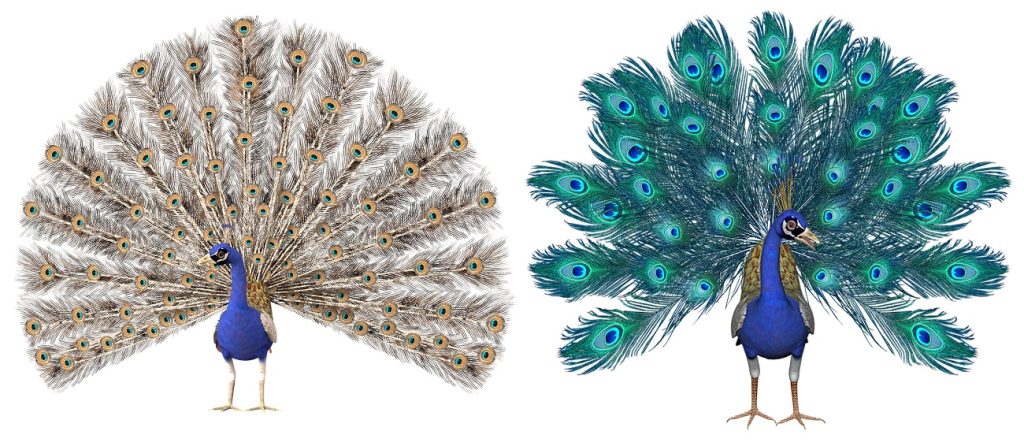
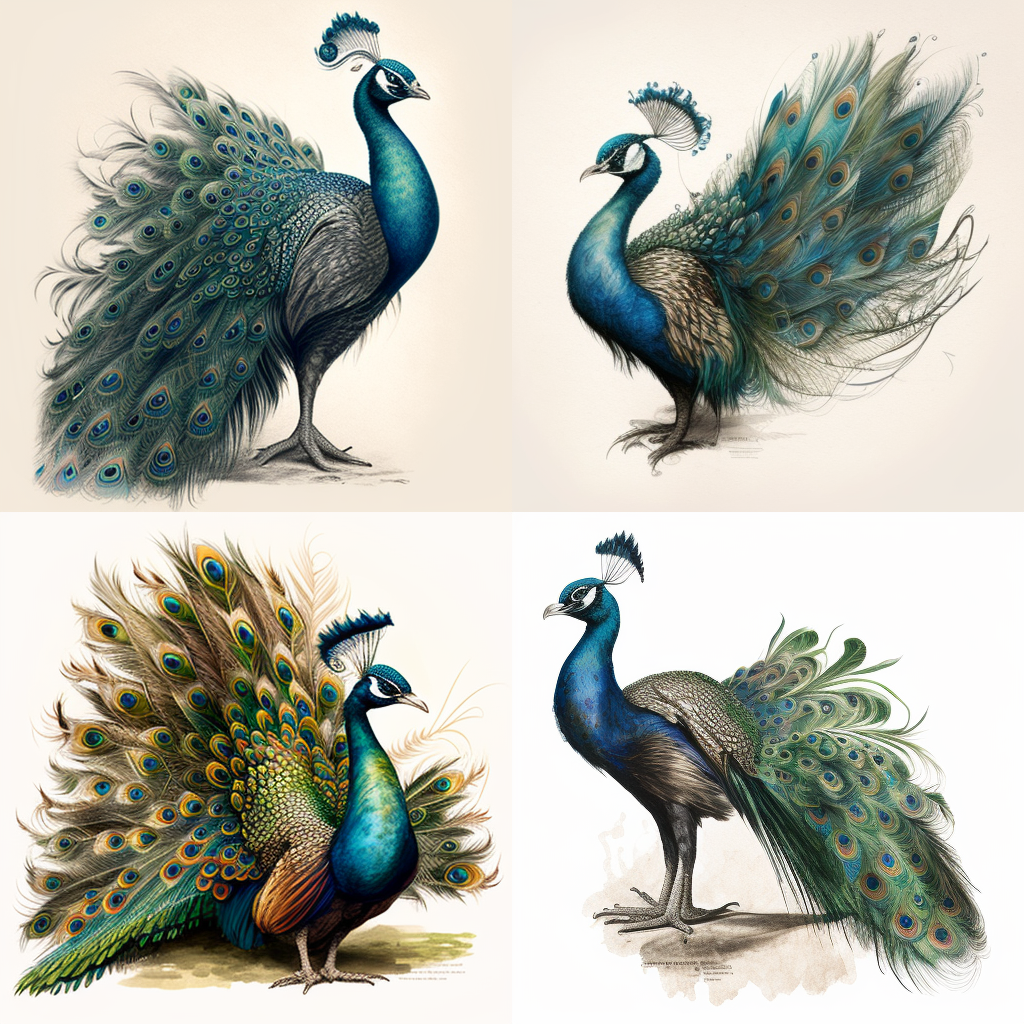
To draw a realistic peacock, start by sketching the basic shape of the bird’s body, head, and tail feathers. Next, use reference images to observe the colors and patterns of a real peacock, paying attention to the iridescent colors and distinct eye-shaped markings on the tail feathers. Draw each feather individually, using small lines to mimic the texture of the feathers. To create depth and dimension, add shading and highlights to the feathers, taking note of the light source to produce realistic shadows. Don’t forget to include details such as the peacock’s beak and legs, as well as any other distinguishing features such as its crest. Finally, consider the composition of your drawing and position the bird in a way that highlights the fan shape of its tail feathers. Remember to take your time and be patient with each detail to create a beautiful and realistic drawing of a peacock.

In Summary
With these steps, you can draw and color a beautiful and realistic peacock. Don’t be afraid to experiment with different techniques and styles to make your peacock drawing unique and expressive.
