Follow our easy tutorial and you will have your own baby chick drawing! This is a great instructional article to teach kids how to draw a chick.
Are you interested in learning how to draw a cute baby chicken? Drawing is a wonderful way to express your creativity, and in this step-by-step guide, we will show you how to draw a chick from scratch. Whether you’re a beginner or have some drawing experience, this tutorial will help you create an adorable chick in no time. So let’s dive in and get started!
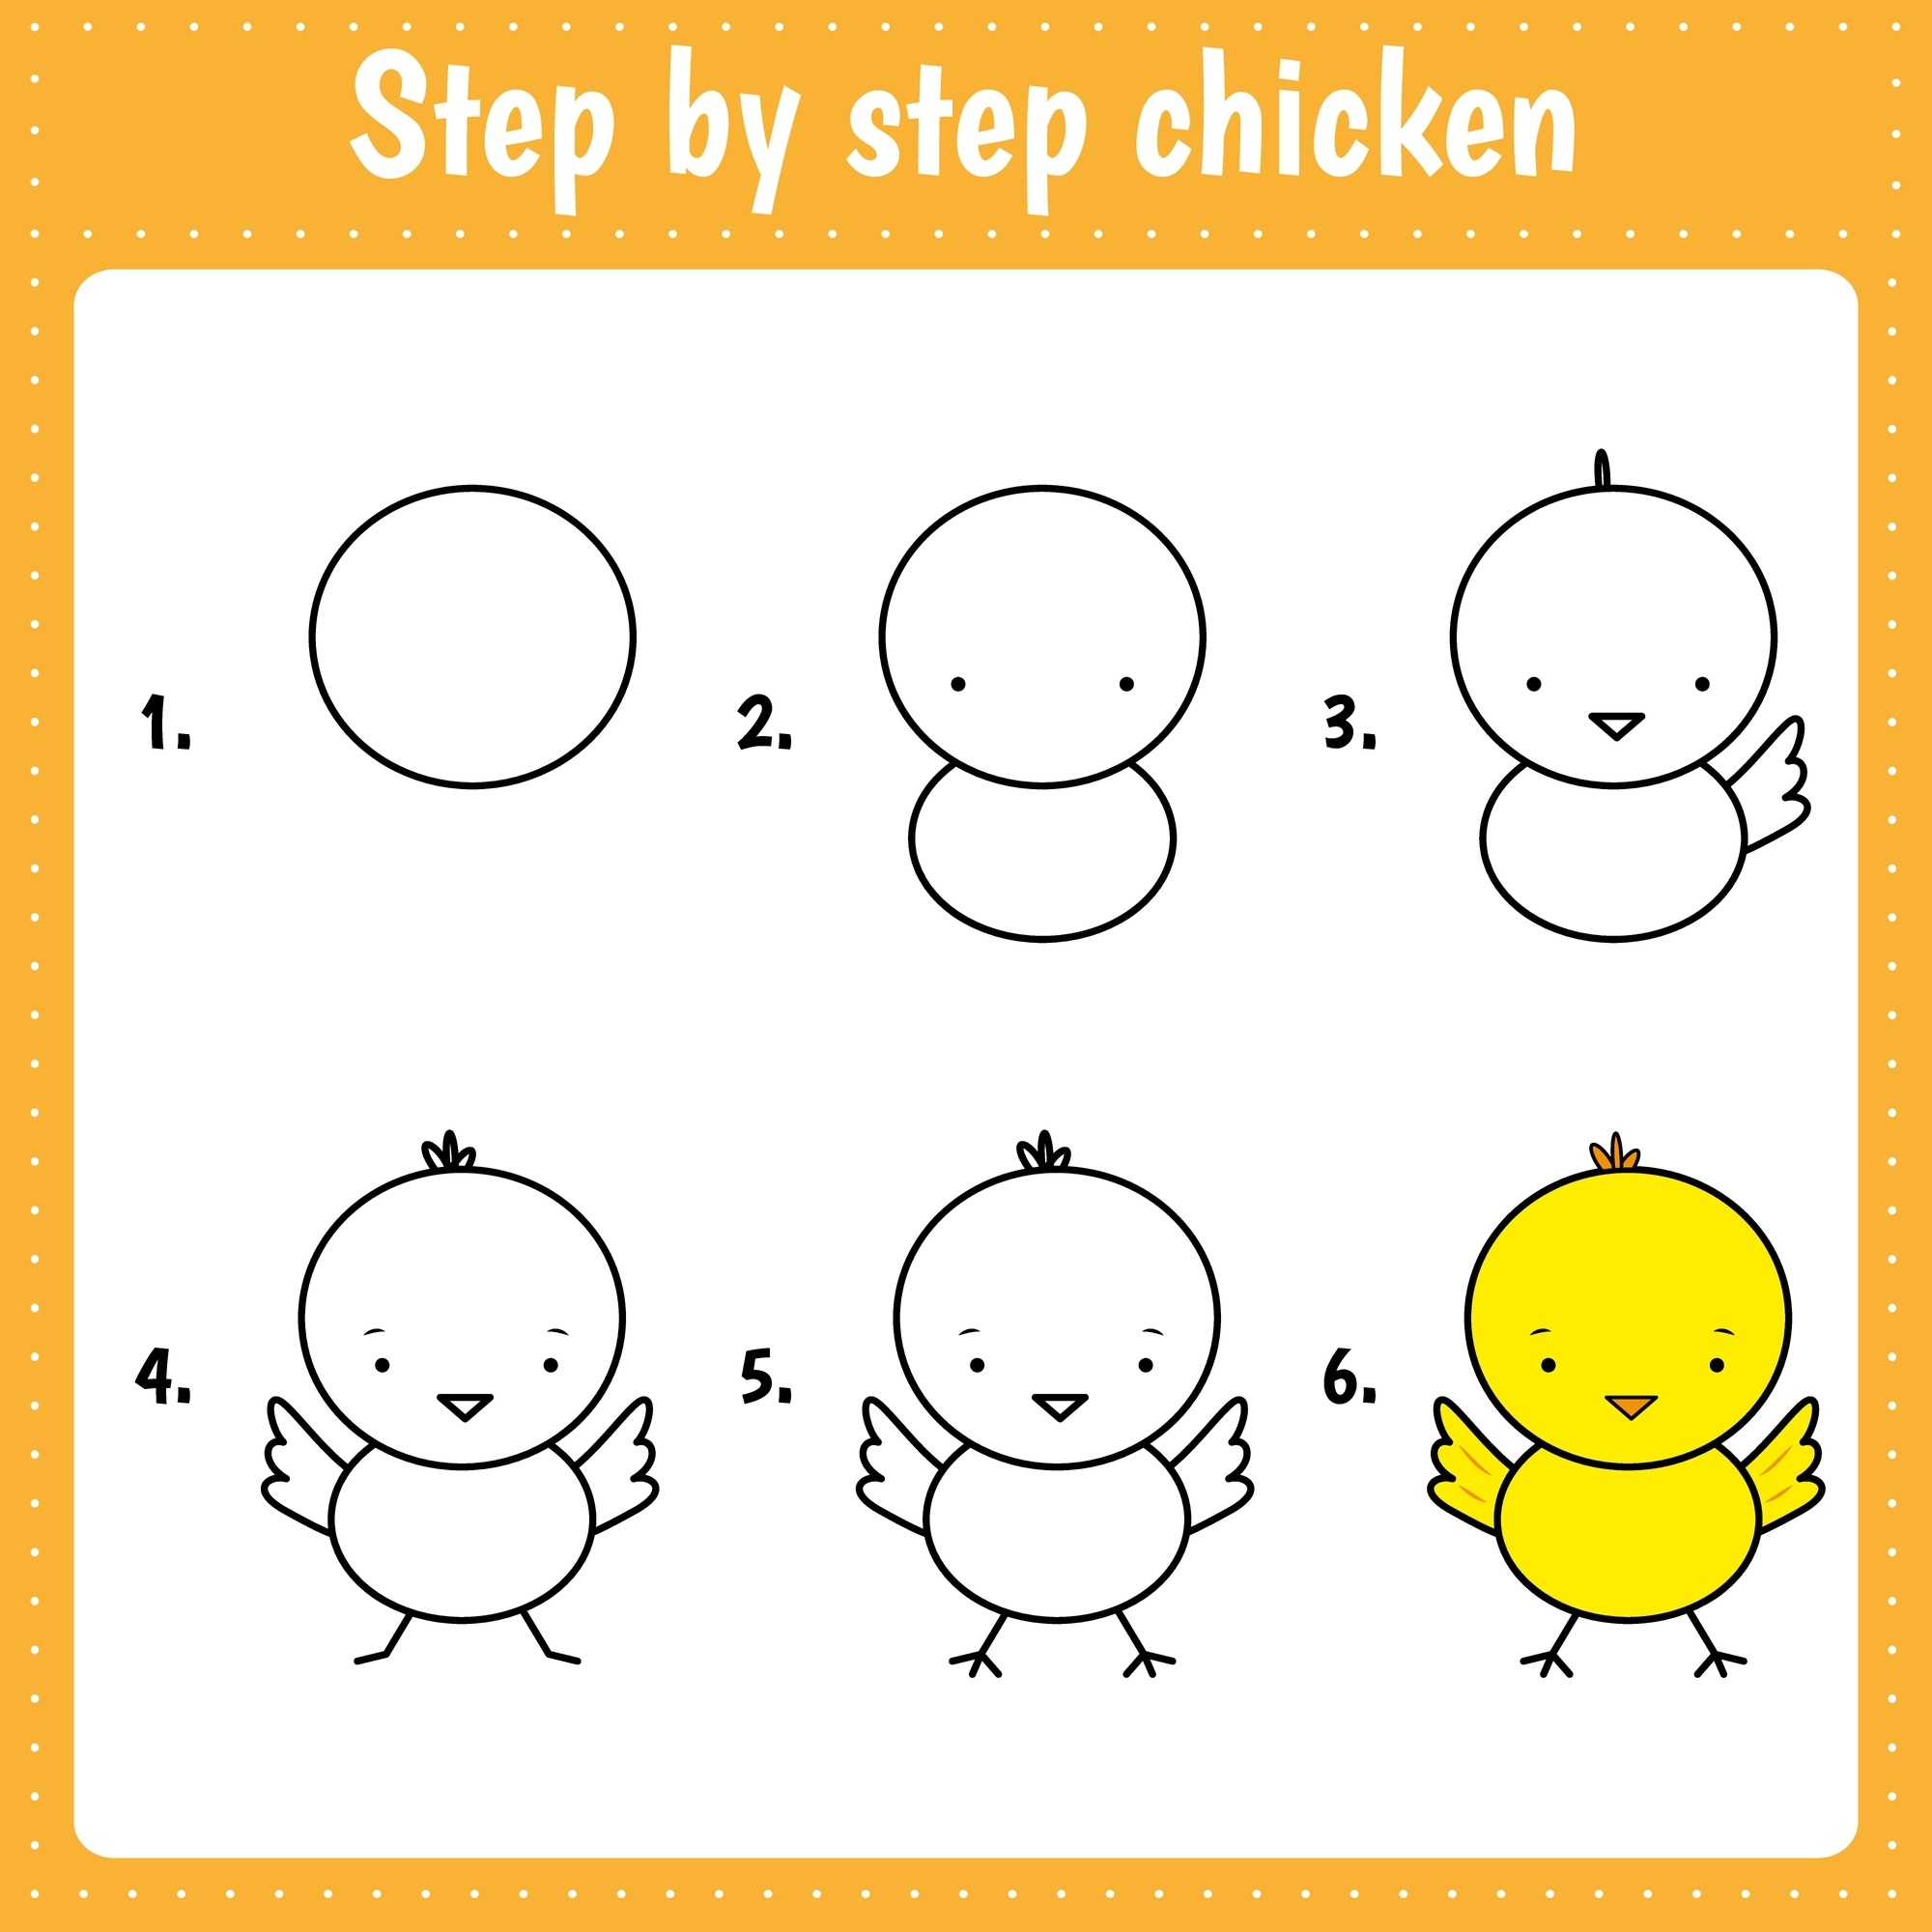
Step 1: Draw a Circle for the Baby Chick’s Head
To begin, start by drawing a medium-sized circle at the center of your paper. This circle will serve as the head of your baby chick. Make sure to leave enough space around it for the body and other features.
Step 2: Draw a Circle for the Baby Chick’s Body
Next, draw a slightly larger circle just below the head. This circle will form the body of the chick. Ensure that it overlaps the head circle slightly.
Step 3: Draw the Baby Chick’s Eyes and Beak
Now it’s time to bring your chick to life by adding its facial features. Draw two small oval-shaped eyes towards the top of the head circle. Inside each eye, draw a smaller circle to represent the pupil. Just below the eyes, draw a triangular beak, pointing downwards.
Step 4: Draw Three Tiny Strands of Hair on the Chick’s Head
To add a touch of cuteness, draw three short, curved lines at the top of the head circle, representing tiny strands of hair. This will give your chick a fluffy appearance.
Step 5: Draw the Wings of the Baby Chick
Moving on, let’s draw the wings of your baby chick. Extend two curved lines outwards from the sides of the body circle. These lines should resemble the shape of a stretched-out letter “C” on each side.
Step 6: Draw the Legs and Feet of the Chick
Now it’s time to give your chick some legs and feet. Draw two long, curved lines extending downwards from the body circle. At the bottom of each line, draw three small, claw-like shapes to represent the chick’s feet.
Step 7: Color Your Baby Chick Yellow
Finally, it’s time to bring your drawing to life with colors. Baby chicks are typically yellow, so grab your yellow coloring utensil and color in the body, head, wings, and beak. You can add additional details or shading as desired to make your chick even more vibrant and realistic.
Body Parts of a Chick You Need to Draw
Head: The head is typically round and slightly larger in proportion to the body.
Body: The body of a baby chick is plump and oval-shaped. It should be slightly smaller than the head.
Eyes: Draw two small, circular eyes on the head, usually towards the top portion. You can add small pupils within the eyes for detail.
Beak: Baby chicks have a short, triangular-shaped beak. Draw it just below the eyes, pointing downwards.
Wings: Chicks have small wings that are usually positioned slightly away from their bodies. Draw curved lines extending out from the sides of the body to represent the wings.
Legs and Feet: Chicks have short, sturdy legs and claw-like feet. Draw two long, curved lines extending downwards from the body to represent the legs, and add small, claw-like shapes at the bottom for the feet.
Feathers: Baby chicks often have fluffy feathers. You can represent this by drawing short, curved lines on the body, particularly around the edges.
How to Teach Kids to Draw a Baby Chick
Start with Basic Shapes:
Encourage kids to begin by drawing simple shapes as a foundation. A circle for the head and an oval for the body are good starting points. This will help them establish proportions and create a recognizable shape for the chick.
Break It Down into Steps:
Breaking down the drawing process into steps can make it more manageable for kids. Guide them through each step, such as drawing the head, body, eyes, beak, wings, and feet one at a time. This approach helps them focus on individual elements and build confidence as they progress.
Use Light Pencil Lines:
Encourage kids to use light pencil lines when sketching the chick. This way, they can easily make adjustments and erase any mistakes without leaving prominent marks. Once they’re satisfied with the overall shape, they can go over the lines with a darker pencil or pen.
Add Details Gradually:
Remind kids to add details gradually as they gain confidence in the overall form. Start with basic facial features like the eyes and beak, then move on to wings, legs, and other smaller details. By taking it step by step, kids can concentrate on each detail and achieve a more accurate representation of a baby chick.
In Conclusion
Congratulations! You have successfully drawn an adorable baby chick step-by-step. Feel free to add your personal artistic touches and experiment with different colors or backgrounds to make your chick truly unique.
