Follow our easy tutorial and you will have your own cartoon mouse drawing! This is a great instructional article to teach kids how to draw a cartoon mouse.
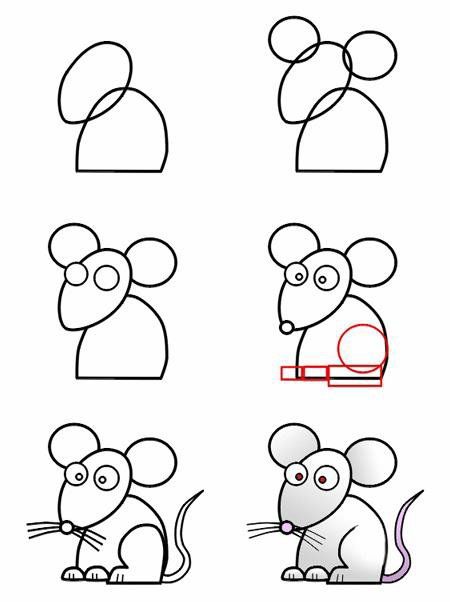
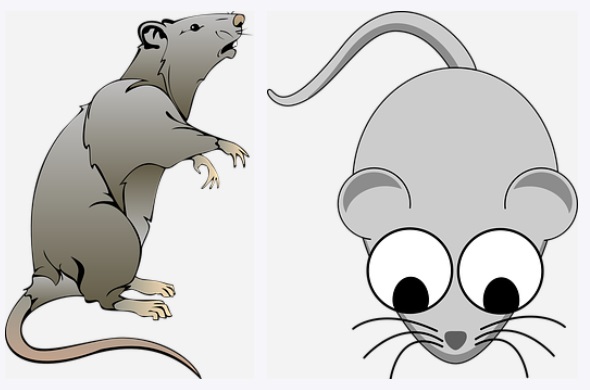
Start by drawing a diagonal oval for the head of the mouse. At the top of the head, draw two circles to make up the ears. Beneath the head, draw a half oval with a flat bottom for the body. Next, draw two circles for the eyes and draw the pupils within the initial oval head you drew. In addition, draw a nose on the head and several whiskers for the mouse. Next, you need to draw a sitting leg along with two small feet. This can be done by drawing several round shapes that will end up making up the feet and legs. Next, draw a tail out of the body in the opposite direction of the head. Last but not least, color your mouse grey to make it look more realistic.
Step-By-Step Cartoon Mouse Drawing Tutorial
If you’re looking to learn how to draw a cartoon mouse, you’ve come to the right place! This step-by-step guide will walk you through the process of creating a cute and lovable cartoon mouse that anyone can draw. Whether you’re a beginner or an experienced artist, this guide will help you create a character that will make everyone smile.
Materials Needed:
Before we begin, it’s important to have the right materials. You’ll need a pencil, eraser, paper, and perhaps some colored pencils, markers, or paints to add some color to your mouse. Once you have your materials ready, let’s get started with Step 1.
Step 1 – Draw the Body of the Cartoon Mouse
The first step in drawing a cartoon mouse is to draw the body. Start by drawing a large circle center of your paper. This will be the mouse’s body. Next, draw a smaller circle on the bottom of the larger circle for the mouse’s belly. Connect the two circles with two curved lines on either side to form the mouse’s torso. Finally, draw two small circles for the mouse’s shoulders and two more circles for the hips.
Once you’ve drawn the basic shape of the mouse’s body, you can start to add details like the arms and legs. For the arms, draw two thin curved lines that connect the shoulders to the torso. For the legs, draw two longer curved lines that connect the hips to the feet. Don’t worry too much about the details at this point – we’ll add those in later steps.
Now that you have the basic shape of the mouse’s body, it’s time to move on to Step 2.
Step 2 – Draw the Head of the Cartoon Mouse
The next step is to draw the mouse’s head. Start by drawing a small circle at the top of the mouse’s body. This will be the head. Next, draw two small circles on either side of the head for the mouse’s ears. Connect the ears to the head with two curved lines, and draw a small curve in the center of each ear to add some detail.
Once you’ve drawn the ears, it’s time to add the eyes. Draw two large circles in the center of the mouse’s head, leaving some space between them for the nose and mouth. Inside each eye, draw a smaller circle for the pupil, and shade around the pupil to create the iris. Finally, add some eyelashes above each eye.
Now that you have the basic shape of the mouse’s head, it’s time to move on to Step 3.
Step 3 – Draw the Ears of the Cartoon Mouse
The mouse’s ears are an important part of its character, so it’s important to get them right. Start by drawing two small circles on either side of the mouse’s head for the ears. Next, connect the ears to the head with two curved lines, making sure to add some detail to the center of each ear.
If you want to give your mouse some personality, you can also add some accessories to the ears, like a bow or a hat. Once you’re happy with the shape of the ears, it’s time to move on to Step 4.
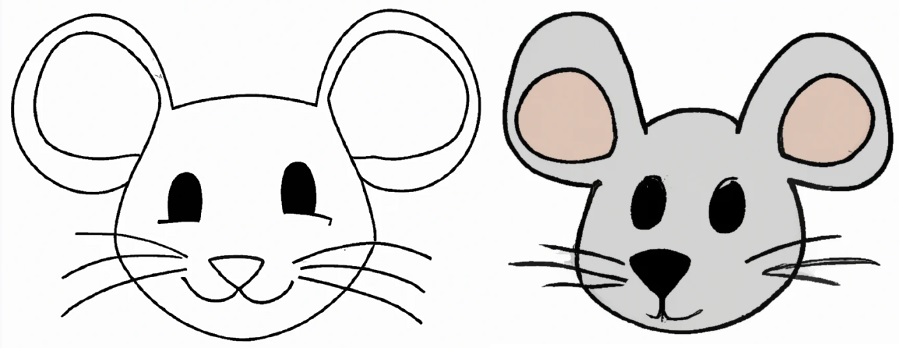
Step 4 – Draw the Face of the Cartoon Mouse Including the Eyes, Nose, Mouth, and Whiskers
The face is where you can really start to bring your cartoon mouse to life. Start by drawing a small triangle below the eyes for the nose. Next, draw a small curve below the nose for the mouth. Finally, add some whiskers on either side of the nose to give your mouse some character.
If you want to give your mouse a different expression, you can adjust the size and shape of the eyes, nose, and mouth to create a happy, sad, or surprised look. Once you’re happy with the face, it’s time to move on to Step 5.
Step 5 – Draw the Legs of the Cartoon Mouse
The legs are an important part of the mouse’s body, so it’s important to get them right. Start by drawing two long curved lines connecting the hips to the feet. Next, draw a small curve at the end of each leg to create the mouse’s toes. Finally, add some detail to the legs by drawing a small curve on either side of each leg.
If you want to give your mouse some personality, you can also adjust the size and shape of the legs to create a different stance or pose. Once you’re happy with the legs, it’s time to move on to Step 6.
Step 6 – Draw the Feet of the Cartoon Mouse
The feet are the final part of the mouse’s body, so it’s important to get them right. Start by drawing two small circles at the end of each leg for the feet. Next, draw a small curve on either side of each foot to create the mouse’s toes. Finally, add some detail to the feet by drawing a small curve in the center of each toe.
If you want to give your mouse some personality, you can also adjust the size and shape of the feet to create a different stance or pose. Once you’re happy with the feet, it’s time to move on to Step 7.
Step 7 – Draw the Tail of the Cartoon Mouse
The tail is the final part of the mouse’s body, so it’s important to get it right. Start by drawing a thin curved line at the end of the mouse’s body for the tail. Next, add some detail to the tail by drawing a few small curves along its length.
If you want to give your mouse some personality, you can also adjust the size and shape of the tail to create a different stance or pose. Once you’re happy with the tail, it’s time to move on to Step 8.

Step 8 – Add Details and Shading to Your Cartoon Mouse
Now that you have the basic shape of your cartoon mouse, it’s time to add some details and shading to give it some depth and character. Start by adding some fur to the body, ears, and tail by drawing small curves along their length. Next, add some shading to the face, legs, and feet by lightly shading in some areas to create some depth.
If you want to add some extra detail, you can also add some accessories to your mouse, like a necklace, hat, or scarf. Once you’re happy with the details and shading, it’s time to move on to Step 9.
Step 9 – Color Your Cartoon Mouse
The final step is to add some color to your cartoon mouse. Choose your favorite colors and start filling in the body, ears, face, legs, and feet. Don’t be afraid to experiment with different color combinations to create a unique and interesting character.
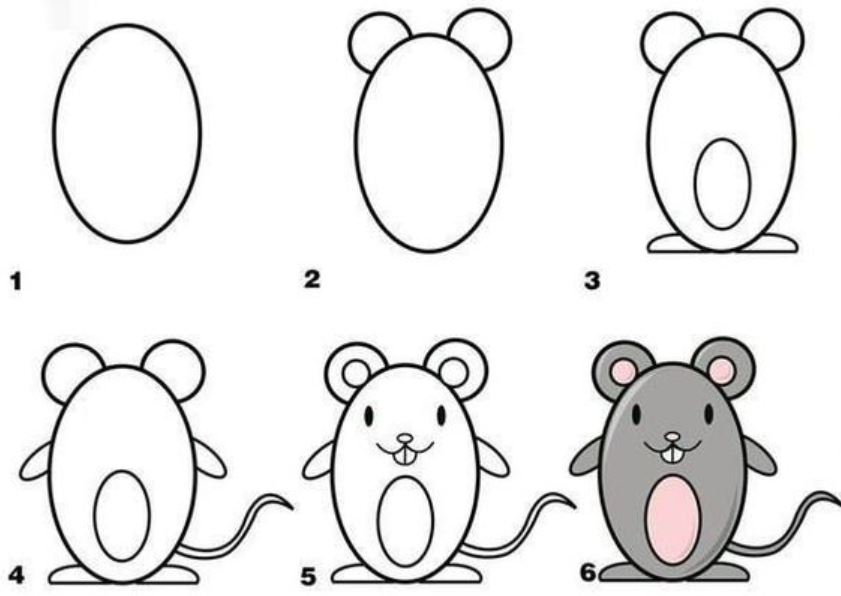
How to Draw a Cute Cartoon Mouse
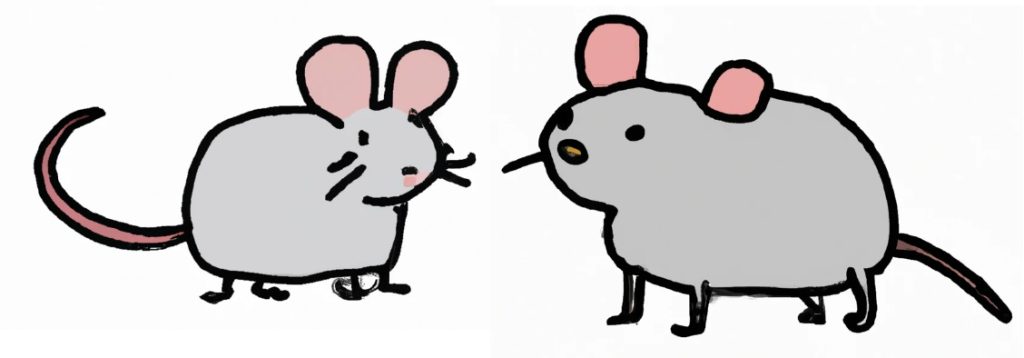
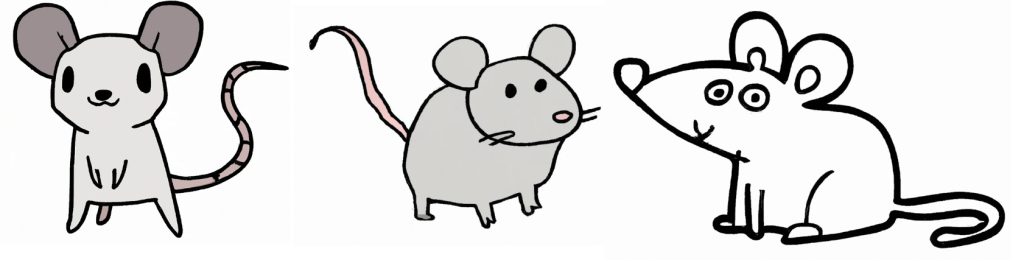
First, draw an oval to make up the body of the mouse. On the top of the mouse’s head, draw two circles that will make up the ears. Next, draw a small oval within the body of the mouse to make up the belly. Then, draw two small feet at the bottom of the mouse. Next, draw a tail coming from behind the body. Next, add some of the details such as the inside of the ears, the eyes, the nose, the whiskers, and the mouth. Last but not least, give your mouse some color using grey and pink. Now, you have drawn your very own mouse.
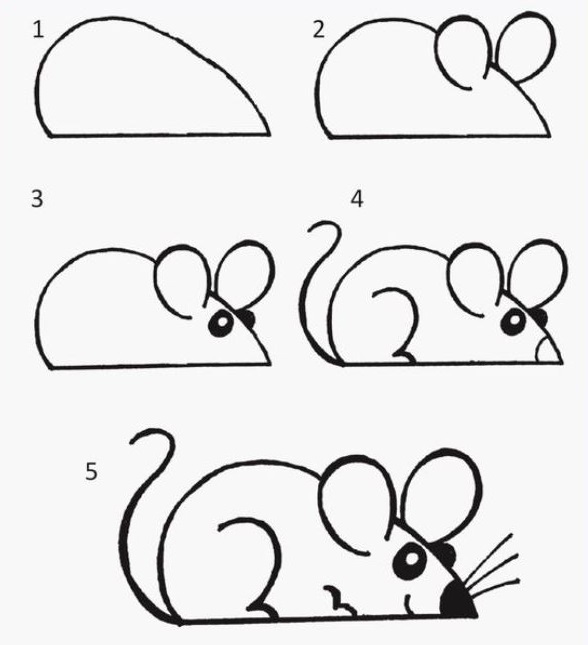
How to Draw a Sniffing Cartoon Mouse
First, draw a rounded shape with a diagonal point in one corner and a flat bottom to make the mouse’s body. Next, draw two round ears towards the point of your rounded shape in the first step to make the mouse’s ears. Draw two eyes as black circles underneath the ears. Then, draw a tail, the back mouse leg, and a nose. Lastly, draw the front leg and some whiskers and you have a cartoon mouse drawing.
In Summary
Once you’re finished coloring your mouse, step back and admire your work! You’ve just created a cute and lovable cartoon mouse. If you follow the steps in this article, you can create your own drawing with ease.