Follow our easy tutorial and you will have your own parakeet on a branch drawing! This is a great instructional article to teach kids how to draw a parakeet on a branch.
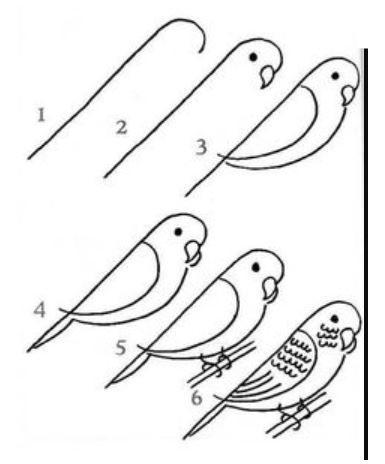
First, you can start by drawing a diagonal line with a rounded top that will make up the bird’s head. On the bird’s head, you can draw a small dark circle for the eyeball and a small curved beak with the mouth closed. Third, draw a stomach and a wing on the side of the bird’s body. Next, start drawing the parakeet’s tail, and draw the feet on a branch. Lastly, draw more details on the feathers of the bird and some lines at the bottom of the wing. The parakeet should now look like it is standing on a branch with its side profile.

Step-By-Step Parakeet on a Branch Drawing Tutorial
If you’re a beginner learning how to draw a parakeet bird on a branch, you’ve come to the right place! Drawing a parakeet may seem daunting at first, but with practice and patience, you’ll be able to create a beautiful piece of artwork. In this tutorial, we’ll guide you through the process of drawing a parakeet bird on a branch step-by-step. Let’s get started.
Materials Needed to Draw a Parakeet
Before we start drawing, you’ll need a few materials. Here’s what you’ll need:
– Eraser
– Paper
– Pencil
– Colored pencils or markers (optional)
Make sure you have all the materials before starting. Now, let’s move on to the next section.
Step 1 – Sketch the Outline of the Parakeet
Start by sketching the outline of the parakeet. Draw a small circle for the head, and then draw a larger circle for the body. Connect the two circles with a curved line to create the parakeet’s neck. Sketch the wings by drawing two elongated ovals on either side of the body. Finally, draw a small triangle for the tail.
Remember, this is just a rough sketch, so don’t worry about getting all the details right at this stage.
Once you’re satisfied with the outline, move on to the next section.
Step 2 – Add Details to the Parakeet’s Body
With the outline in place, it’s time to add some details to the parakeet’s body. Start by drawing the beak. The beak should be slightly curved and pointed at the end. Next, draw the eyes. Parakeets have large eyes, so make sure they’re proportionate to the head.
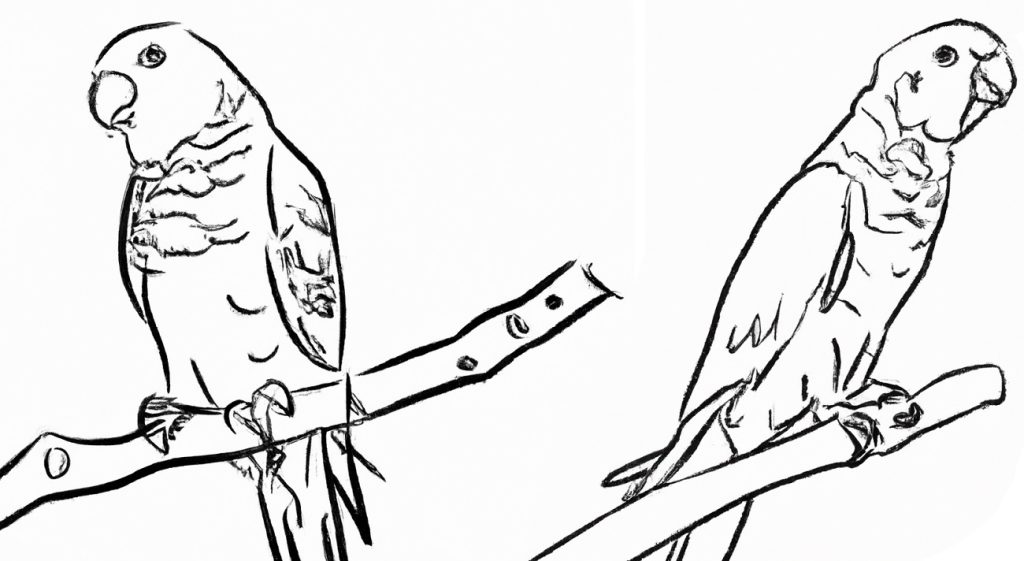
Draw the feet and toes next. Parakeets have four toes, two facing forward and two facing backward. Make sure the toes are curled around the branch.
Once you’ve added all the details to the body, move on to the next section.
Step 3 – Sketch the Branch Under the Parakeet
Now it’s time to draw the branch. Draw a long, curved line for the branch, and then add some smaller, curved lines for the twigs. Make sure the branch is thick enough to support the parakeet’s weight.
Once you’ve sketched the branch, move on to the next section.
Step 4 – Add Details to the Branch
Add some texture to the branch by sketching some bark lines. Draw some leaves or flowers on the branch to make it look more natural. Remember to leave some space for the parakeet to sit on.
Once you’ve added all the details to the branch, move on to the next section.
Step 5 – Erase the Rough Sketch and Unnecessary Lines
Now that you’ve added all the details to the parakeet and the branch, it’s time to erase the rough sketch. Use a clean eraser to remove all the unwanted lines and smudges. Be careful not to erase the details you’ve added.
Once you’ve erased the rough sketch, move on to the next section.
Step 6 – Color the Parakeet
If you want to add color to your drawing, now’s the time to do it. Use colored pencils or markers to color the parakeet. Parakeets come in a variety of colors, so feel free to use your imagination.
Start by coloring the body, and then move on to the wings and tail. Use different shades of green and blue to create a realistic look. Once you’re done coloring the parakeet, move on to the next section.
Step 7 – Color the Branch
Now it’s time to color the branch. Use browns and greens to create a natural look. Use different shades of brown to add texture to the bark.
Once you’ve colored the branch, move on to the final section.
Step 8 – Add Final Touches and Details to Your Parakeet Drawing
Finally, add some final touches to your drawing. Use a black pen to outline the parakeet and the branch. Add some shading to the parakeet to make it look more three-dimensional. Sign your name on the bottom of the drawing to show that it’s your artwork.
And there you have it! You’ve successfully drawn a parakeet bird on a branch step-by-step. Congratulations!

Tips for Drawing a Parakeet on a Branch
To draw a parakeet on a branch, start by outlining the shape of the branch with a light pencil. Then, lightly sketch the basic shape of the bird’s body, head, wings, and tail, using reference images to get the proportions right. Once you have the basic shape, add the details of the parakeet such as the feathers, beak, and eyes, paying attention to the colors and patterns. Draw the branch in more detail, adding texture and any leaves or flowers that might be on it. Shade the drawing to add depth and dimension, considering the light source and how it would affect the shadows on the bird and branch. Finally, color in the drawing with colored pencils, markers, or paints. Keep practicing and experimenting with different techniques until you achieve the desired result.
In Summary
Remember to take your time and use light lines at first, as you can always go back and darken or refine your drawing later. It’s also a good idea to practice drawing the basic shapes and proportions of the parakeet before adding in the details.