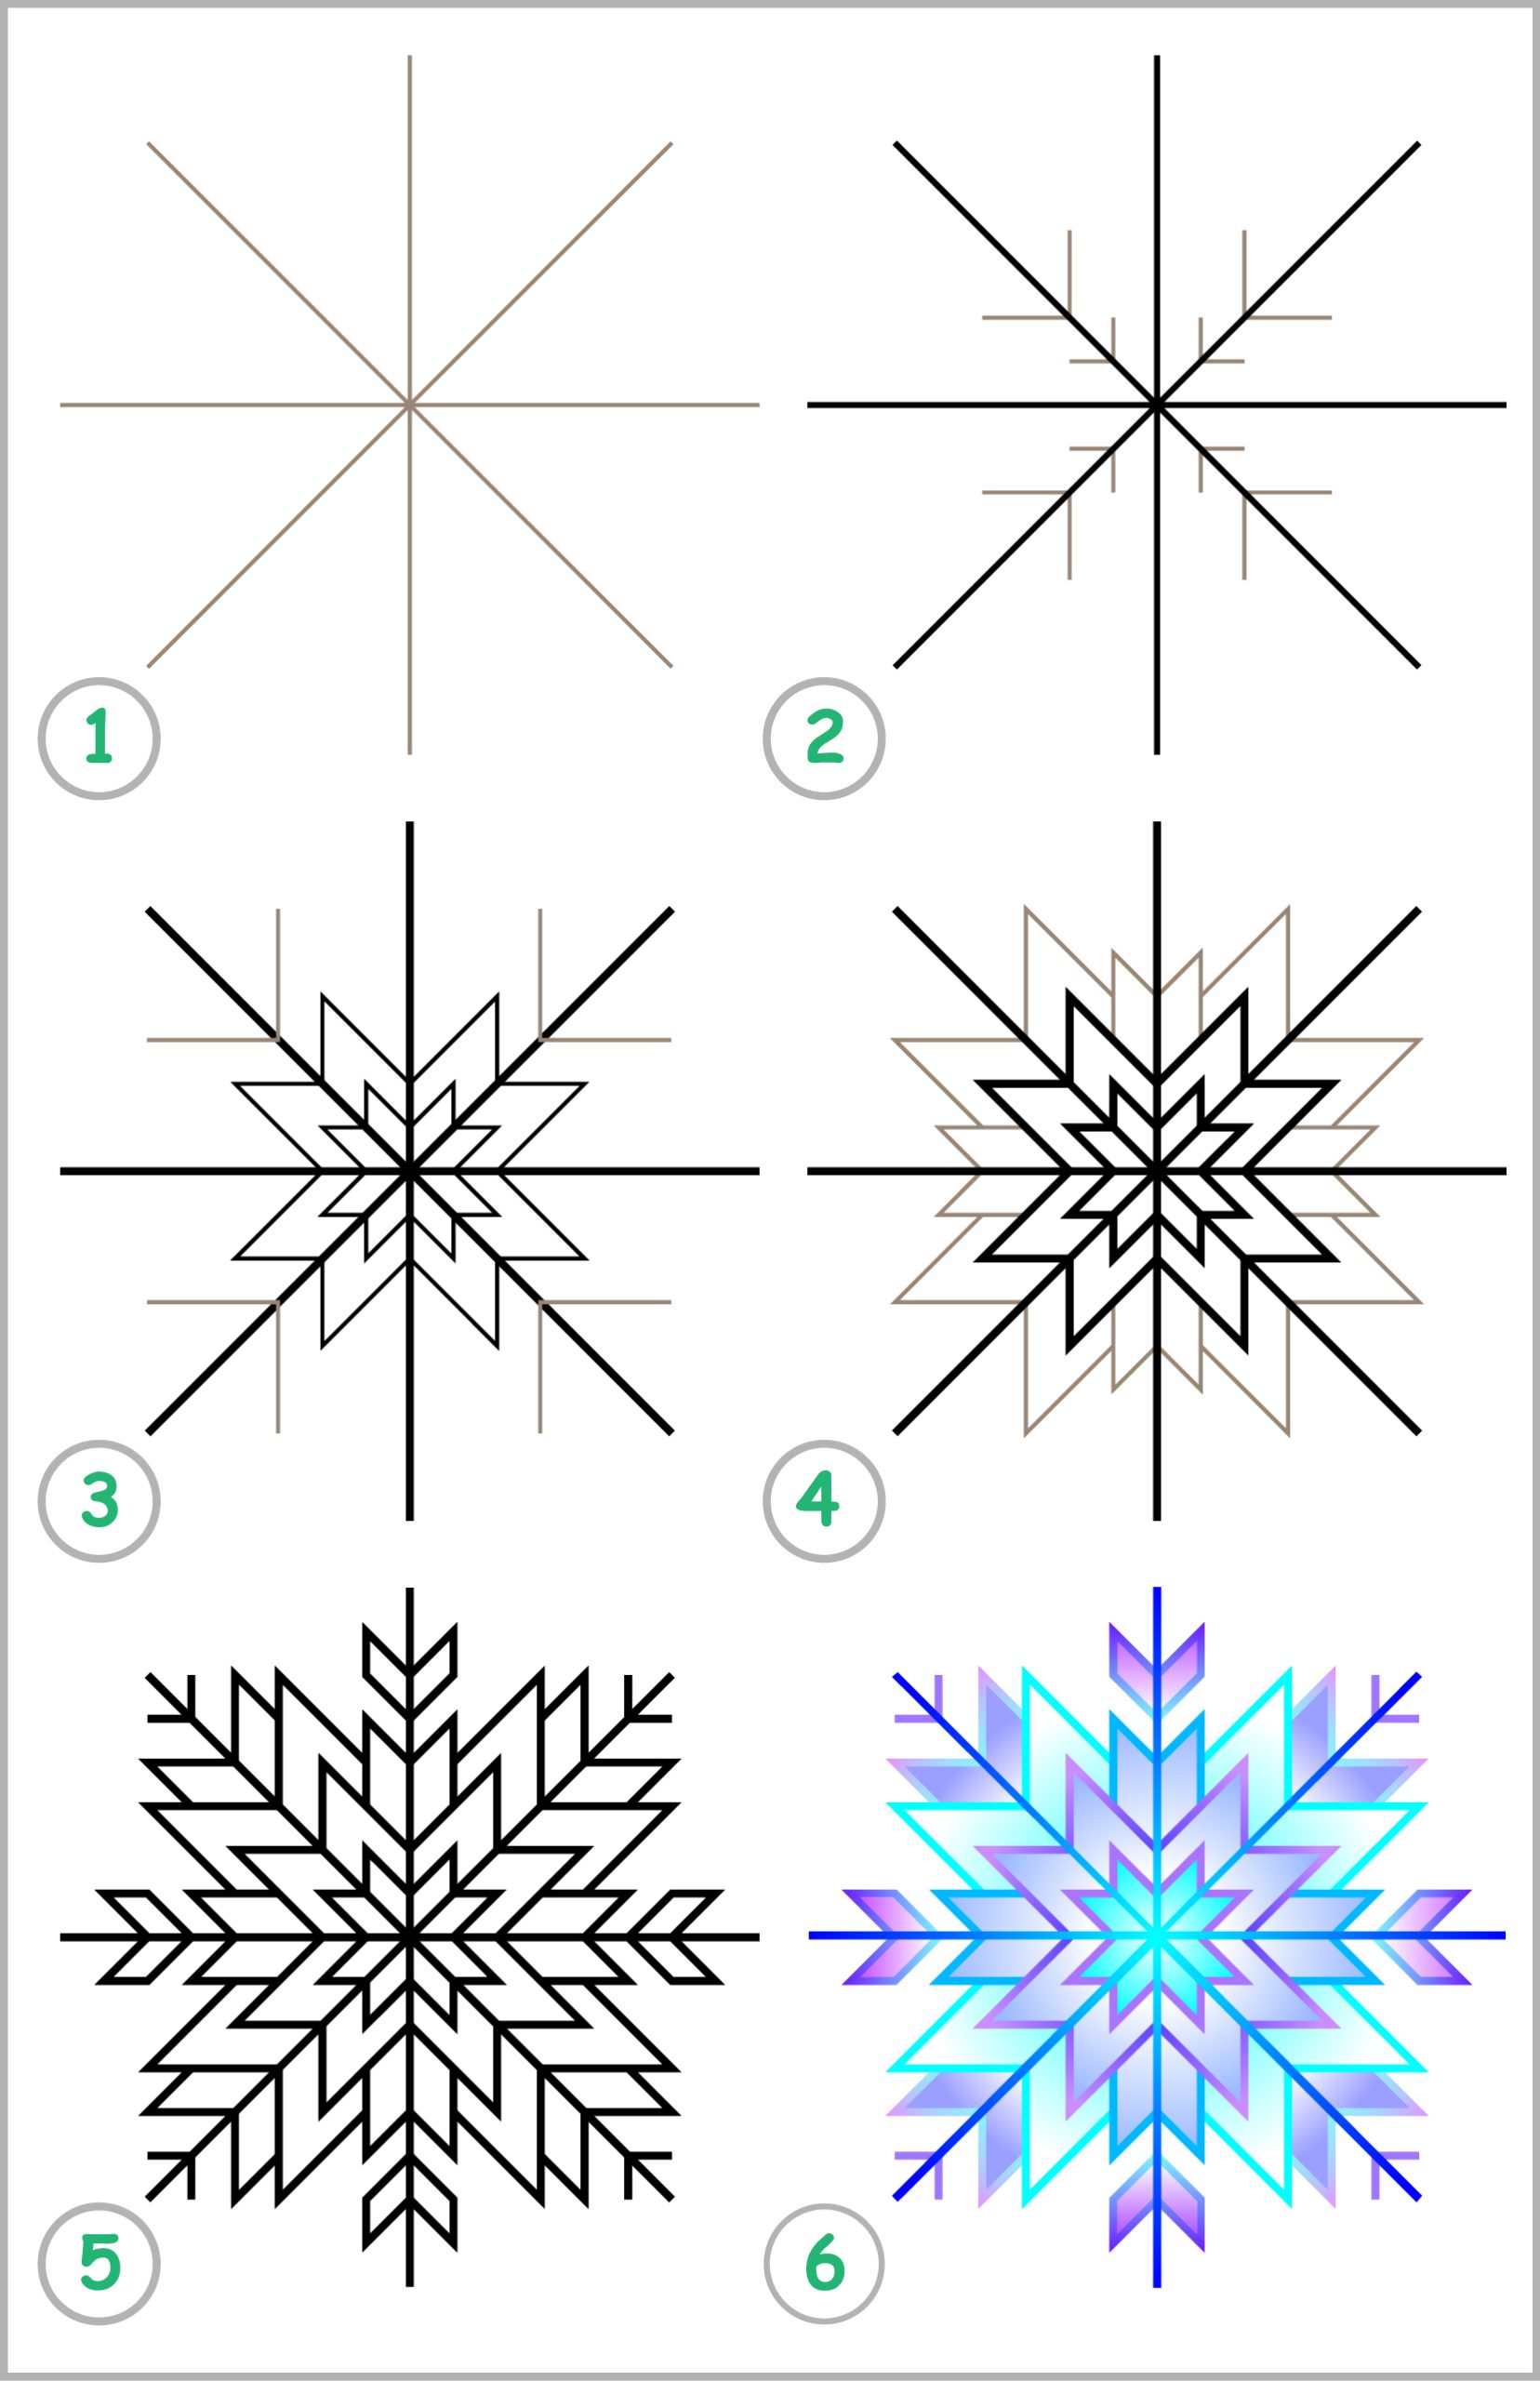
First, start by drawing 4 lines that intersect in the middle. It will be 1 vertical line and 1 horizontal line and then two intersecting diagonal lines. You can draw what looks like an asterisk, but you want to use thin lines. Within the 2 diagonal lines, draw one smaller arrow shape towards the center and one larger arrow shape further away. Then, connect your arrow lines to start creating the snowflake pattern. After that, you will want to draw a series of triangles and arrow shapes going further out for each line. Finally, color in your snowflake using blue colors. Since snowflakes are white, you generally color them in blue so you can see them.
Step-By-Step Snowflake Drawing Tutorial
Have you ever wanted to know how to draw a snowflake? It’s easy to be creative and make something beautiful by drawing a snowflake. This step-by-step guide will help you learn how to draw a snowflake, no matter how much experience you have as an artist.
Step 1: Start with a Circle
Draw a circle as the first step. If you are drawing by hand, you can use a pencil to make a perfect circle, or you can just draw a circle without using a pencil at all. Using a “ellipse” tool in a computer drawing program, you can make a circle. This is where your snowflake will start.
Step 2: Add the Lines
The next step is to draw the lines that give your snowflake its shape. This can be done with a pencil or a drawing program on a computer. Draw a line from the middle of the circle to the edge to start. Then, draw a second line from the circle’s center to its edge, but this time at a different angle. Do this four or five times, so that you have a total of four or five lines radiating from the center of the circle.
Step 3: Add the Details
Now it’s time to add the details that will give your snowflake its shape. Start by drawing small lines from the ends of your lines to connect them. You can also add small circles to the ends. Once you have the basic shape, you can add more details to make it look more real. You can make your snowflake look more interesting by adding small dots, curved lines, and other shapes.
Step 4: Color Your Snowflake
Coloring your snowflake is the last step. You can color your snowflake with a pencil, a pen, or paint. You can also add color by drawing on a computer. Try out different colors to make a snowflake that is unique and beautiful.
Best Tips For Drawing a Snowflake
Start by drawing a small circle in the middle of your paper. This will be the snowflake’s base. Make a star shape by drawing six straight lines from the center circle. Draw a small V at the end of each line to make the first layer of the snowflake. To keep going, repeat this process by drawing a second layer of six lines and V-shapes that are slightly longer than the first layer and fit into the spaces between the first layer’s lines. To finish the snowflake, draw a third layer with six longer lines and V-shapes that go beyond the second layer and make the snowflake’s final shape.
In Summary
Drawing a snowflake is an easy and fun way to get creative. With this step-by-step tutorial, you can quickly learn how to draw a beautiful snowflake. So grab your pencils and paper and try drawing a snowflake today!
