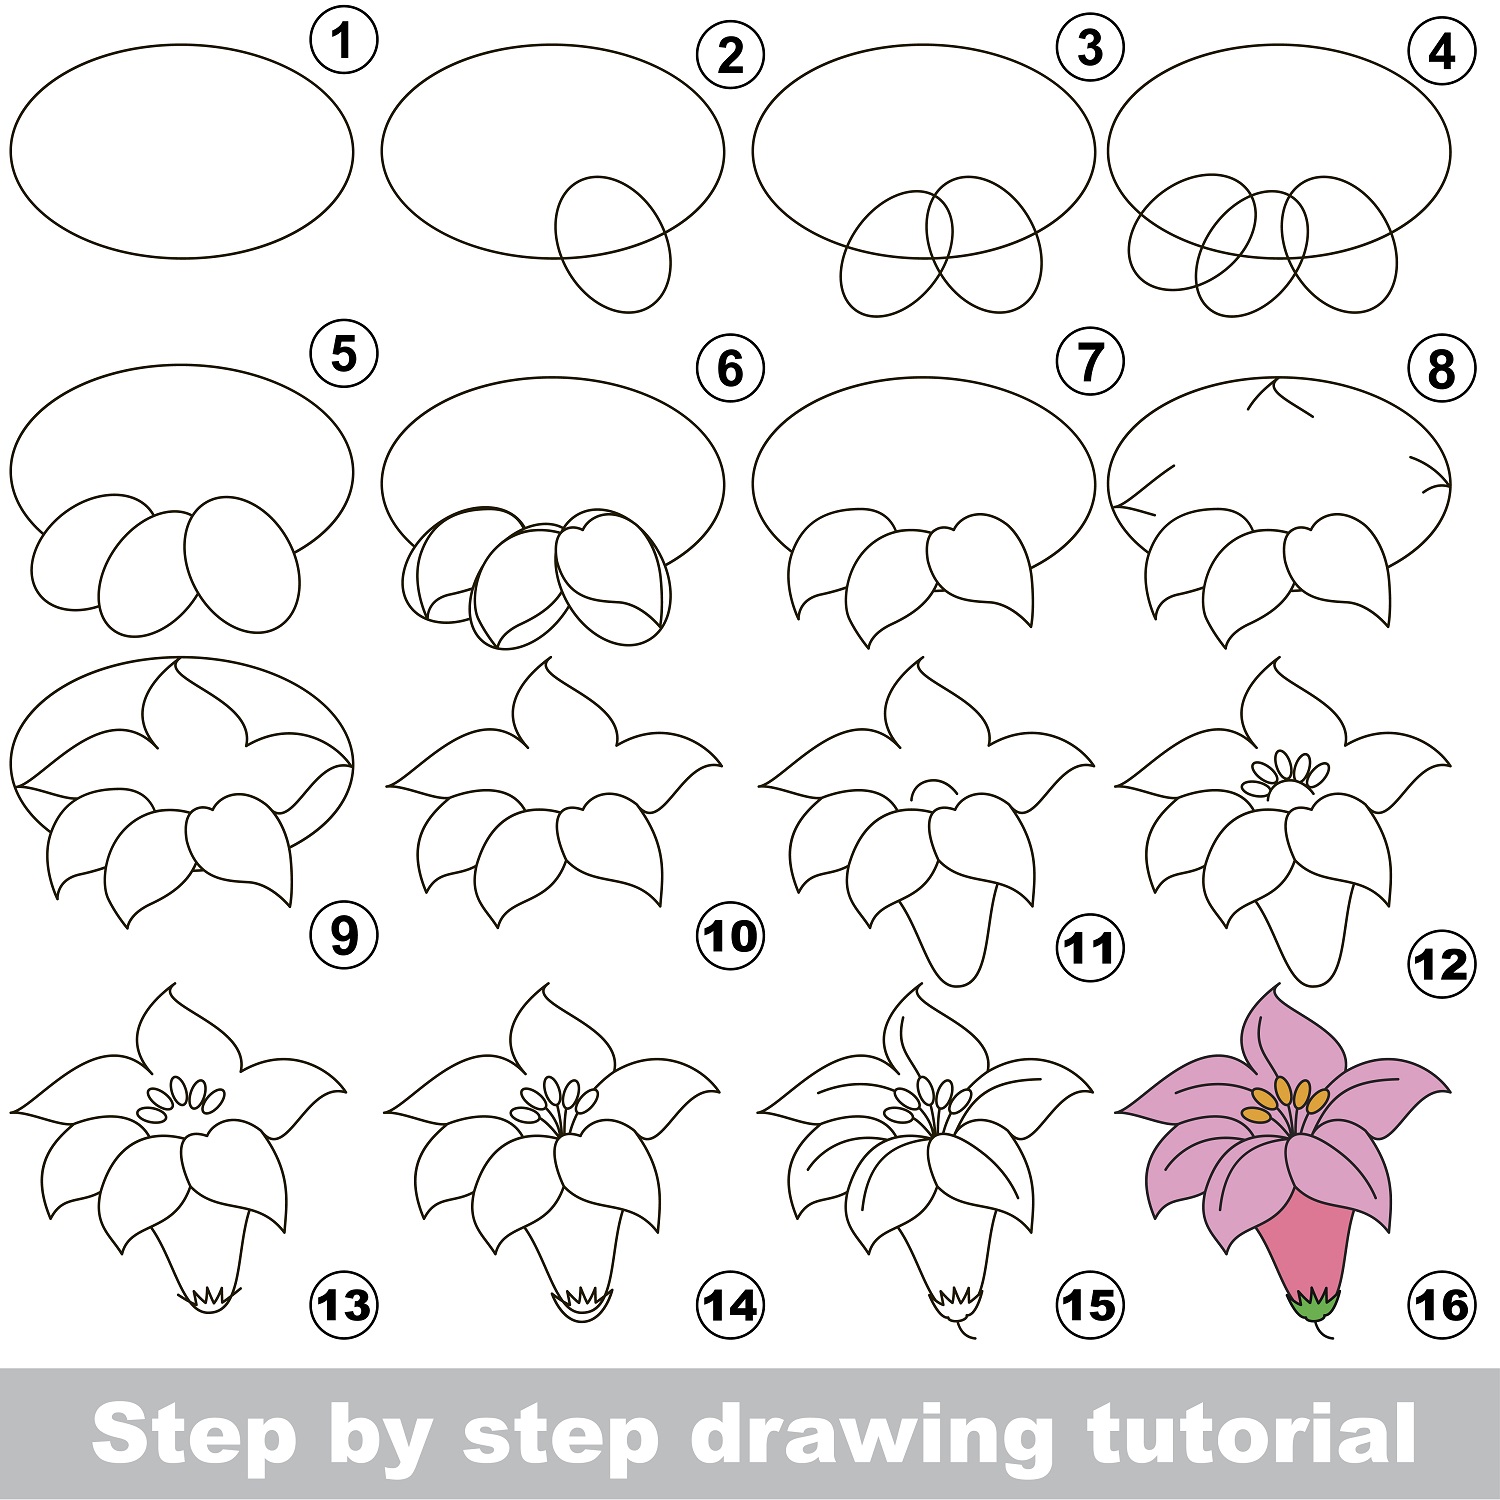
First, start by drawing a sideways oval. Next, draw small 3 circles at the bottom of the oval that will turn into petals. Then, take the circles and turn them into Lily flower petals, which are rounded at the bottom and come to a tip. After that, turn the top part of your original oval into larger lily flower petals. Next, draw the stamen in the center of the flower by drawing lines with an oval at the top of the line. Finally, you have to draw the receptacle that leads up to the flower. Lily flowers have large petals and then have a thin stem. Underneath the petal, they have small green leaves as well.

Step-By-Step Lily Flower Drawing Tutorial
Are you looking to learn how to draw a beautiful lily flower? Look no further! Making a lily flower is easy and enjoyable, and with a few simple steps, you can have your own unique masterpiece in no time. Read on to learn exactly how to draw a lily flower step-by-step.
Step 1 – Draw the Flower Head of the Lily
To begin, draw two curved lines that meet at a point. This will form the flower head of your lily. Make sure the lines are smooth and symmetrical. You can add more curves to make it look more realistic if desired.
Step 2 – Draw the 6 Petals of the Lily Flower
Once you have the flower head drawn, start to draw the petals. Each petal should be a curved line, starting from the center point and extending outward. Draw 6 petals evenly spaced around the center point, making sure to keep the lines smooth and symmetrical.
Step 3 – Draw the Stem of the Lily
To draw the stem of the lily, draw a slightly curved line that extends down from the center point. Make sure the line is straight and not too thick. This will give the lily more realism.

Step 4 – Draw the Pistal in the Center of the Lily Flower
Next, draw the pistal in the middle of the lily flower. Draw a curved line that extends from the center of the flower to the end of the stem. This will give the lily a more realistic look.
Step 5 – Draw the 6 Stamen Filaments and Anthers in the Center of the Lily
After that, draw 6 stamen filaments and anthers in the center of the lily. Start by drawing a small circle in the center of the flower and then draw 6 curved lines that extend outward from the center. These will be the stamen filaments.
Then, draw small circles at the end of each filament. These will be the anthers. Make sure to keep the lines smooth and symmetrical to give the lily a realistic look.
Step 6 – Add Detail like Veins and Texture to the Petals
To add some detail to the lily, draw veins and texture on the petals. Start by drawing lines that extend outward from the center of the petal to the edge. This will give the petal a realistic look. You can also draw small circles on the petal to give it a more textured look.
Step 7 – Color the Stem Green and Color the Lily Flowers
Once you have your lily drawn, it’s time to color it. Start by coloring the stem green. Then, color the lily flower in whatever color you desire. You can use a variety of colors to give your lily a unique look.
Step 8 – Add Shading and Surrounding Detail like a Garden
To finish off your lily drawing, add shading and surrounding detail. You can use darker colors to give the lily some depth and dimension. You can also draw a garden or other surrounding details to make the drawing look more complete.

Tips For Drawing a Lily
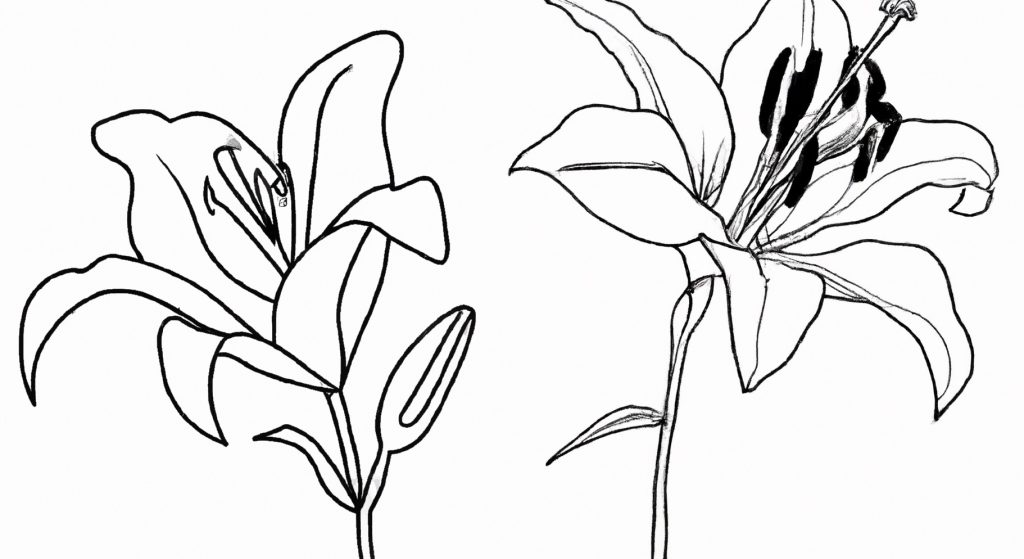
Begin by sketching the general shape of the lily flower, including the stem, petals, and stamen, and then gradually add more detail and texture as you go along. It’s also important to pay close attention to the proportion and placement of each part of the flower. Take a good look at a reference image of a lily flower or observe a real-life flower closely to get a sense of how each part is situated and how they relate to each other.
Another tip is to use a light touch with your pencils and build up the shading and detail gradually. This allows you to make adjustments as you go along and create a more realistic and subtle effect.

Parts of a Lily Flower
Petals
The most visible part of the lily flower, typically six in number, comes in a range of colors and shapes.
Sepals
The green leaf-like structures protect the lily flower bud before it blooms.
Stamen
The male reproductive part of the flower consists of a long, slender filament and an anther at the top, which produces pollen.
Pistil
The female reproductive part of the flower consists of a stigma, style, and ovary.
Stigma
The sticky, knob-like structure at the top of the pistil receives pollen.
Style
The long, slender tube connects the stigma to the ovary.
Ovary
The enlarged base of the pistil contains one or more ovules, which develop into seeds after fertilization.

In Summary
Drawing a lily flower is easy and fun. With a few simple steps, you can have your own unique masterpiece in no time. Follow the steps outlined above and soon you’ll be creating your own beautiful lily flower drawing.

