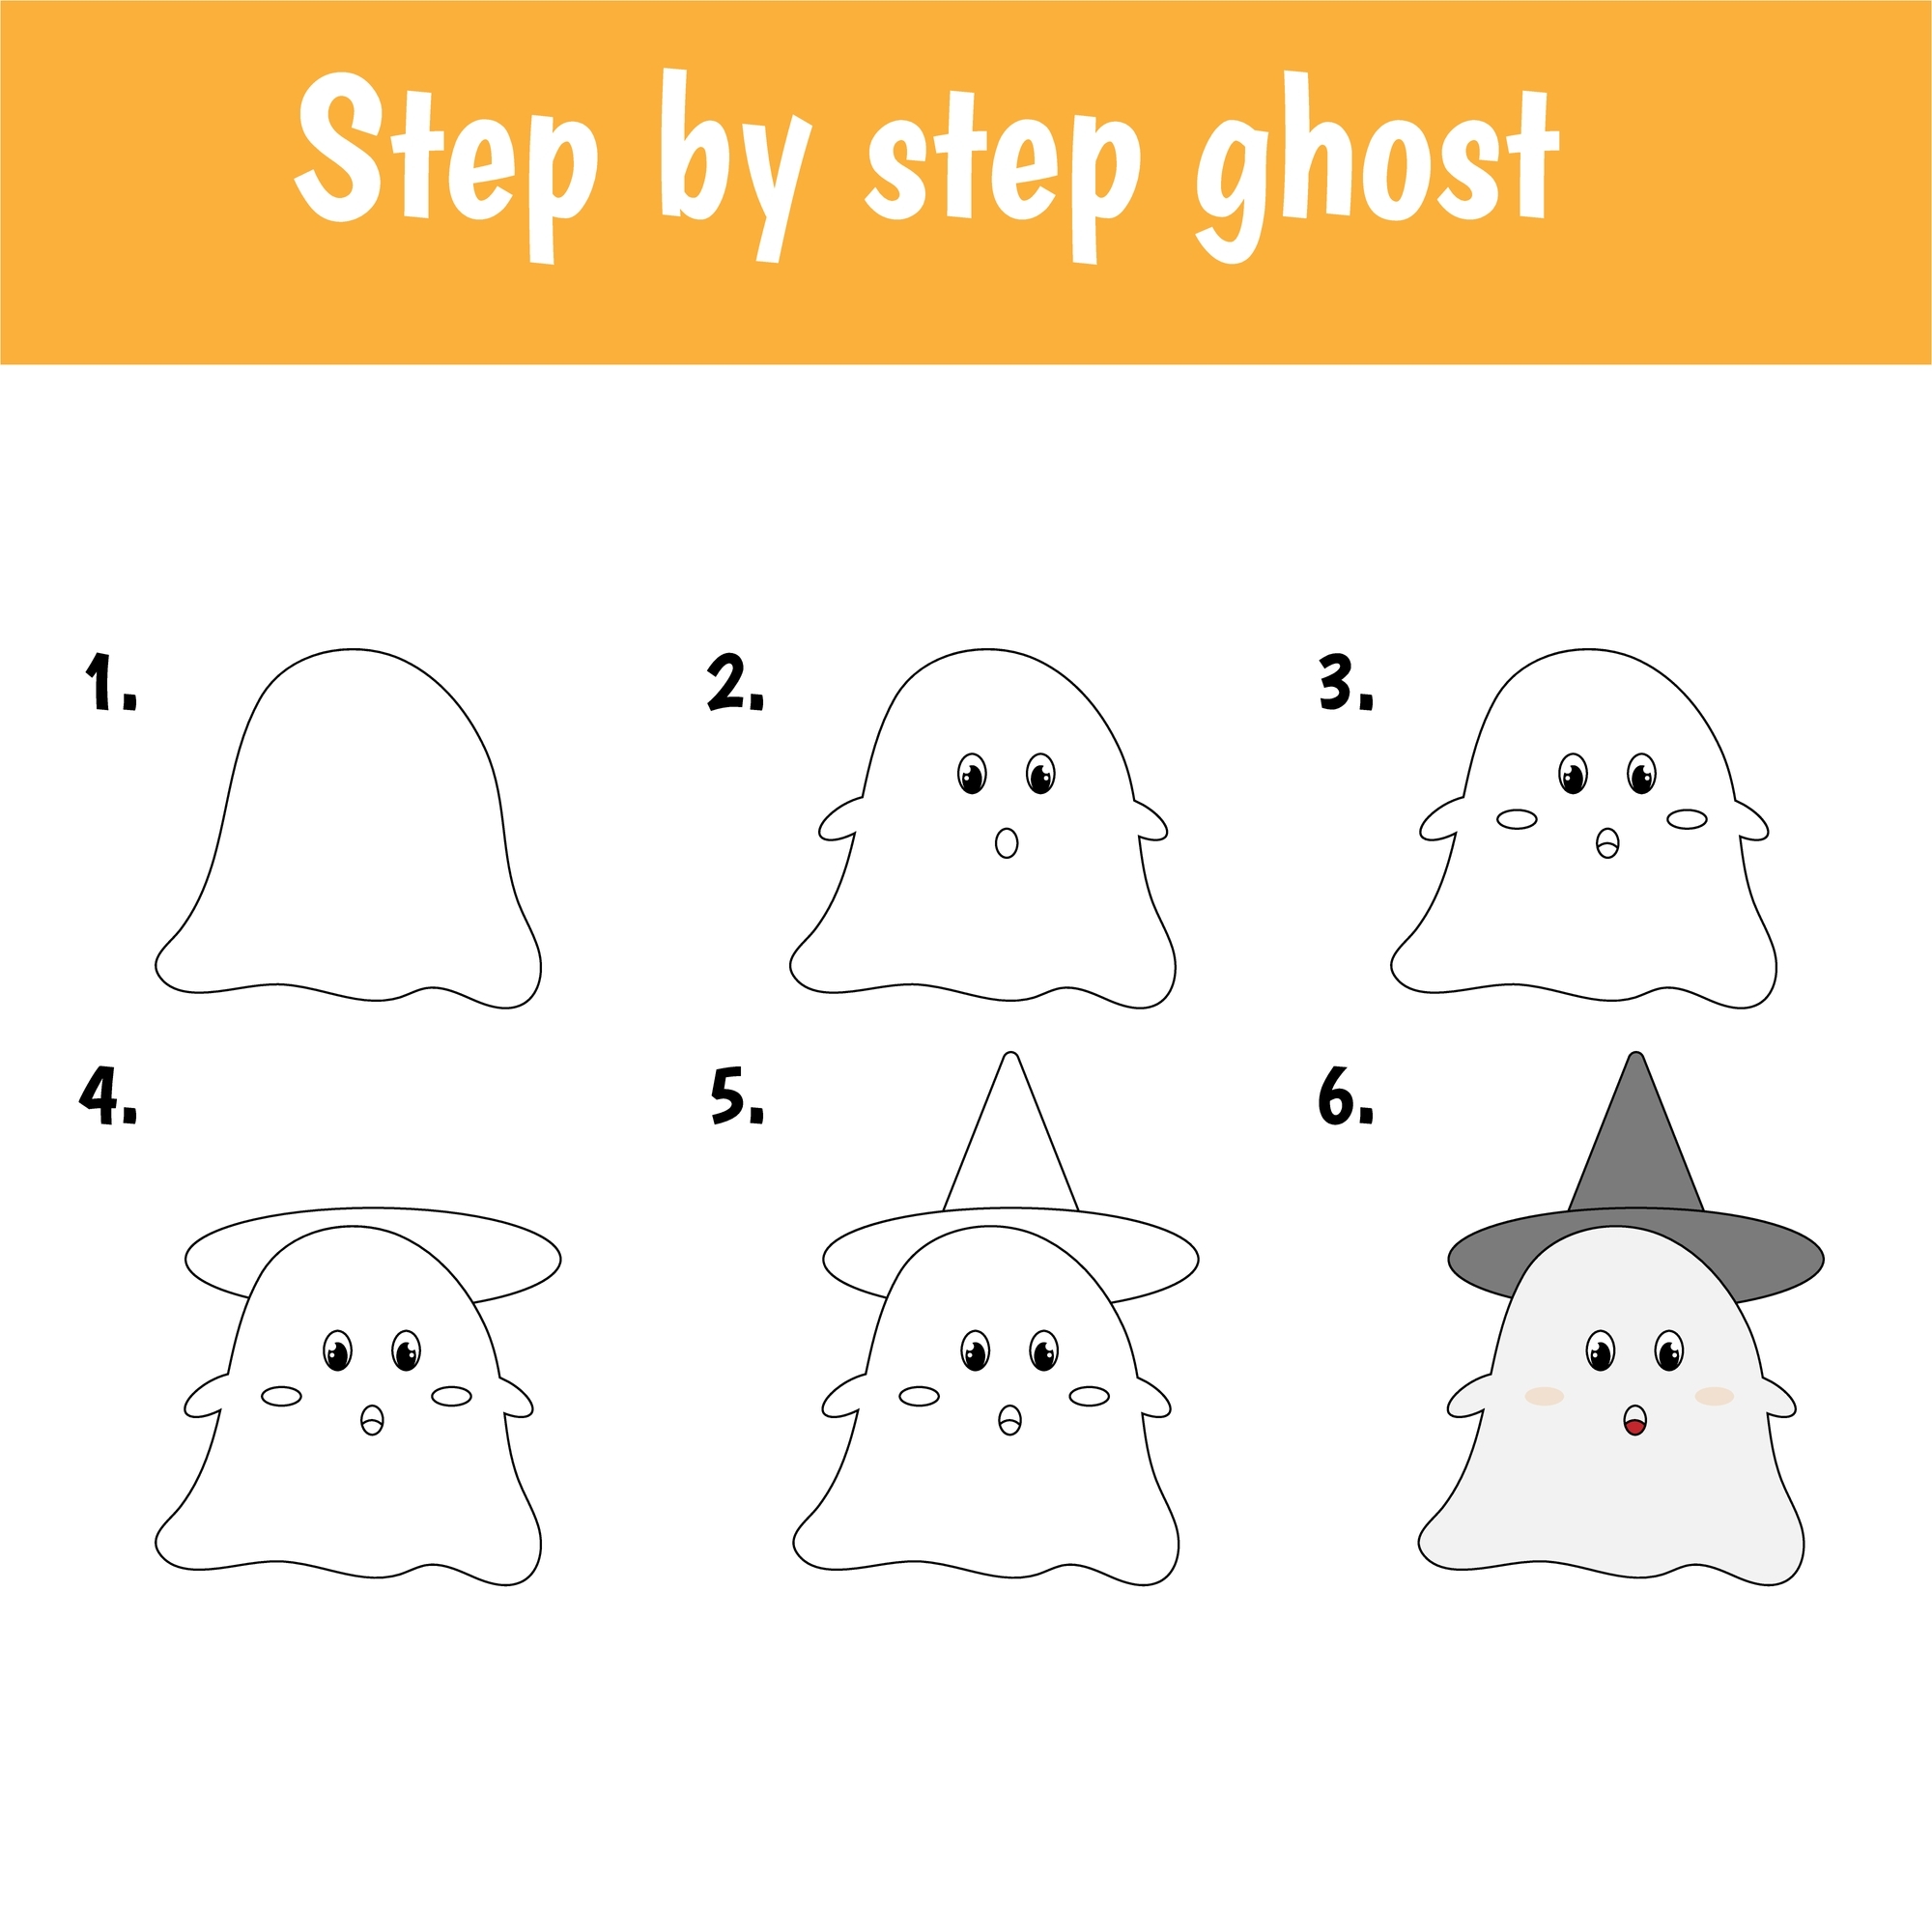
First, start by drawing the outline of the ghost with a rounded head at the top and the bottom should be wavy like ghosts generally look. Next, draw two small rounded arms at the side of the ghost’s body. Next, draw three circles on the face for the eyes and the mouth. Color in the pupils of the eyes. Next, you can draw a hat on your ghost that resembles a witch hat. All you need to do is draw a rounded oval over the head and a triangle at the top of the head.
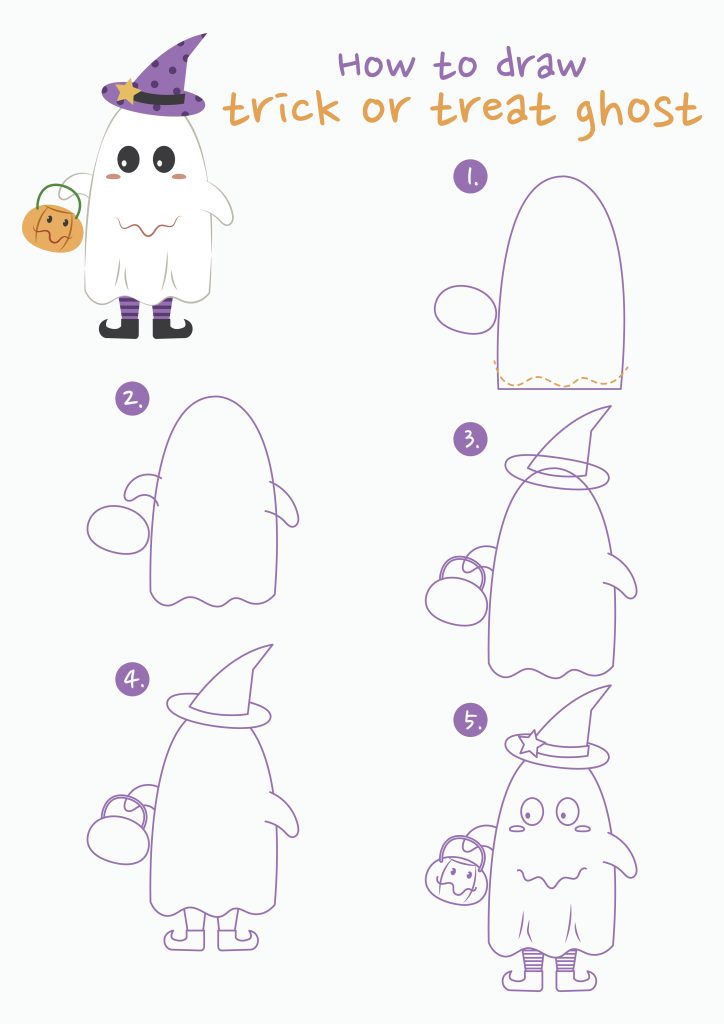
How to Draw a Trick or Treat Ghost
Step-By-Step Ghost Drawing Tutorial
Below, you can follow our step-by-step tutorial if you want to draw a more detailed and realistic-looking ghost.
Step 1: Draw The Outline Of The Ghost’s Body
Start by drawing a big, round circle for the head. Below that, draw a bigger circle that is a little bit oval-shaped for the body. Ghosts are usually shown to have a flowing, billowing shape, so make the bottom of the oval a little bit jagged or wavy.
Step 2: Draw The Ghosts Rounded Arms
Next, make the arms by drawing two long, thin lines on either side of the body. Draw a small circle for each hand at the end of each arm.
Step 3: Draw The Eyes and Mouth Using Circles and Ovals
Draw two big eyes that look like ovals in the middle of the head. Add a small circle for the pupil in each eye. Draw a wavy line for the mouth below the eyes.
Step 4: Add Details Like Sheet Folds, a Hat, or Hair
You can add details to your ghost, like folds in the sheet or a few strands of hair floating above the head, to make it more interesting.
Step 5: Add Shading to Add Depth
Lastly, you can add shading to make your ghost look more three-dimensional. Shade around the edges of the body, arms, and head to make them look more round, and add shading around the eyes and mouth for depth.

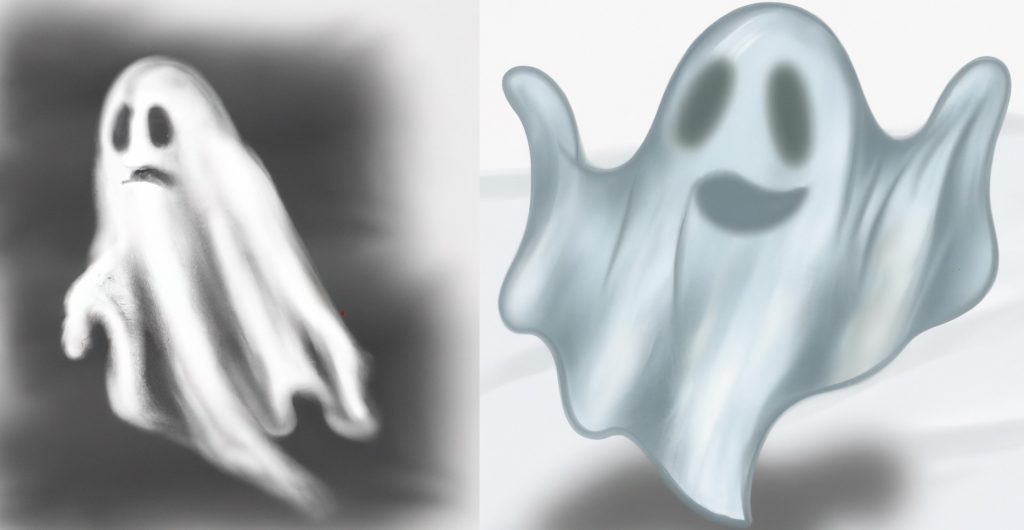
Best Tips For Drawing a Realistic Ghost
Ghosts are often shown as translucent or partly transparent, so playing with your drawing’s transparency and opacity can make it look more like a ghost. You can get this effect by making some parts of the ghost a lighter shade of the same color or by using a blending tool to make the edges of the ghost’s body fade out. Try out different levels of transparency to make the effect more ethereal and spooky.
By using this tip in your ghost drawing, you can make a more realistic and scary ghost picture.
In Summary
Drawing a ghost can be a fun and simple project for artists of all ages and skill levels. You can draw a ghost that is both cute and scary by following the steps in this tutorial and adding some scary details.
Don’t forget to start with simple shapes and then add details to make the picture more interesting and lively. By experimenting with transparency and opacity, you can make your ghost drawing even scarier.
Whether you’re drawing a ghost for Halloween or just for fun, don’t be afraid to try new things and be creative. With a little practice, you can make a scary ghost drawing that is all your own and sure to impress.